
- Are AI Generated Games The Next Big Thing? - February 2, 2024
- If You Play 3 Games A Year, Stop Voicing Your ‘Expert’ Opinion - January 9, 2024
- Is Sony’s Adaptive Difficulty A Good Idea? - January 7, 2024
Dark Souls II is somewhat of a Blacksheep when it comes to the titans in From Software’s catalog. It wasn’t quite as difficult as Dark Souls, and largely, people had huge issues with the bosses. For me, I think Dark Souls had one of the best collections of bosses in the entire series. The reason is that these bosses felt so much like yourself. You still had your monstrosities from your nightmares come to life, but the majority of these bosses were human-sized, or at least human-shaped. They represented duty become twisted and mutated in a slowly decaying world, and the result is some of the most memorable encounters in the Dark Souls lexicon.
I’ve played through Dark Souls II a handful of times. I’ve found its status as the Blacksheep of the series an endearing thing, and the weirdness at play within Dark Souls II is apparent all over the place. The story is eerie and ambitious with an awesome finale, and it feels far more obvious what is going on this time around. The base area is also incredible to look at not only visually but design-wise too.
Not only are the bosses cool to look at, but they are incredibly tough as well and require a variety of tactics to get the better of them. This isn’t your typical roll around to the backside and starts poking strategy here; you’re going to have to respect these bosses as if another player was controlling them because that’s what it feels like a lot of the time. Steel your nerves. It’s time to fight.
Dragonrider

This guy is a pain if you’re not an avid melee user at this point. The arena you’re fighting in is as big of a problem as the Dragonrider itself. The arena is a death trap where the fight will end quickly if you fall into the pit. In order to make this much more manageable, you can pull a lever on the right of the entrance inside the arena. There is another lever behind an old knight right before the walkway. Pulling both of these levers will get rid of the pit completely. This will make the fight so much easier as you can now just focus on the boss itself.
The Dragonrider has a large halberd, and he’s also got a massive shield. He’s a lot faster than he looks and will unleash a massive amount of slashing and stabbing attacks which are pretty hard to dodge because of the size of the Dragonrider’s weapon. The positive is that after these attacks come, there will be a pretty long period of delay where you can either heal or attack.
If you don’t want to deal with a fair fight, there is a way you can trick this annoying boss into killing itself. Just as the Dragonrider will try to push you into the pit if the levers haven’t been pulled, you can do the same to the Dragonrider.
See, the first thing the Dragonrider is going to show to you is his lunge attack. He covers a good amount of space in this attack, so all you are going to do is hug the pit edge. This overzealous boss will follow that lunge attack with a sweep attack, and he’ll fall right off and die. This might take a few tries to trick him, and you might die a few times in the process, but a properly timed dodge will be the chef’s kiss here.
Flexile Sentry
This boss is horrifying looking and looks like he might be able to destroy you if you’re not careful, but you can actually take this boss down pretty easily. The Flexile Sentry has multiple weapons, and the main idea here is to force him to attack you with the side that has clubs. These attacks move far slower than the other side, and he has a direct tell when his attack ends. He will slam the ground, and when that happens, you need to run in and hit him with everything you’ve got.
Rinse and repeat here, and you should be fine. Be careful about his up-close sneak attack that does a lot of damage. He launches this attack after standing completely still. When he does this, halt your attack and back off until this little sneak attack is done with. Stick to the plan, and you’ll be fine taking the Flexile Sentry down.
Ruin Sentinel
The Ruin Sentinel is not going to be a fun time. I’m just getting you ready for it. Anytime a Dark Souls game has you fighting multiple bosses, you know it’s going to be a problem. So the fight starts with just one sentinel, and they’re easy enough. You should stay on the platform and just block the whole time while sticking to this boss’s left side on the opposite side of its weapon. They attack quickly, but there will be a clear opening after these attacks. Stick to this enough, and you’ll be able to kill the first sentinel pretty easily.
As soon as you kill the first one, two more sentinels activate. When this happens, jump off and get full health. You have to manage both of these guys at the same time, so when one is open, the other one isn’t, and you need to keep that in mind. If you’ve got any throwing weapons or damaging items, now is the time to use them.
If you have any ranged weapons or magic ready, you will be able to take these guys down far easier. They are extremely vulnerable to lightning. You can widdle their health down pretty fast using those spells. You need to be quick with getting your distance, though, so don’t stick in one spot for too long, and you’ll be able to survive this one with some patience.
Belfry Gargoyle
This is another rehash of Dark Souls bosses, and these were among the hardest in the first game. They’re no cakewalk here either, so get ready for a tough fight. The first gargoyle will be alone for only a short amount of time. After that period of solace you get, more gargoyles show up, and that’s when you need to start defending. If you’re brave, you can take out the first gargoyle with some quick attacking and smart dodging, but it’s risky, and if it damages you too much, then you won’t be able to handle the onslaught from the gargoyles.
Things can get really hard in a hurry here, and at one point, you’ll be facing off against 5 gargoyles at once. You need to be smart here and try and focus on whichever gargoyle is using a fire breath attack. This is your opening. You need to run in and attack it from behind, and there will seldom be a break from one of these guys using this attack.
Ranged characters are going to have an easier time here. With 5 gargoyles, you can just hang back and launch magic and arrows from a distance. You will still need to dodge a lot and make sure you’re taking them down one by one, but with some careful play, you should be fine here.
Lost Sinner

The Lost Sinner is one of the most fun fights in the game. The arena here is incredibly atmospheric, and this boss is just downright creepy. Immediately, the Lost Sinner will speed right on up to you and start attacking like crazy. Hopefully, you brought a great shield because you’ll be assaulted a heavy amount here. Bring along a quick weapon for this, and you’ll be able to capitalize on the small number of spaces you’ll have to attack here.
You’ll notice that the arena here is incredibly dark. Since you just beat the gargoyles, though, you have the Bastille Key, and you can use this right before the fog door to open up the door up the stairs on the left and right side. Get a torch and bring it up here and light the oil, and all of a sudden, the whole boss arena will be lit up. This is a huge benefit because the Lost Sinner can break your lock-on in the darkness. Now, there will be nowhere for her to hide.
If you’ve been training upon your parries to this point, it will come in handy here as all of the Lost Sinner’s attacks can be easily parried. This is tough to do, but if you can pull it off, you can get some massive damage off on the Lost Sinner.
This is a tough fight that tests everything you’ve learned about the bosses in the game up to this point, so stay focused and heal when you can, and you’ll come out a winner.
Executioner’s Chariot
This boss is pretty easy, but it can still deal a good amount of damage to you if you’re still a bit iffy on your dodging skills. The skeletons that roam the area, as well as the boss himself, are all vulnerable to fire, so whether that means using items or spells to take advantage of, make sure you carry some kind of fire-based weaponry into this fight.
When the battle first starts, you need to find the Necromancer and kill him as fast as you can. Then, the skeletons will be next. You’ve likely fought a ton of these already, and here, it’s the same deal. Then find the next Necromancer kill him, and then pull the lever near him.
The thing to worry about here is that the Necromancers revive the skeletons that appear here, and if you don’t kill them quick enough, you can find yourself being outnumbered in a hurry. In addition to this, the Executioner’s Chariot is doing laps around the area, so whenever you hear a rumble coming, dodge roll into one of the alcoves in the area.
Once you’ve dispatched the Necromancers and skeletons, that lever you pulled will bring down a gate, and the Executioner’s Chariot will crash right into it. Now that it’s had its little race session rudely interrupted, it’s time to fight a two-headed horse causing all this trouble. It’s not that fast, but it can use a damaging breath attack. If you can dodge this move, the horses will be wide up for attack. Fire swords and other weapons imbued with a Fire Resin can do some awesome damage here as well. Be patient and wait for the openings, and this boss should be finished off in no time.
Prowling Magus and The Congregation

You love group bosses at this point, right? Luckily, this is one of the easiest bosses in the entire game. All you need to do here is keep moving, and that way, the roaming zombie mob can’t overwhelm you. There will be a handful of spell casters here, signified by their religious-like attire, and they will be your main point of emphasis. Their magic is pretty powerful, but you can dodge out of the way pretty easily if you’ve been paying attention.
You can either focus on the zombie mob at the start of the fight or go right for the mages and the Magus, who is roaming around firing off dark orbs of energy at you. The key here is that you never want to focus on two things at once. If you’re going to clear the zombies, just make that your main effort. They die pretty quickly, and if you’re using a two-handed weapon with some long reach, you can hit multiple zombies with each attack, making the clearing of them fairly simple of a task.
Scorpioness Najka
This fight is going to be trickier than the last few. Once you get over the crazy boss design here, you need to immediately get some distance from her. She moves really fast and can also cast homing magi arrows at you, so even at a distance, she’s very deadly.
While she moves fast, her attacks are actually pretty easy to dodge. Each time she attacks, dodge to the side and quickly get an attack in there. The real-time to unleash on her is after her tail attacks. Majka will attempt to impale you with her tails, and if you get hit with this, you will take a good amount of damage and have the Toxic status inflicted on you. This is like a worse poison, so bring some poison healing items along with you for this one. The positive is that she’ll be on a really long delay after it, and you can take down a ton of her health when the tails are stuck in the ground.
The other attack to watch out for is when she burrows underground. Watch for her movements in the dust, and you’ll be able to track when she pops up, and you can dodge this attack pretty easily. As you bring her health down even further, you might see her start to use magic attacks. The arrow attack I mentioned earlier is damaging but fairly easy to dodge. The one you really need to watch out for is when she conjures up multiple magic orbs and pauses on firing them. She’s waiting to get in close and will unleash these along with her thrust attack, making it very hard to dodge.
If you’ve got enough health, you can try to tank this attack and attempt to finish her off before she can follow up. If not, focus on dodging the magic and not the thrust attack. One option is to block the thrust attack and then immediately dodge the magic attack. This works well because two dodges in a row might leave you on a cooldown, and that’s when Majka uses her magic attack. A little bit of perseverance and attention to detail here will go a long way, and it’ll help you come out victorious.
The Duke’s Dear Freja
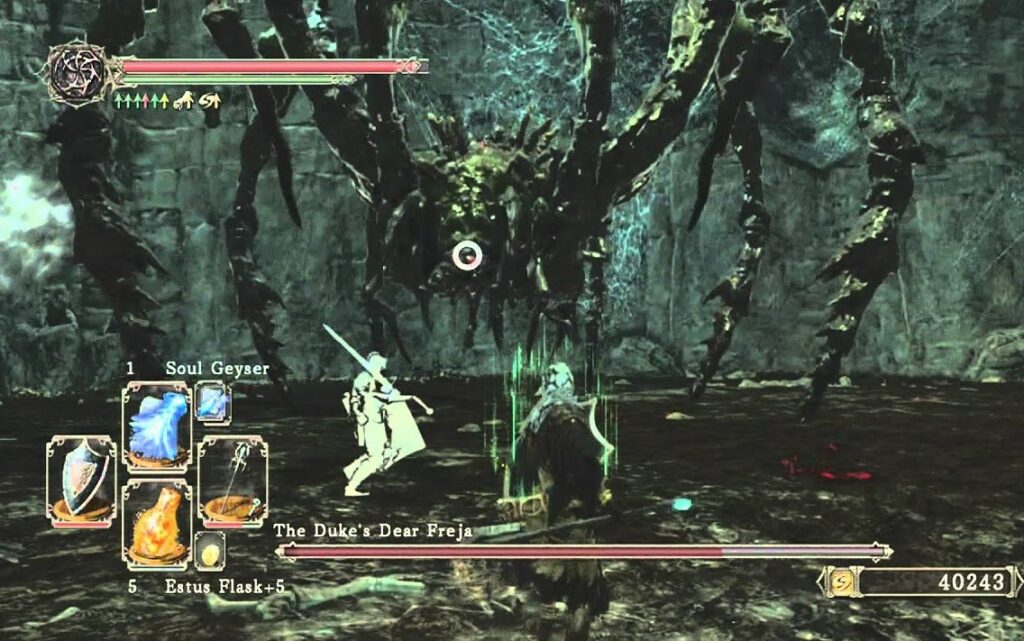
Shocking, it took so long for Dark Souls II to throw a spider boss at us, but don’t worry, arachnophobes, you got your wish! Freja is an annoying group fight that involves a lot of little spiders and a lot of little ones. At the start of the fight, you’ll be swarmed by a group of spiders. If you try to kill these at the start, you likely will get distracted, and Freja will wreck you when you do, so forget about them for now. Freja will come hard and heavy at you at all times, and her attacks are some of the most damaging in the game. If you can, kill off some of the spiders, but not all of them.
Freja has two heads, and each of them acts individually. You can read her attacks by staying close to one of the heads and then immediately dodging towards the other when it starts to move, signaling an attack. This will allow you to dodge her attacks pretty easily. One attack you can’t dodge is a giant beam attack that she fires, as well as a few leaping attacks Freja can use as well.
For the beam attack, just run as soon as you see it coming and beeline it behind her. The beam can’t reach here, but this is still tough to pull off because of how gigantic Freja is.
Staying close to her heads will open up a ton of opportunities to attack, and the only thing you need to worry about there is the spiders attacking you here. Stay close to the head and take care of them as quickly as possible and then get back to mashing away at Freja. Once Freja is dead, kill off the spiders, and you’ll have survived this tough battle.
Skeleton Lord
Dark Souls II just loves its skeletons, and here, you’ll be fighting the toughest one yet. This is yet another group boss, so at the start of the fight, rush right at the first Skeleton Lord and kill it as fast as possible. The reason we want to act fast is that like the Ruin Sentinel fight earlier, two more are coming to join the party. With the two now awakened, you need to be aware of both at the same time. Don’t get too caught up attacking one and forget about the other, as this can spell certain death.
Once you’ve dealt with these two, you need to kill the skeletons on wheels. These guys are incredibly frustrating to fight because of their speed and damage-dealing abilities, so make sure you be careful when taking them out. After you do this, another pack of skeletons will appear, and you’ll have to take them on in small groups. Otherwise, you can get overwhelmed quite easily here.
Mytha, The Baneful Queen

This boss is an annoying one for a few reasons. It’s a small arena, Mytha is fast as hell, and the entire arena is covered in poison, constantly draining your health the entire time. To counter this, we’re going to remove the poison from the fight before we even get it started.
Before the fight, there is a ramp near a big windmill that is feeding the poison into the boss arena. Take a torch and attack the windmill from here to light it on fire, and once you do that, you’ll completely remove poison from the arena. Now, it’s time to fight.
Mytha is a small boss that moves very quickly and attacks with rapid melee combos with her spear. She’ll also use a swirling attack as well, and in between these attacks, she’ll just be readying up another, so your downtime is little, if any.
She also has a dash attack where she thrusts her spear at you and also has some magic missiles in store for you as well. The idea here is to keep her close to you the entire fight. Without her poison, she has no way to keep her away from her, so just block or dodge her combos and attack when an opening is afforded.
This is a much easier fight without the poison involved, so regardless of the masochist you are, just do yourself a favor and burn the windmill down before you fight.
The Old Iron King
This is a unique boss, and the first thing that you’ll notice is he’s very large, and you don’t have much room to maneuver. The good thing here is the King doesn’t really have a lot to throw at you when it comes to attacks, so this fight should be a fairly simple affair, despite his incredibly intimidating appearance.
First off, the King has a combo attack that involves slamming his fist into the ground and then swiping that arm across the area you’re located. They can come in any mix of those attacks, so be on your guard at all times.
In order to dodge these, you can either roll out of the way or try to tank them with your shield. Keep in mind that when that fist attack hits, this is the best time you’ll have to attack. So try and get in 2-3 hits each time he does this.
A good melee or ranged weapon is good enough to take down the King at this point in the game, and considering how far into the game you encounter him, he’s no match for your battle-hardened self.
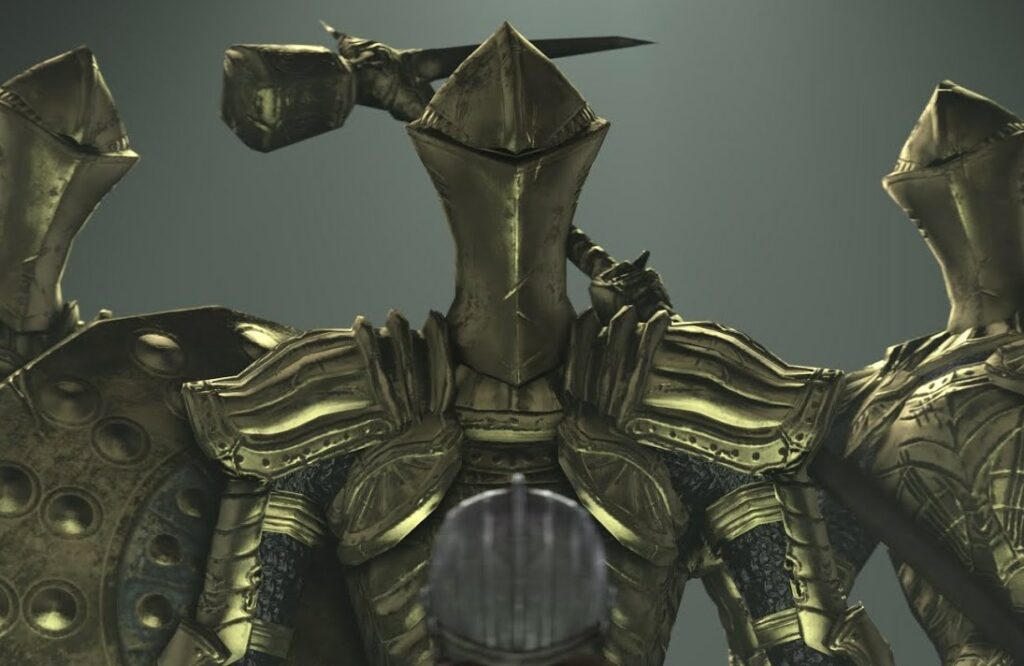
Dragonriders

Boy does this game love throwing two things at you during a boss fight. If you remember, way back at the beginning of your journey, you actually fought one of these guys already. Now, you’ll be facing two of them, and luckily, they don’t have many new tricks up their sleeves.
The difference between the two is one is identical to the first Dragonrider, while the second is a bow-wielding Dragonrider. to counter this double team of theirs, we’re going to stick to the bow wielder like glue. This will make it impossible for him to launch his arrows at you. Wail away up close on this guy while being mindful of his melee-focused teammate.
Once he’s dead, it’s time to deal with the Dragonrider. This is just like the first fight, so keep strafing and dodging, and after each barrage of attacks he unleashes, you will have a decent opening to get in 3-4 attacks if your weapon is fast enough. Repeat this strategy, and this boss will be taken care of before you know it. Is that all you’ve got, Dark Souls II?
Veldstadt, The Royal Aegis
This boss is awesome aesthetically, and this beast of a knight has a ton of hurt in store for you. You want to be able to move fast in this fight, so wear some light armor if you’ve got it on you.
Get in close to Veldstadt and roll to the side any time he comes at you with his massive mace. If you get any distance from him, he comes at you with a massive lunging attack that could kill you outright, so either block or dodge here.
The time to attack is when he gets down on one knee and summons a dark magic attack. This is the time to try and end the fight, as the resulting area of effect attack can deal a ton of damage. Keep up this strategy, and Veldstadt should fall in no time.
The Guardian Dragon

This boss is massive, so you know what to do here. It’s time to run to the back and start wailing away. The Guadian Dragon has a ton of damaging attacks, but most are well choreographed. You need to worry about its breath attack and its stomping attack while it’s on the ground. Both are easy to see coming, so just dodge away.
When the dragon heads to the air, start running off to the side as the incoming attack will be really damaging. It also has a few biting attacks that are damaging as well, but you can either dodge these and block them outright.
Sticking to the back of the dragon throughout the fight will make this fight rather painless.
Throne Watcher, Throne Defender
Another two boss fights, these guys hit hard and hit often. The Defender is slow and hits harder, and the Watcher is fast as hell, but not that powerful. You want to focus on them one at a time but do not kill them. Once you’ve gotten one of their health bars down near the end, focus on the other one. The reason behind this is that the one left alive will revive the other one.
Because of this, you need to kill them both within a small time window. Their attacks are mostly melee-based, so get ready to block or dodge some three-hit combos. You will need to separate them so you can focus on them one at a time, but when the time comes to strike them down together, just lure them to you by backpedaling, and if you have a big enough two-handed weapon, you can end the fight right here.
Nashandra

It’s final boss time, and Nashandra is no pushover. She’s big and incredibly powerful and fast. She can also curse you with her summon magic. Her melee attacks are a couple of swipe attacks or a massive slice that comes at you vertically. You can either dodge or block these and then get in your own attacks.
During the fight, do not back away from Nashandra, as this will lead to a magic blast right into your face.
Halfway through the fight, Nashandra will start powering up a magic attack within her hand. Run for the hills when this happens, as you might get killed in one hit here. Keep your health up and be patient in between her barrage of attacks, and the queen will fall to you after a long and arduous journey.
FAQ
Question: Can you face any of these bosses with a friend?
Answer: Dark Souls II allows you to summon a friend at any time to face off against the various bosses available. The bosses will get a small health boost and also become more aggressive to counter this, though, so be aware of that.
Question: Do you have to face the bosses in the same order?
Answer: One of the coolest things about Dark Souls II is its hub base of Majula, and part of the reason is that you can face any of the bosses you want in whichever order you please. Some are naturally more obvious at the start, but how you choose to approach them is, most of the time, completely up to you.
Question: How many bosses are added with the DLC?
Answer: Though they’re not listed here, the DLC has 9 more bosses in store for you, and some of them are among the hardest that the Dark Souls series has ever thought up.
Conclusion
The catalog of bosses on display from Dark Souls II is incredibly impressive, and while some are on the easier side, others will be an incredible challenge, so hopefully, this guide gives you the help you need to feel some of gaming’s most formidable foes.
Looking for more interesting readings? Check out: