
- Crucible Knight Elden Ring Guide - February 5, 2023
- Corrupted Monk Sekiro Guide - December 31, 2022
- Elden Ring Malenia Guide - November 2, 2022
Bloodborne features a wide variety of gorgeously designed enemies throughout Yharnam and the worlds within the base game, and this is even more true within the Hunters Nightmare. This is the DLC area of Bloodborne, and in my opinion, it is the best DLC that Fromsoftware has created. The bosses within this singular expansion rival all of the bosses in the main game in terms of quality, and within it lie some of the most difficult challenges you will face.
While Lady Maria is not one of these formidable challenges, she still remains one of my favorite bosses in the Soulsbourne universe. The best word to describe this fight would be elegant, as two skilled hunters seemingly dance across the arena, trading blows and evading punishment. This boss fight stands as one of Fromsoftwares’ most inspirational bosses, and across all of their titles after Bloodborne, we can see her influence in many instances.
Where to Find Maria
Lady Maria awaits your arrival at the top of the Astral Clocktower within the Hunters Nightmare. To get to the Hunters Nightmare, there are a few steps you need to take beforehand.
To-Do List Before You Can Access
- -Found Cathedral Ward
- -Killed Vicar Amelia
- -Interacted with Laurence’s skull
Once you have purchased the DLC, you may first be confused because there are no fundamental directions regarding how to access this area. After killing Vicar Amelia, head back to the Hunters Dream and be sure to spend your blood echoes, level up, and so on. After, make your way to the right side of the house, next to where the Doll usually sits. Here you will find an item called the Eye of the Blood-drunk Hunter. Once picked up, a text box will appear, reading:
“The Eye of the Blood-drunk Hunter beckons Hunters to the Hunter’s Nightmare. A deformed creature will whisk you away outside Odeon Chapel.”
After getting this item, travel to the Cathedral Ward and head to the doorway to the left. Once you are outside, look for the graveyard to the right. Move to the back of the graveyard against the fence. Here, an Amygdala will grab you, and instead of dying, you will be transferred to a cutscene. After this, you will be granted access to the Hunters Nightmare. Good luck!
Where to Find Lady Maria

Lady Maria awaits your arrival at the top of the Astral Clocktower within the Hunters Nightmare. You will need to do a few things to reach the top of the clocktower, and these things include:
- -Beaten Ludwig, the Accursed/Holy Blade
- -Traveled to the top of Research Hall
- -Beaten the Living Failures
After killing the Living Failures at the top of the research hall, you will be granted an item labeled Astral Clocktower Key. At the opposite end of the arena, you will find a lantern next to a giant door. Interact with the lantern, and travel back to the Hunters Dream, being sure to spend your blood echoes before you travel back. Come back to the giant door and open it with the Astral Clocktower key, revealing the arena you will be battling in.
As you enter, you will become overwhelmed with the gorgeous setting of the arena. The light beaming through the gaps in the massive clock on the wall coupled with the ringing of the enormous bell hanging above stand as visual reminders of your progress. A reminder that you were looking at this place from the ground not too long ago. You will notice a lady slouched over in a chair at the end of the arena. Head over in her direction, and when you get close, you will be prompted to inspect the corpse. This will trigger the cutscene before the fight, so be ready.
Fighting Lady Maria
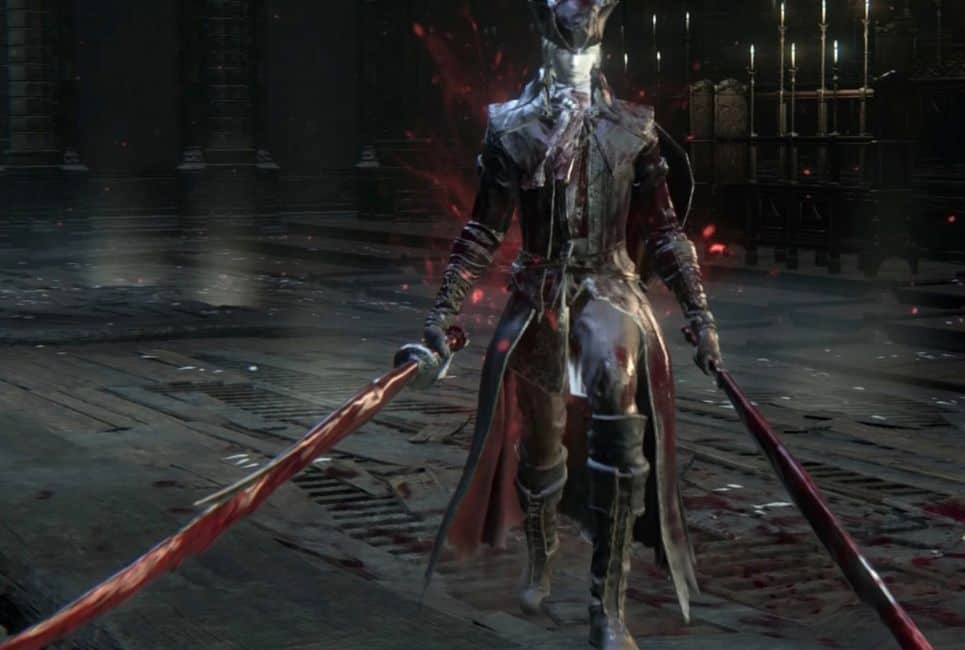
First Phase
As shown in the cutscene, Maria wields a weapon by the name of the Rakuyo, which she splits in half to duel wield. She will launch a flurry of attacks at you, ranging from a quick charge attack to slightly delayed two-handed swipes coming from over the shoulder. Below I will go over her tells, and which attacks will come from these tells.
3-Hit Combo
To start the fight, I have found that Maria usually likes to lead with a quick three-hit combo to catch you off guard. When she is still somewhat far away, she will raise her sword above her head for about a half-second, and this is your cue. Maria will strike down quickly with that sword, followed by a second two-handed slash, and finally a wind-up, over-the-head heavy attack. Dodge to the side when she does this and punish when the window opens up.
Thrust Attack
When Maria lifts and points the end of her sword at you, this is her tell before a thrust. After a quick flash of her attack, she will close the distance with a thrust attack, seemingly coming in at bullet speed. Wait until Maria is just about to launch at you, then dodge to the side and punish. Backstepping is a terrible idea because the range of the thrust goes very far, and she likes to follow the first one up with a second jab with her other hand.

Two-Handed Cross
Maria will cross her arms in an X and lunge forward with a two-handed swipe. She commonly does this to get you away from her, so be prepared to dodge while attacking and pay attention to the tells.
Pistol Attacks
Yes, Maria was a Hunter just like you, and she has access to many of the same weapons. One of these weapons that you share with her is the pistol, and she will use it in an attempt to stun and visceral you. She takes a knee when she is about to shoot at you, so be sure to stay to the sides when she does this.
Regular Attacks
The standard swipes are telegraphed in much of the same ways as the other attacks and won’t feature a follow-up attack. These are most likely to come after punishing Maria as a way for her to create space. After one or two fights, you will begin to internalize the tells, and soon you will be flying through this fight.
You will quickly notice one thing about Lady Maria: she is fast. Her ability to quickly close the distance between you two with her attacks will catch some people off guard when they first encounter her. On top of this, Maria uses Quickstep, allowing her to eliminate windows to punish with a quick teleport. The most important tip that I can give for this fight would be to parry as much as possible. The tells she provides are often very subtle and quick, so it may take a little practice. However, once you get the timing down, this first phase, and a lot of the rest of the fight, can be significantly trivialized.

Second Phase
At around half health, Lady Maria will stand still in the middle of the fight. Fromsoft veterans will quickly realize that this is her shifting to her second phase, and the best thing to do would be to get out of the way. She will slowly lift her swords up in front of her, and then in a move that seems counterintuitive at first, she will plunge these swords into her chest. After a second, Lady Maria will rip these swords back out of her chest, spraying a blood AOE attack in the proximity around her. Getting covered in this blood splatter will really hurt, but the bold and greedy Hunters out there can manage to get safe hits in on her during this phase change.
Standard attacks in this phase do not change that much. However, Maria now harnesses the power of the blood arts. Her attacks will now be ‘laced’ with this blood, and each swipe is coupled with a follow-up blood attack. This blood follow-up has an insane range, so you will need to be cautious even at a distance. On top of this, Maria now has access to a few stunning moves to keep you on your toes.
Charged up Thrust Attack
When there is considerable distance between you two, Maria will kneel down slightly and seemingly charge up her Rakuyo, putting the two pieces of the sword back together for a moment. The Rakuyo will light up for a quick second, and Maria will launch a blood beam directly at you from the end of this sword. It comes in a split second, but if you time your Quickstep just right, the beam will miss you every time,

Spinning Blood-Tornado
This has to be one of my favorite moves that she has, and the spectacle that this move creates helps make this one of Fromsoftware’s most pleasing bosses to date. Maria will lean forward, seemingly prepping her body and blades for a giant leap. As Maria leaps into the air, she will gracefully spins around until she reaches the peak of her jump. Below her, a massive blood tornado rises up out of the ground and seemingly allows Maria to float in the air. Once she reaches the top of her jump, she will quickly plunge down on your exact location, slamming you into the ground with immense force. A well-timed quickstep or roll will make her miss this attack, which could take some practice.
Spinning Slash
Maria will attempt to catch you in a twirling slash, where she will charge her swords up in front of her, and spin twice in the air, unleashing two swipes that fully cover the area directly around her. She likes to make this attack directly after the charged-up blood-beam attack, so watch for that when going on the offensive. Dodging this early will lead her to face the wrong direction when spinning, leaving her vulnerable for a few attacks after the spin.
Horizontal Bloody Slash
In the same manner as the Blood Beam attack, Maria will charge up an attack, with the sword on her hip glowing. This is your tell, as she will release a horizontal blood slash at blistering speeds in the coming second. Either dodge through this attack or keep your distance as it hits like a truck.

Overhead Smash
The last move that has a tell revolving around the Rakuyo glowing would be the overhead smash. Maria will lift her sword above her head and, after a slight delay, reign down a punishing overhead slash that also comes with a blood attack follow-up. The best advice I can give for dodging this attack would be to clear far out of the way and punish her after she attacks.
Swooping Slash
Maria has plenty of moves that cover a lot of ground quickly, and this attack is not different. Maria will hold her blade horizontal to her body and promptly swoop in at you from an angle. This attack will always come from your left side, so be sure to time your dodge and point it in the right direction.
Third Phase
Lady Maria will resort to her final, most potent form after you have chipped away close to 75% of her health bar. She will hold her swords out to her sides and slowly levitate into the air as blood from around the arena channels back into her. After Maria absorbs all the blood in the air, she will again release a blood AOE attack, so stay out of the splash zone. She will then fall to the ground, prepared to do whatever she can to end your quest for insight.
In this phase, she now adds fire arts to her repertoire, and now every attack will be followed up with blood and fire. Most of the attacks and their tells stay the same. However, the added fire damage with the blood damage can stack up fast. Be sure to manage your blood vials, and save up plenty of bullets for this fight, as parrying her many attacks is the key to a swift victory.

Strategy
As I mentioned before, you can parry Lady Maria for easy visceral if you are genuinely having difficulty. However, my favorite way to approach the fight would be to not use my gun and instead two-hand the Blades of Mercy that you get from Eileen the Crow. The two-handed version of the weapon allows for a fast recovery attack after a sidestep/backstep, and it works perfectly in this fight. The little run-up that you do with this attack closes the distance fast, and the Blades of Mercy’s quick timing will allow you to get in and out. For this fight, I would recommend the following weapons/quick items:
- Blades of Mercy (2 handed)
- Bolt Paper
- Tiny Tonitrus
- Blacksky Eye
- Empty Phantasm Shell
- A Call Beyond
Lady Maria is most resistant to fire, so save your Fire Paper for another fight. She is susceptible to being stun locked, and you can knock her out of some attacks with a heavy hit. My word of advice would be to turn this fight into a dance. This battle becomes an elegant duel between two skilled hunters with the Blades of Mercy. Below, I will go deeper into the lore associated with Lady Maria, which clarifies much of what we have and will experience.
The Tragedy of Lady Maria
This fight is easily one of my favorites throughout Fromsoftwares titles. However, it was not the most challenging. Lady Maria is no pushover, and her design is top tier. Still, she suffers from the same drawbacks that many humanoid encounters in Soulsbourne games, resulting in an easier fight to control and manipulate. So why is Lady Maria one of my favorite bosses, despite not being all that difficult? The answer to this question can be found through some research into the backstory of Lady Maria, and within, we realize the significance that utilizing these blood and flame arts serves to her character.

Research Hall Exploration
As you make your way through the Research Hall, you will notice a few things. The first thing you will probably notice is the design of the enemies littered throughout. They all have large blue heads with no facial features and are dressed in identical white gowns. Some of these enemies are strung up with restraints going down their bodies, forcing them to crawl like worms wherever they go. They bear a similar resemblance to the creatures you fought in the Celestial Emissary fight; however, in the case of the enemies in the Research Hall, these adversaries will sometimes talk to you, giving insight into the reality of the situation.
Gone too Far
The next thing you will notice about the enemies is that they all talk about one person, in the same way, viewing her as a motherly figure. The lady that these enemies constantly reference is Lady Maria, and this is our first clue as to what happened here. Some of the enemies you can talk with are seemingly just enlarged heads with no limbs or torso. Talking to one of these heads will prompt them to say this:
“Lady Maria, I’m a robin. Will I ever curl up and become an egg? What say you, Lady Maria? Lady Maria? Say something, anything…”.
How do all these enemies know Lady Maria, and why do they address her like a motherly figure? Well, the answer lies in the appearance of these enemies. Lady Maria was a part of the Healing Church, and with these people, Lady Maria helped oversee and conduct inhumane experiments on these individuals. The experiments obviously got out of the control of the Healing Church, as aside from these deformed individuals, the Research Hall is largely abandoned.
Brain Fluid
The quote above, as stated earlier, comes from a giant head on the ground. We will receive a ‘Brain Fluid’ item when we kill these heads. The item description will reveal that it was “Extracted from a patient whose head expanded until that was all that they were.” These giant heads serve as examples of how the Healing Church went too far with their experimentation, and once they realized this, they seemingly just abandoned the experiments altogether.
Living Failures
While the Research Hall is an example of how Lady Maria went too far with these experiments, it certainly isn’t the last. Lady Maria and the Healing Church created the Living Failures in their constant experiments, which seem like enlarged versions of the enemies inside. These Failures serve as the protectors against anyone seeking to enter the Astral Clocktower, as they carry the key to the giant door leading in.
After fighting our way through the Research Hall and taking down the Living Failures, we now can enter the clock tower. Inside, we find Lady Maria, sitting seemingly dead in a chair at the end of the room. This would explain why the Research Hall was abandoned, as with Lady Maria out of the picture, there would be no one to watch over and care for the patients.
First Interactions

As you approach her corpse, Lady Maria will awake from her slumber and grab you by the forearm to pull you in close. When face to face, Maria says,
“A corpse should be left well alone. Oh, I know very well. How the secrets beckon so sweetly. Only an honest death will cure you now. Liberate you, from your wild curiosity.”
When she mentions secrets and wild curiosity, a few things come to mind. Could she be talking about the experiments that we saw within the Research Hall? Maybe she means the Living Failures outside of the clocktower? While this could all be true, there is something that Lady Maria is hiding from the world that we haven’t seen yet. The area that she is desperately trying to protect is called the Fishing Hamlet, and it serves as one of both her and the Healing Church’s most vile mistakes.
Fishing Hamlet Experiments
The Fishing Hamlet is the last area of the Hunter’s Nightmare, and Maria guards the secrets with more than her life. The Byrgenwerth scholars and Lady Maria conducted heinous experiments on the residents of the Fishing Hamlet. One of these residents mutters about their interaction with these scholars and touches on one of the mistakes. Speaking to himself, the resident says,
“Byrgenwerth…Byrgenwerth. Blasphemous murderers…Blood-crazed feinds…Atonement for the wretches…By the wrath of Mother Kos…Mercy for the poor, wizend child…Mercy, oh please.”
This dialogue can give us an idea of why the Fishing Hamlet was destroyed by the scholars with the help of Lady Maria. The Great One, known as Mother Kos, washed up on shore in the Fishing Hamlet, and she was pregnant with a baby Great One. This likely drew the scholars and Lady Maria to the Hamlet. The opportunity to experiment on a Great One was too tempting. These experiments led to the destruction of the Fishing Hamlet along with the inhabitants. It also left the child of Mother Kos without a parent, which explains the name ‘Orphan of Kos.’

The Well
Lady Maria was obviously disgusted with her actions in the Fishing Hamlet, and we can see this through her actions. She threw her Rakuyo into the well within the Hamlet out of disgust for her actions. This can explain why she leaves the Research Hall unguarded, as it is still an example of her inhumane failures, however, the atrocities there do not come close to the horrific experiments conducted in the Hamlet.
Connection to Gherman
This determination to bury the Fishing Hamlet away from memory explains why Maria resorts to using Blood and Fire arts in combat. Born in Cainhurst, Lady Maria became adept in utilizing Blood arts, and she later honed in on these skills under the guidance of Gherman, who happens to still be the Host of the Nightmare. Gherman developed feelings of attraction to Maria, but in his deal with Laurence, Gherman was relegated to the Hunters Dream, unable to be with Maria. This explains why the Doll in the Dream looks like Maria, as Gherman had her constructed to look identical to his love.
Determination through Guilt
After the mistakes in the Research hall and the Fishing Hamlet, Maria swore off her Rakuyo and the blood and fire arts. As you begin to get closer to your goal of beating Maria, she realizes that her death means that the secrets of the FIshing Hamlet will be exposed. In a few last-ditch efforts to nullify your curiosity, Lady Maria will call upon her old training, and it is a tragic yet beautiful thing to be a witness to. This makes her story so miserable, as she is only battling you due to immense guilt, and this desperate attempt to hide the truth of her mistakes will be her last, as you will need to end her suffering to continue forward.
Overview
Lady Maria of the Astral Clocktower is one of the standout moments in the Hunters Nightmare DLC, which is high praise considering the content and quality featured throughout this expansion. Even after many Fromsoftware releases, Lady Maria still remains one of my favorite bosses that the series has to offer. Her inspiration across all the titles can be seen in many bosses, with Dark Souls III having Sister Friede and Elden Ring having Malenia, Goddess of Rot, just to name a few. The Hunter fights in Bloodborne will always have a special place in my heart, as the quickstep combat system coupled with the health-regaining counterattacks make these encounters graceful and fair while still being able to punish your mistakes. The battle with Maria is fantastic in itself, with the lore only adding to the sadness of the circumstances.
FAQ
Question: Was Lady Maria a vileblood?
Answer: Yes, Lady Maria was born in Cainhurst and descended from Annalise, Queen of the Vilebloods. This is most likely where she learned the basics of the blood arts that she uses in her fight.
Question: Can you find Maria within the regular world?
Answer: When the player makes their way to the Hunters Workshop outside of the Dream, you will encounter what looks like the Doll, lying dead in the corner of the workshop. This is presumed to be Maria, and a clue that leads to this would be a Hunters Bone next to the corpse. This allows for Quickstep in combat, and this is something that Lady Maria features in her battle.
Question: Are Molotov cocktails effective?
Answer: While Maria is more resistant to fire, Molotov cocktails will still pack a hefty punch against Maria. Be sure to have some of these items equipped and ready in battle because sometimes she will be vulnerable to these at a distance.
Looking for more interesting readings? Check out: