
- Crucible Knight Elden Ring Guide - February 5, 2023
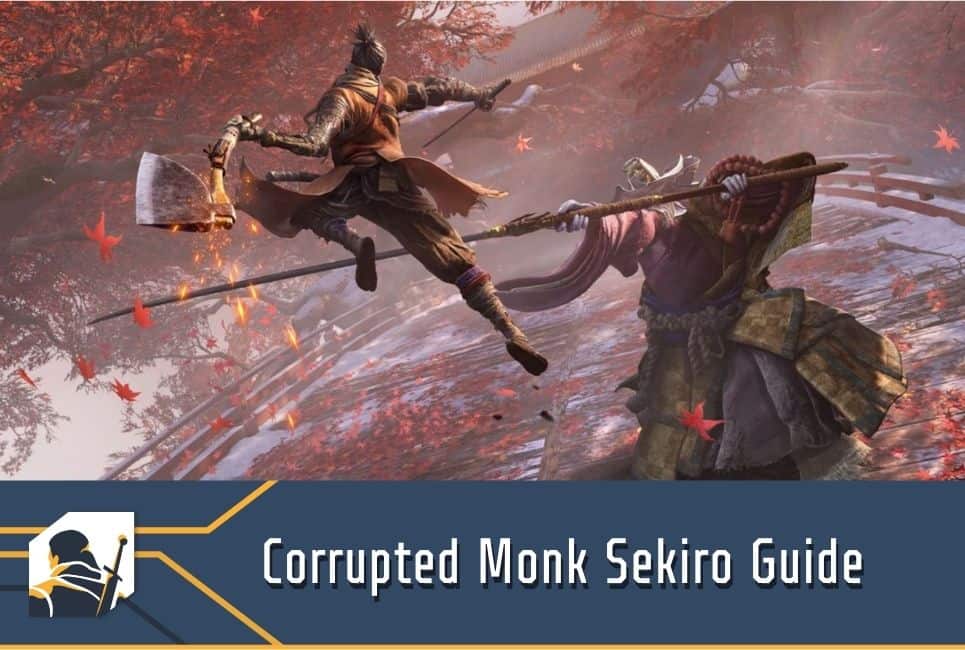
- Corrupted Monk Sekiro Guide - December 31, 2022
- Elden Ring Malenia Guide - November 2, 2022
The vast yet concentrated lands that the player will explore in Sekrio are home to some of the most intense encounters that Fromsoftware offers. Each battle must be approached with strategy and precision, which can be achieved through trial and error. This is a point of emphasis in all Souls-likes; the idea that it will take multiple attempts for the player to master the enemy moveset, turning a seemingly impossible boss battle into a game of timing and strategy. In Sekrio, the player is given a chance to ‘practice’ against certain bosses, with one of these enemies being known as the Corrupted Monk.
This boss will be taken on two separate times, with one of the encounters coming earlier in the game. In this first battle, the boss will be named Corrupted Monk. Below, I will go over how to reach this battle, as well as how to best approach it to ensure victory.
Reaching Corrupted Monk (Illusion)
To find this first encounter, we must travel to the Water Mill Idol within the Ashina Depths. This is located on the outskirts of Mibu Village, so the player will need to explore that area to reach this idol. From the spawn point, head up the hill towards the tree with a light shining, and stay on this path forward.

Eventually, you will emerge into an open area and see a woman with a basket on her head, crying and playing an instrument. Talking to her will have you ask why she is crying, but this is a trap. Orin of the Water is an optional boss in Sekrio, but once you have triggered her dialogue, she will fight you regardless of what you say.
Orin of the Water
Orin is a quick-moving, brutal encounter in your first few attempts. Her lunging sword flurries take a while to master the deflect timing, and her ability to shift to an apparition form for long moments of invincibility makes offense difficult. The strategy here is to remain on defense, allowing her to fly to you. Deflecting is the way to go, as we look for a posture damage kill, not vitality.
The real danger in this fight lies in a few combos. Orin will give some tells before the attacks start, so be on the lookout for two visual cues. First, she will slowly float up in the air, seemingly lunging at you. This will usually come at the end of a long combo, or she will start this after coming out of invincibility. She will come down with a few strikes and then unleash a perilous attack, which comes in the form of a sweeping strike. You will need to jump over or out of the way of this attack. However, jumping over will allow you to punish Orin with a head stomp, significantly raising her posture.

The next tell will come when Orin is far away. She will quickly zig-zag toward you; each time she advances, she will promptly stop and unleash a spinning attack. Maintain your distance, and try to deflect the last attack when she reaches you. Then, jump because she will release the same perilous attack.
Lastly, in phase two, Orin will utilize a grab attack, where she looks to plunge her daggers into you. Grab attacks are the most challenging to counter for me due to the lack of a direct counter aside from dodging. This is why maintaining distance is so critical in this fight, as it will seemingly neutralize the threat of this grab attack.
With these tips in mind, Orin will be relatively easy. You do not need to use Divine Confetti; however it will speed up the process. Orin will take two deathblows to kill, so take your time and be wise to win this battle. Killing Ori will drop the Breath of Life: Shadow, a latent skill allowing you to recover life upon a death blow and a prayer bead. After Orin is killed, we can move on to the Corrupted Monk.

From where we battled Orin, continue over the bridge and towards the large house with bell enemies and Mibu Villagers patrolling. Ignore them and instead stay left and through the passageway to an open arena. Here, we will battle the Corrupted Monk (Illusion), and below I will go over the strategy for this fight.
Approach

This boss only has one life in this specific battle, so the player should be able to take it down after a few attempts. However, it is essential to learn the moveset deeply, as it will be similar to the encounter with the real boss later. The Corrupted Monk is a large enemy with a giant health pool, so we will want to go for a posture kill. This means deflecting will be the best approach, and because of this, you must master the deflect timing in each attack. The primary attacks will look like this;
Spinning Attack

The Monk loves to move around quickly, and her large weapon allows her to cover massive ground with sweeping strikes. This attack will start with her stepping towards you while simultaneously bringing her weapon far back, seemingly loading up a big strike. She will then unleash the attack and use her momentum to spin around for five powerful strikes continually. Timing the deflects on these is crucial, as the quick succession of the hits can build up your posture meter fast, and if you get hit once, it can create a domino effect of damage taken, leading to a quick death. Stay defensive and quickly punish for a few strikes after the last deflection. Try and dodge out of it if you can because of the posture build-up, however, don’t do this if she is too close, and instead deflect as best you can.
Upward Slash
This move can be unpredictable, as it does not come in the traditional top-down swing. Look out, as it can come as a single strike or sometimes double. When she is still, the Monk will catch you off guard with an uppercut. She will start the strike low and quickly slice up, hoping to catch you off guard. Again, dodge this if you have distance, but if not, it is easily deflected with enough timing practice. This attack will likely come at the end of a combo, usually as a way for her to break your posture meter. It can be good to have your meter broken on this if it is too high, as she stands still for a few moments after the attack, allowing a full reset to your posture bar.
Jumping Slash (Distance)
Despite her stature, the Monk can seemingly fly around the arena, creating space to change the fight. To telegraph this, the Monk will spin in place, and as she splashes down, she will leap backward, repositioning and creating massive space. Be on the lookout for this initial spin, as the strike can be somewhat unpredictable, along with the reposition.
Charging Uppercut

This attack will come after some distance is created between you two and will likely come after her jumping slash. She will look at you and point her blade out to her side. Then, in a few quick steps, she will launch a sweeping uppercut in your direction and hover in the air before slamming down with a punishing blow. Again, deflecting both of these strikes is the best way to go, as the area covered by them and her closing the distance fast make these strikes nearly impossible to dodge.
Double Downward Slash
When you are up close and personal with the Monk, she will attempt to back you up with a few downward slashes. After administering a few hits to her, she will two-hand her blade and bring it over her shoulder, and quickly slash it down toward you. After this, she will spin around and unleash another sweeping slash. This tell will come soon, so dodging may be difficult. Instead, look to deflect the attack and punish the first chance you get. She will also let out a spinning downward slash after she deflects your last attack, which can be seen visually as her blocking the attack with her shoulder.
Perilous Sweep
One of the Monk’s perilous attacks comes in the form of a double sweep. This will come in various forms, but the most likely will come after an onslaught of either offense or defense between you two. When the red Kanji appears above your head, the Monk will likely reach out toward you with the first sweeping attack and switch hands to sweep back in the opposite direction. If you are too close to her when she starts this, counter this attack with a jump and stomp to her head, knocking her out of the attack animation.
Mikiri Counter

The monks’ next perilous attack will come in a quick outward jab at you, which can be countered with a Mikiri. The red Kanji will appear over your head when she pulls the blade directly back, with the tip facing you. Players should quickly use the Mikiri to stomp on the blade when she lunges forward, raising their posture bar significantly. This will come either when there is no action or as a final attack in a long combo of moves.
Useful Items for the Fight
Players can use a few items to significantly increase their chances of overcoming this first battle, and I will list them below.
- Divine Confetti
- Fistful of Ash
- Firecrackers
- Snap Seeds
- Ako’s Sugar/Spiritfall
- Gokan’s Sugar
- Sweet Rice Ball
- Ungo’s Sugar
Of these items listed, the most important are the snap seeds, firecrackers, and fistfuls of ash. These all work as stuns on the boss, allowing you to get offensive strikes in more frequently while also canceling some of their attacks. The snap seeds are vital, as they will stun the boss and take off a large portion of their health bar. While we are not going for a health kill, the lower vitality an enemy has, the longer their posture bar will stay full after being raised. This will speed up the fight significantly. However, as I mentioned above, it is crucial to memorize the moveset of this boss to prepare for the real battle ahead.
Killing the Corrupted Monk will give you experience points, however, the most important thing you get comes from a new skill learned. The Mibu Breathing Technique will be awarded to you upon victory, allowing the player to swim underwater and dive far below the surface. This makes some previously inaccessible areas explorable and will enable the player to continue forward in their journey. Luckily, there are many areas and bosses to be found before encountering the real Monk Battle, so take your time and perfect your craft while also remembering the Monk’s moveset to the best of your ability.
After this battle, head into the small opening ahead to enter the giant area known as the Wedding Cave. Inside this cave is an item called the Shelter Stone, which is imperative to have if we want to continue to the next battle with the Monk.
True Corrupted Monk Location

Later in the game, Sekrio will be granted access to Fountainhead Palace. This Palace is a fan-favorite area, as its gorgeous design, creative enemies, and overall lore significance combine to create one of the best areas in a Fromsoftware game. Blocking your entry into this area, however, stands the True Corrupted Monk. This is the real version of the Monk we fought in Mibu Village, and while the moveset generally stays the same, there are a few changes to the pacing of the fight.
How to Reach the Monk
In order to reach the Corrupted Monk and the Fountainhead Palace, there are three items that the player must collect. These items are:
- Mortal Blade in the Senpou Temple:
Given to us by the Divine Child after the Folding Screen Monkeys fight - Lotus of the Palace Flower in the Sunken Valley:
Located in a small cave accessible after defeating the Guardian Ape - Shelter Stone in the Ashina Depths:
Can be found in the Wedding Cave after defeating the Corrupted Monk
Once all of these items have been collected, head into the Wedding Cave after praying at the idol outside. Inside the cave, there should be what looks like a small house where we want to head. Once inside this small structure, you will receive the option to pray. Doing so will trigger my favorite cutscene in the game, as a giant rope hand will grab Sekrio in the tent and carry him to Fountainhead in the most cinematic moment. Once the cutscene is over, the player will want to carefully traverse down the rope to the land below, where an idol will be waiting in front of an entryway leading to a bridge.
Walking about halfway across this bridge will trigger the fight, and seemingly from the skies, the True Corrupted Monk will come crashing down to meet you, knocking you down as you land. This battle consists of three phases, and I will review each approach below.
First Phase

This battle will be identical to the first fight we had with the apparition version. The attacks will not differ, so be sure to use the same approach you used to ensure victory. However, players should note that snap seeds will not work in this fight, as this boss is not an apparition but instead the real thing. Firecrackers will still be viable, so be sure to have spirit emblems at the ready.
Second Phase

This phase can be highly punishing if not approached correctly, as the Monk will disappear at the start of the phase, sending multiple shadows of herself, each one launching a different attack. This will last a while, and keeping up with all the strikes coming your way is challenging. It reminds me of the shadow phase of the Mergo fight in Bloodborne, however, there is an easy way to counter this, ending the second phase early. As you administer the first deathblow to the Monk, quickly grapple up to the tree in the back left of the arena and face the Monk as fast as you can.
These trees can be used to avoid shadow attacks, however, if you get up to the right tree at the start of the fight, you can see the Monk standing still in the middle of the bridge. Jumping on top of her will allow you to get a stealth death blow on her, ending the second phase immediately.
Third Phase

This last phase is one of the most challenging phases, and sadly we cannot get a quick death blow as we did with the second phase. After the second death blow is achieved, the Monk will fall on its back, seemingly dead. However, mere seconds later, a centipede will shoot out from the Monk’s head, revealing what was controlling the Monk all along. In this last phase, the centipede unleashes a perilous attack; a vomit-like projectile damaging you. This is very dangerous because it will quickly stack up your terror meter while hurting you.
Sekiro players are very familiar with the dangers that Terror poses. If the meter fills up all the way, it results in instant death. This attack usually comes in the form of a three-hit combo and is the second perilous attack in the combo. The first one will be a sweep, and the centipede will vomit in front of the Monk right after. While the damage of this perilous attack isn’t too drastic, the terror meter will fill up around 90% of the way if not dodged at all.
The fight will usually open up with the spinning slash featuring five strikes. While many of the moves remain the same, I will review the main changes to look for.
Sword Strike Flurry

In this phase, the Monk will unleash a lightning-fast flurry of strikes, ranging from slamming to a final sweep. These attacks have immense power, so keeping distance is essential. However, if there is a lack of space, it will take practice in the timing to deflect each attack due to the rapid speed they come at. There will be a brief moment of either punishing or healing that the player can do after this intense volley, however, make sure you are far enough away because the Monk is known to bait out heals so you can get animation-locked, leaving you vulnerable.
Forward Spinning Slash

In the first fight and this second fight, the Monk uses the backward-spinning leap to create distance. However, in this fight, the Monk will also use it to close distance, leaping towards you while torpedoing in the air, looking to hit you with a strike as she lands. Maintain your ground, and look to deflect the final two strikes if needed. After this, the Monk will leave time for the offense, so take advantage.
Downward Slam:

The Monk will heavily utilize the two-handed downward slam with her blade, which punishes both vitality and posture. Dodging to the side is viable, however, deflecting her can build up the Monk’s stance significantly. Mastering the deflect timing will allow you to stay in her face during these flurries and maintain a certain rhythm to the fight.
Terror Vomit
As mentioned above, the centipede will unleash a terror-filled vomit upon you as a perilous attack. It usually will come at the end of a chain of attacks, however, it can also be unleashed on its own. This attack can be countered by dodging to the side, and this will leave the Monk vulnerable, so be sure to quickly switch to the offensive after dodging.
This is the most prolonged phase of the fight and certainly the most challenging if you take the stealth death blow in the second phase. It is best to face this battle on the ground, and with enough practice, the True Corrupted Monk will go down in no time. Utilization of the trees can be helpful in some scenarios, however, it is essential to note that her strikes can still hit you even in the treetops. Below, I will list the best items to use for this battle.
- Shinobi Firecracker Prosthetic
- Fistful of Ash
- Divine Confetti
- Ako’s Sugar/Spiritfall
- Gokans Sugar
- Sweet Rice Ball
- Ungo’s Sugar
- Purple Mottled Gourd
- Pacifying Agent
- Ganchiin’s Sugar/Spiritfall
Fountainhead serves as an excellent prize for defeating one of my favorite bosses in the game, and the unique and terrifying design of the Monk and its moveset makes this battle one to remember. After defeating the True Corrupted Monk, the player will have earned their way into the best area Sekiro offers. Along with entrance to Fountainhead, players will receive a Dragon’s Tally Board, adding certain items the merchants can sell.
FAQ:
Question: Can I get two stealth deathblows on the Monk in the second fight?
Answer: Yes, you can do this, however, I do not enjoy doing so. If you use a Ganchiin’s Sugar before entering the fight, you can sneak onto the trees just like in the second phase, allowing you to get two stealth deathblows on the Monk.
Question: Is the Corrupted Monk a mandatory boss?
Answer: Yes, to continue with the main story, you must defeat the Corrupted Monk to gain access to Fountainhead Palace.
Question: Do I need to use Divine Confetti on the Corrupted Monk (Illusion)?
Answer: While it certainly does help speed up the fight, it is optional to use Divine Confetti when fighting the first Corrupted Monk.