
- Crucible Knight Elden Ring Guide - February 5, 2023
- Corrupted Monk Sekiro Guide - December 31, 2022
- Elden Ring Malenia Guide - November 2, 2022
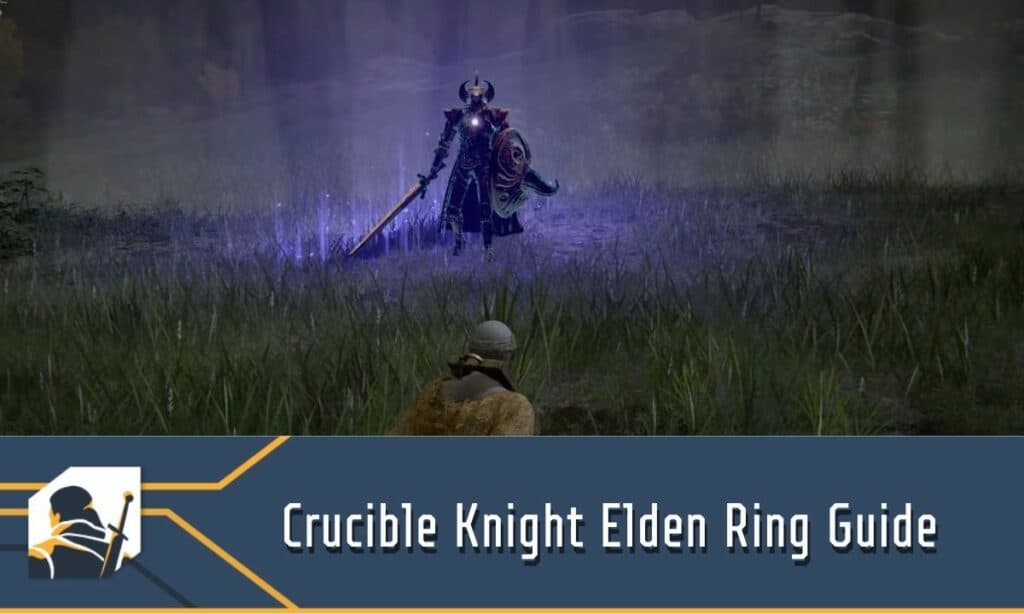
The Crucible Knight in Elden Ring is a menacing, challenging mini-boss within the world of Elden Ring. This massive Knight lurks in the many corners of the world, awaiting the ensuing duel between you two. Wielding various weapons, this brute of an enemy will be a challenging battle for the Tarnished every time.
Overview
The battle will be broken up into two phases, with the second phase coming when the health bar is reduced to half or even if it is just taken down by one-third.
First Phase
The Crucible Knight will often hide behind his shield when approaching the fight, eliminating the chance for unpunished aggression from the player. There are a few moves that the Crucible Knight will utilize in this phase, and mastering these dodges will prepare you for the second phase to come. The moves in the first phase are listed below:
Charging Jab

The Crucible Knight will attempt to close the distance between you and him with many of his attacks, and one of the most annoying ones happens to be his quick charging jab. He will telegraph this attack by pulling his sword behind him while simultaneously charging the player before thrusting forward. This attack can be used on its own or at the end of a combo, so be sure to dodge it appropriately. The best way to deal with this attack would be to dodge to any side, aside from straight back, as that can lead to you getting hit after the I-frames wear off. Parrying will also work here.
Sideways Slice

This attack will likely be woven into a flurry of attacks meant to catch you off guard during downtime. The most common time the Knight will use this will be in between jab attacks, so players should use that as their queue to dodge. The attack will be telegraphed by the Knight holding his sword low and then quickly taking a few steps towards you to close distance, slicing horizontally out towards you. The best strategy would be to roll into him slightly to the side so you can get behind him and punish him. This will be one of your few windows to get some damage in, so take advantage of it.
Rock Stomp
This is one of the most infuriating moves to get used to dodging, so if you fail the first few times, don’t give up hope. The Crucible Knight will hold his sword vertically in the air and then stomp hard down into the ground, creating a large area in front of him to fill with rock spikes, damaging the player. The size of this rock-damage field is similar to that of Hoarfrost Stomp, if not slightly larger. Dodge rolling to the left or right will work fine. However, jumping when he stomps is the easiest way to approach this move. Jumping will fully counter this one move, as the rock spikes will not reach high enough to damage the player.
Downward Slam/Double Spin Slash

After he uses Rock Stomp, the Crucible Knight will bring down his sword from its vertical position, crashing it down into the ground. This isn’t the most challenging move to dodge, as a simple dodge roll to either side will fully counter this move. The danger comes after this move as if you are close to him; he will spin around twice, using his blade to slice around him in a large area. This will require practice to dodge, but it is relatively simple. Dodge to the right for both swipes, and there will be a half-second waiting period before the player should initiate the second roll.
Shield Charge
The Crucible Knight’s shield is just as dangerous as his sword because instead of just being used to block incoming damage, it can also be used as an offensive tool. Beware of this attack when the Crucible Knight looks to dip below his shield. He will pull his guard back towards him and take a few delayed steps towards you before thrusting forward with the shield, attempting to stick you with the horn on the face. This attack does massive damage and will launch the players off their feet and into the air, leading to a hectic scramble to survive. To dodge this move, one must be patient. Wait for the Knight to take a few steps towards you and dodge right before he lunges with his shield. This will leave him vulnerable to your offensive attack for a moment or two, so take advantage.
Those are the major moves that the player should be worried about in this first phase. In my journey, the Knight would seemingly wait for you to pop a flask to use his charging jab. This means that, even though there is a distance between you and him, the second you choose to heal, he will likely charge towards you with the jab attack covering an immense amount of ground. This makes healing difficult, so be wise about using your flasks, as there are minimal openings for offense. One of the most reliable openings comes in the second phase, and I will go over that below.
Second Phase
The Crucible Knight will gain new powers in the second half of this battle, which will be shocking for some players to see, given his heavy armor and slow move set. The Crucible Knight will sprout wings out from its back, giving him the power of flight. Not only this, but the Knight will also utilize a giant tail that appears on him repeatedly, allowing him to dish out a whole new arsenal of dangerous attacks. Below, I will go over what changes from the first phase to this one.
Swooping Charge

The Crucible Knight will sprout wings at the start of the phase change, as mentioned below. When he does this, he will elevate high into the air and plunge in the player’s direction with his sword pointed toward them. The Knight’s approach to hitting you is much like jousting, as he will swoop down towards you in a similar path. To dodge this move, wait for him to get close to you with the sword and dodge into the blade, using the invincibility frames to phase through his weapon and body. After doing this, you will have a perfect, risk-free opportunity to heal, as he will be far away without enough time to interrupt you.
Follow-Up Tail Attack

One of the most annoying parts of this battle has to be this attack, as it closes specific windows of opportunity for offense that was available to the player in the first phase. And with a fight that already offers limited offensive opportunities, strategic and careful tactics are essential for overcoming this fight. After a long combo of attacks, the Knight will commonly grow his tail instantaneously and spin in a circle, slapping you with the tail in the process. Dodging into it, or to the Knight’s right side, will allow you to dodge the move and punish accordingly successfully. It is not the most elaborate attack. However, the timing always seems to come after you have committed to attacking. Be patient, and only engage when all possible attacks have been dodged.
Spinning Tail AOE
This attack comes quickly, with a slight telegraph before unleashing it. When there is a distance between you and the Knight, he will grow his tail and spin around in a circle twice, attempting to smack you with it. Each time he turns, the tail will increase dramatically, covering massive amounts of the battleground with the enlarged tail. If there is enough distance between you two, the first tailspin will not be a danger, and you will need to dodge through the tail the second time. It will take a lot of work to get the timing down for the dodge due to the quick speed and significant ground that the attack covers.
Upward Sword Slash

The Crucible Knight will drag the tip of his sword across the ground for a second before slashing upward toward you. This attack will likely be chained into a flurry of sword strikes, so focus and patience are vital in evading this offensive push. The attack will be telegraphed by the Knight crossing his sword across his body, digging the tip into the ground for a few seconds. Dodging either to the side or into the blade is the best way to approach this attack, and it shouldn’t take too long to master the timing.
Locations
The Crucible Knight will be an enemy the Tarnished will face multiple times throughout their journey. This is commonplace in Fromsoftware games such as Dark Souls, as these field bosses serve as a skill check as the player progresses in their journey. Below, I will list the locations where the Tarnished can battle this Knight and the rewards they will receive for doing so.
Stormhill Evergaol in Limgrave

This will likely be the player’s first encounter with the Crucible Knight, as the battle occurs shortly after unlocking the Gatefront Site of Grace. As this is the introductory fight, you will likely have to try to take him down many times, but staying confident and learning the moves will prepare you for future battles.
Rewards:
- Aspects of the Crucible: Tail
- 2100 Runes
Redmane Castle in Caelid

Upon reaching the inside of Redmane Castle, inside the arena where the soldiers rally for the Rhadan fight, the Tarnished will have to take down both the Misbegotten Warrior and a Crucible Knight at the same time. The best way to handle this fight is to maintain distance and focus on the Misbegotten Warrior so that you can get a one-on-one battle with the Crucible Knight.
Rewards
- Ruins Greatsword
- 16,000 Runes
Auriza Hero’s Grave in Leyndell, Royal Capital

Reaching this boss fight will take a lot of traversal and quick thinking, as the Tarnished will need to make their way to the bottom of this underground maze to find the Crucible Knights. I said Knights, meaning this boss battle is you against two Knights. One of these Knights will have the standard move set, wielding a shield and sword. However, the other Knight is a bit different. Crucible Knight Ordovis uses a spear in combat, and he, too, has AOE attacks, distance closing moves, and fights very similarly to the Crucible Knights we are used to.
Rewards
- Ordovis’s Greatsword
- Crucible Knight Armor Set
- 28,000 Runes
The Nameless Eternal City within the Deeproot Depths

This Knight is known as Crucible Knight Siluria, and we can find him standing by a tree in the Nameless Eternal City. He, like Ordovis, uses a heavy spear and has the same move set as the previous fight.
Rewards
- Siluria’s Tree
- 25,000 Runes
These are the main encounters with the Crucible Knight that the Tarnished will have in their journey. These mini-bosses become standard enemies later in the game, so encounters like the one we have in Crumbling Faram Azula should be handled relatively easily at this point. Even though this is the case, players will learn to love their battles with the Crucible Knight, and many of the rewards from these battles will allow us to emulate some of the same moves the Knight used against us. Also, items like the Crucible Knight Hornshield enable the Tarnished to recreate the Knight look on their characters.
Overview
The Crucible Knight is at first a menacing foe; however, through many battles with him, the task becomes less grueling every time. This enemy defies many of the rules regarding enemies we have learned through games like Dark Souls. This massive Knight with heavy armor glides across the arena with its ability to close distance, and the second phase gives them the power of flight. Even though it may be challenging to adjust to, it is an overall improvement to the flow of battle within the realm of field enemies. The constant movement and many counters will keep the player on their toes.
Spirit Ashes with a lot of health will significantly decrease the difficulty of this battle. The Mimic Tear is the best choice for this battle, even after the nerf it received. The combination of your weaponry and quickness and a significant health pool will allow the Mimic to distract the Knight, giving you a prime opportunity for damage output. In terms of movement, having the Bloodhound Step Ash of War equipped will help players evade nearly every attack the Knight throws.
Spells like the Opaline Bubbletear and the Ambush Shard will benefit this fight, as they allow the player to output damage while maintaining distance. Magic may have a tough time in this battle, as the Knight has a decent amount of magic resistance.
Lastly, parrying is an excellent strategy for this battle. While the Knight’s strikes come in at top speed, learning the timing of the parry will significantly reduce the time this encounter lasts. This is because, a lot of the time, the Knight will follow with an attack like the overhead slash after being parried. Continuously parrying when given the opportunity will take practice, but if the Tarnished can master the timing, then parrying is ultimately the best available strategy.
FAQ:
Question: Are the Crucible Knights Optional?
Answer: Yes, all Crucible Knight battles are optional and can be avoided, but the items they drop should motivate players to take on these challenges.
Question: What are the Crucible Knights weak to?
Answer: These Knights are especially weak to physical attacks, fire, and parrying.
Question: How many Crucible Knights are in the game?
Answer: If the Tarnished is keen and explores every inch of the world, they will encounter a possible 16 Crucible Knights.
Looking for more interesting readings? Check out: