

- Crucible Knight Elden Ring Guide - February 5, 2023
- Corrupted Monk Sekiro Guide - December 31, 2022
- Elden Ring Malenia Guide - November 2, 2022
The ending of a Soulsborne game is a big deal. The countless hours you have put into your character and the many brutal deaths on your journey will leave players clamoring for a satisfying end to their adventure. This is especially true in Elden Ring, which has six different endings you can get. One of these endings entails you bringing on the ‘Age of Stars,’ requiring you to complete several tasks for Ranni the Witch, an in-game NPC. Not only are you getting the Age of Stars ending when you complete Ranni’s quest, but you will also receive many special items fit for a sorcerer.
Ranni’s questline is one of the longest ones you will encounter in the game, as there are many essential steps you must take at specific points to complete it fully. I enjoy this ending, and helping Ranni in her journey gives somewhat of a happier outcome compared to the traditional conclusions of Soulsborne games. Below, I will go through the questline step-by-step to ensure you don’t miss out on important events.
Step 1: Meet Ranni
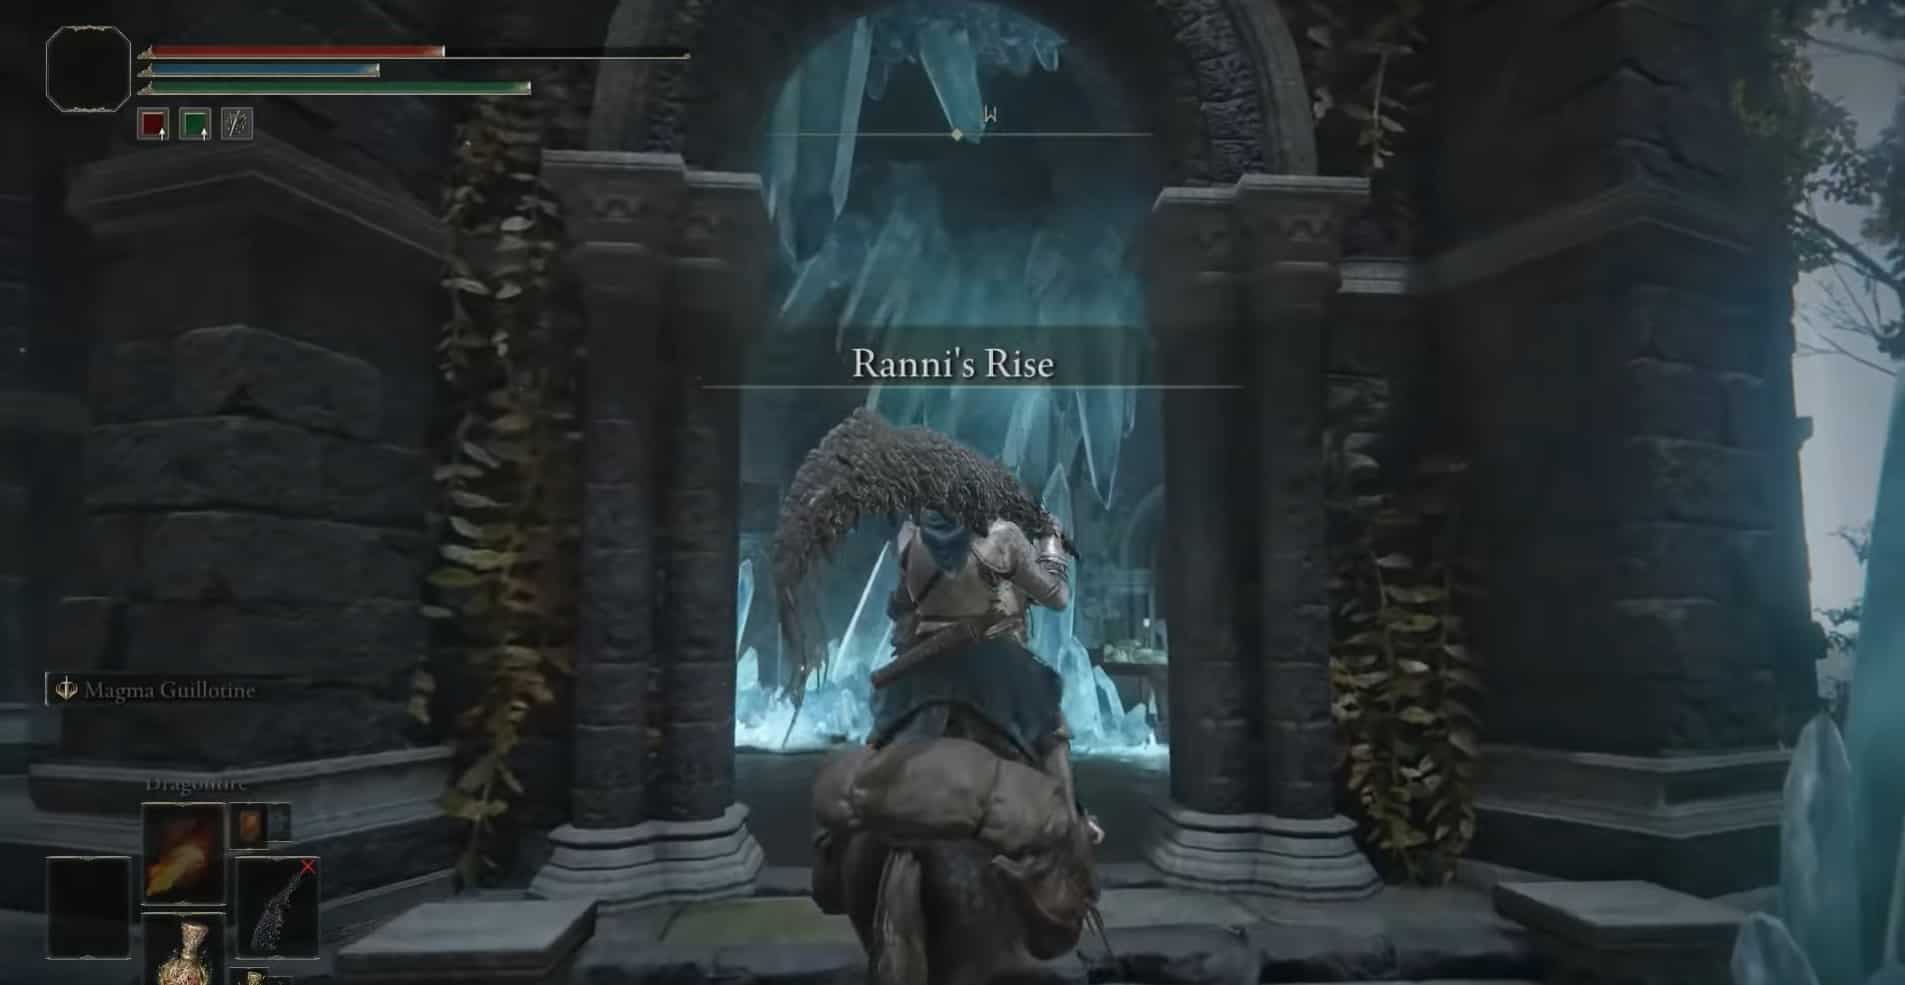
Of course, before starting this questline, you will need to speak to Ranni atop her Rise. Ranni’s Rise is located in the Northern part of Lurina of the Lakes and can be accessed after the fight with Royal Knight Loretta in Carnia Manor. Head towards the entrance of the Rise and head inside. Head through the Rise upstairs until you reach a grace point, and then be sure to interact with it.
At this point, all you need to do is take the elevator, continue up the stairs towards the top of the Rise, and Ranni the Witch should be sitting in her chair, waiting for you. Talk to Ranni until she presents you with this option;
“Wilt thou enter into my service? I am the Witch Ranni. I stole Death long ago, and search now for the dark path. That I might one day spend the whole of it, and rid the world of all that came before.”
To start the questline, be sure to enter into her service. This will allow you to travel back down into the Rise, and meet the others who were previously invisible. Before leaving, exhaust all of her dialogue to trigger everything. Going downstairs, you will meet:
- Blaidd (Wolf Warrior)
- Iji (War Councilor)
- Seluvis (Sorcerer)
To leave the Rise, you will need to talk to Blaidd and Seluvis only once but will need to speak to Iji twice. Seluvis is especially not welcoming, but Iji and Blaidd are. They will discuss Nokron, the city with the treasure Ranni needs. After talking to all of them, head back upstairs to chat with Ranni again. She will warn you that she is about to enter her slumber, and this can be annoying because if you don’t know what to do in the quest, it doesn’t help to have Ranni sleeping, unable to offer assistance.
Step 2: Talk to Iji and Seluvis

Meeting Seluvis in Seluvis’s Rise will prompt him to ask you to find Nepheli and give her a potion. Accepting this task will award you with Seluvis’s Potion. Next, we can talk to Iji, located at the Road to the Manor grace point. When the menu pops up, select the ‘About Nokron’ option to get information regarding the whereabouts of this underground city. Inquiring ‘About Blaidd’ will give you insight into the history of Ranni and her companions, as Iji and Blaidd swore allegiance to Ranni as vassals when she began her new journey.
Step 3: Meet Blaidd in the Siofra River

If you haven’t already found the Siofra River Well, a long, gorgeous elevator that takes you all the way down below the surface, you will want to start at the Mistwood Outskirts grace point. Head right towards the coast, but travel a little South. Avoid the giant bears scratching the trees, and eventually, you will find what looks to be a dome. Enter this building, and step on the elevator to travel down.
Once you reach the bottom of this elevator, continue North through the large building. I usually hop on horseback here, so I don’t have to deal with many enemies inside. Once you have made it through this building, you will see a building door to the right and an elevator inside. After going up the elevator, you will still be in the Siofra River area, just elevated a little. Again, use your horse to travel east up the hill and continue East until you reach a pillar sticking out of the ground.
These pillars contain torches, and you will have to light a certain amount of these torches to unlock the Ancestor Spirit boss fight. Just light this torch and head towards the building with the large stairway to the South. On this first pillar, before the stairs on the right, you can find the map of the Siofra river, which you should pick up. Please do not go up the stairs but continue past them towards the East. You will want to stay directly East when traveling, as it seemingly takes you in a straight line to Blaidd. He can be found at the edge of a cliff, and talking with him reveals he thinks Seluvis knows something he is not telling us about Nokron. He suggests we visit him, so we will be sure to do that.
Step 4: Ask Seluvis about Nokron

You will want to travel back to Seluvis’s Rise, below Ranni’s Rise, outside Caria Manor. Approach Seluvis, and ask him about Nokron. He will eventually tell us about a glintstone sorcerer named Sellen in Limgrave, who owes Seluvis a favor for his assistance when she was expelled from the Academy. He will give us a letter of introduction, called Seluvis’s Introduction, and tells us to ‘go ask her.’
Step 5: Find and Talk to Sellen

This quest involves chasing people around looking for information, so bear with me. We are going to want to head to the Waypoint Ruins in Limgrave. There will be a few enemies here, most notably the Mad Pumpkin Head, that you will need to take out before talking to Sellen. She resides in the downstairs cellar, and talking to her will reveal the option to ‘Show letter of introduction.’ Doing this will trigger a surprising response from Sellen, as she claims she was hoping never to have to hear the name Seluvis again. She obliges, however, and agrees to teach you what she knows.
She reveals that to fulfill Ranni’s destiny, General Rhadan must be killed. This is because he managed to take hold of the stars to master gravity magic and continue riding his horse. This, however, stopped the star’s cycles, which blocks both blocks off Nokron, Eternal City, and prevents Ranni from finishing her journey.
Step 6: Tell This News to Blaidd

It is time to reveal what we know to our friend Blaidd, who is still down in the Siofra River. He will be in the same spot, so refer to step 3 if you need to locate him again. When talking to him, the option to ‘Tell Sellen’s story’ appears, and doing this will remind Blaidd of something he heard of on the southern edge of Caelid, which we know to be Redmane Castle. He brings up the fact that there is a festival, and you can challenge Rhadan yourself. He insists that we both meet at Redmane Castle to participate in this festival, so that will be our next step.
Step 7: Kill Rhadan in Redmane Castle

To progress this quest, we will need to kill the General himself. Redmane Castle can be found at the bottom-right of the map in Caelid, and inside holds one of my favorite introductions to a boss. When you get to the Impassable Greatbridge, there should be a teleporter to the left of the bridge, which will take you inside the castle. Head up the stairs and enter the room on the right to get a grace point. Traveling up the stairs further will take us to what I call the lobby, where all the participants are eagerly waiting.
When you enter the castle, depending on how far you are in the game, you may have to fight both a Misbegotten Warrior and a Crucible Knight simultaneously. These two don’t complement each other in battle, unlike how Ornstein and Smough were designed. This fight is not insanely brutal, but it feels like an unnecessary boss battle, in my opinion.
If you do not have to do this battle yet, be prepared for it later.
Entering this lobby, you will find many familiar faces, such as Blaidd, Iron Fist Alexander, Lionel the Lionhearted, and many more. I feel like our player is closest with Blaidd at this point, so I usually talk to him. But, most importantly, you want to speak to the man standing on the platform above, who yelled ‘Champions, welcome!’ as you entered. He will ask you if you are ready to begin the festival, which will trigger the event, and allow you to access the boss fight.
After beating Rhadan, you will be awarded a phenomenal cutscene showing a meteor shower traveling across the screen. This is great for us because that meteor shower will open up the entrance to Nokron, Eternal City, and now we have to find where the meteor crashed. Talking to Blaidd before we leave, he will congratulate us on the victory and tell us to meet him in Nokron now that it is open.
Step 8: Enter Nokron

It is time to get the treasure Ranni is desperately seeking, so travel to the Mistwood Outskirts, and head towards the Mistwood Ruins. In this area, we can find a note from Blaidd, saying that he dealt with a traitor and that we should lead into Nokron. Continue South past the Ruins until you see rocks and debris floating in the air. This is the entrance to the city, so carefully scale down the rocks until you reach the bottom.
You will see a small doorway in front of you, so head into this area and roll down the broken layers of the floor until you reach the bottom. You can run through what appears to be a window and now see the beautiful city of Nokron. You will need to traverse the rooftops to find your first site of grace, so head right and down the skinny pillars. From here, you can see a building that has been toppled over, and you will need to scale up this building and jump to the next roof.
From here, continue scaling the left side of the rooftops until you reach an open window on the left. Jump into this room and carefully scale down to the levels below you, ensuring not to take too much fall damage. Two enemies will not be much of a threat here, so run past them and head through the doorway and down the stairs to the grace point. After this, you must go to the Mimic Tear boss battle. An easy way to cheese this fight is to unequip all of your weapons/armor/talismans before you enter the arena, and once you pass the fog, reequip all these items. This will leave your adversary mimic defenseless and can only punch you for minimal damage. This fight is not difficult to handle regularly, so keep that in mind.
After defeating the Mimic Tear boss, head left up the stairs and down the long path. After crossing most of the bridge, there will be an area where you can drop back onto land and a path streaming up North. Head down this way, but go West instead of following the path. This will take you past a few enemies, and right to another grace point tucked away to the left.
From this grace, traverse the buildings until you reach the Night’s Sacred Ground. Looking South, you will see a dome-like roof leading to two mimic tears. Jump on the dome and down to the level with the mimics and quickly take them out. After fighting them, cut left and travel across the buildings until you reach a partially broken bridge. Here, cross the bridge and hop into the building on the other side.
Drop down to the lowest level of the building, and beware of the few enemies down there, including a giant heat-seeking cannonball. Take them out, then head South outside of the building. You will be able to see a site of grace to the left, so interact with it and handle whatever you need to address now. Now just run past all the mimic tears on the ground until you find a small building with a teleporter next to it. The chest inside this building contains the Treasure of Nokron, also known as the Fingerslayer Blade, and a Great Ghost Glovewort.
Step 9: Travel Back to Ranni’s Rise
With our newfound treasure, we can now deliver it back to Ranni in her Rise. Head to the top and speak to her. She is very thankful for all your sacrifices and commitment and lets you know how important this was to her journey. Talking to her again will have her give you the Carian Inverted Statue, which we will need for later.
Step 10: Venture to the Carian Study Hall

The statue given to us by Ranni will immediately be put to use, and we have to travel back to the Carnian Study Hall. This area is located in Liurnia of the Lakes, attached to the Divine Tower of Liurnia. Once inside this area, we will notice a table that, when approached, will prompt us with the option to ‘Examine pedestal.’ This will trigger a cutscene of us placing the statue, immediately followed by shaking and the rotation of the moon on the table. This signifies that the whole area was flipped on its head, allowing us to explore it in a new way.
You will want to traverse the beams and areas above, all the way down until you reach an elevator. This elevator will take us down to the bottom, or top, of the inverted area, and once we get to the bottom, we want to head to the East, where there is a door we need to open.
This doorway opens up to a grace point and a long bridge, reminiscent of the Divine Tower we visited in Limgrave. This is the Divine Tower of Liurnia, and we will want to open the large doors in front of us and head up the elevator to the top levels. There will be a grace point for you right when you get off the elevator, so interact with it and head up the stairs to the right. At the top, we can pick up both the Cursemark of Death and the Stargazer Heirloom.
Step 11: Head to Renna’s Rise
Renna’s Rise is in the same area as Ranni’s Rise, and we must travel there to use a teleporter. This will teleport you to Ainsel River Main, where you will want to grab the miniature Ranni doll and interact with the grace point in front of you. This teleporter is located at the top of Renna’s Rise, so scale your way up all the stairs and interact with it. When resting, you will see an option to talk to the miniature Ranni Doll. Select this option three times, and the doll will finally speak to you.
Step 12: Kill the Baleful Shadows to get the Discarded Palace Key

She is not too pleased that we recognized her in her disguise, and to pay her back, she tells us to kill the Baleful Shadows. From the grace point, we were just at, head South through the Lake. You will see a giant door with a few torches, so head through that and down the long tunnel down to the bottom levels. When you reach a divide, stick to the right side and continue. There will be a door on the left side of the building in front of you, the entrance to the city of Nokstella.
There will be a grace point soon after you enter the city, so interact with it when you reach it. You will need to do a lot of exploring to traverse your way through this city finally. Eventually, after two trips down some elevators guarded by enemies riding ants, you will finally come across our next grace point. From here, continue down the skinny tunnel to the South and kill or ignore the toads that inflict Death Blight. You will eventually enter an arena with a red-orange filling the air, and here you fight the Baleful Shadow. This is the Shadow of Blaidd, which is confusing initially because that is seemingly our closest ally besides Ranni. After defeating this boss, Ranni will talk to us, saying;
“Now, I can finally stand before them. This is farewell, my dear. Tell Blaidd, and Iji…I love them.”
After this quote, you will be given the discarded Palace Key, allowing you to continue your journey.
Step 13: Kill Astel, Naturalborn of the Void

After killing the Baleful Shadow, use the elevator in this room to travel down to the Lake of Rot. There will be a grace point right in front of the Lake, so be sure to grab that before venturing out. You must cross the Lake and jump on small platforms to create a path. If approached incorrectly, this is a very obnoxious part of the game, so be sure to equip a weapon with the Quickstep or Bloodhounds Quickstep Ash of War. This will make traveling across the Lake a breeze, and coupled with a Starlight Shard, you will take minimal exposure to the Scarlet Rot.
You will know you are close to the end of the Lake when you see a giant entryway in the distance with two large torches sticking out of the statues. Head over there, use Preserving Boluses, and heal if needed. Head into the entryway to find a grace point, and interact with it immediately. Heading West, we need to traverse down the building until you are at a safe distance to land without dying. Once on ground level, continue on the path towards the entryway, but go left instead of up the stairs. Here, we can interact with a coffin that will take us right to Astel’s arena. Best of luck!
Step 14: Grab the Darkmoon Ring in Raya Lucaria Grand Library

After defeating Astel, you will notice that the pathway to continue further is blocked. We will need to travel back to the Raya Lucaria Grand Library to open the chest that has been sealed all game before this. Opening this chest with the Discarded Palace Key we picked up earlier will give us the Dark Moon Ring. Putting this ring on will now open the previously blocked-off area after the Astel fight.
Step 15: Head to the Cathedral of Manus Celes

This area comes after the Astel fight, so after opening the blocked site with the Dark Moon Ring, continue onward. Ride the elevator upwards until you reach the Moonlight Altar area, where you can now freely ride your Torrent. Grab the grace point a little way in front of the elevator, and continue up the hill to the North leading to the Cathedral, but be warned as a dragon known as Glintstone Dragon Adula will spawn as soon as you arrive. I ride past this Dragon into the Cathedral to grab the grace point behind it.
There will be a hole that you can traverse down and travel through the tunnels until you reach Ranni, sitting on a bench in an empty room. As you approach her, you will be given the option to ‘Wear Ring,’ which will trigger a cutscene. In this cutscene, we put the Dark Moon Ring on Ranni’s finger, and after the cutscene, the ghost version of Ranni will appear. You are now Ranni’s lord and have unlocked the ability to summon her for the Age of Stars Ending. We aren’t done just yet, as some significant aspects of the quest are still left. As the conversation ends, Ranni will fade away, and she will leave behind the Dark Moon Greatsword, which is a weapon that any Souls veteran will have fond memories of.
Step 16: Meet Blaidd at Ranni’s Rise

Head back to Ranni’s Rise, but be sure to proceed with caution. Blaidd will be waiting for you on the steps, and just like our buddy Solaire, we will have to fight someone who was once our greatest ally. Defeating him will have him drop the Royal Greatsword and his armor set. There is nothing you can do to stop Blaidd, as the Fingers got too deep into his head, and he is itching for this battle.
Step 17: Talk to Iji about Blaidd

We need to finally travel back to the Road to Manor site of grace, where we are tasked with informing Iji about the fate of Blaidd. It is not a fun conversation, and we can feel the pain in Iji’s words, as he feels that he let down Blaidd in the end. He ends the conversation with these words;
“I’ll catch up with you soon enough, Blaidd. When I do, I only hope you’ll accept my apology.”
That was the entirety of the Ranni questline, and it is easily one of my favorites in Elden Ring. I enjoy how intricate each step is, the research into finding each area, and the new clues we see on this journey. While it may be confusing, the stages make sense when viewed as a story.
Ranni’s Ending: The Age of Stars

All of that work that you put in is about to pay off. After you have battled Radagon of the Golden Order and the Elden Beast, and have emerged victorious, you will make your way back to the stone platform you fought Radagon on. Walk towards his corpse in the middle of the arena, and on the ground you will see a blue summon sign. This is Ranni, and summoning her in will allow you to complete the quest, and achieve the Age of Stars ending.
Many will consider this ending to be the most satisfying, or ‘best’ ending in Elden Ring. There are many options to choose from, and my personal favorite would be the Lord of the Frenzied Flame ending, where you team up with the Three Fingers. If you would like to see a full list of all the endings in detail, check out our Elden Ring All Endings Explained guide. I can agree, however, that this cutscene seems to be the most rewarding.
As Ranni is summoned in, she slowly approaches the corpse of Radagon. She picks up his decapitated head, and holds it up in the air, saying;
“I do solemnly swear. To every living being, and every living soul. Now cometh the age of the stars. A thousand year voyage under the wisdom of the moon. Here begginith the chill night that encompasses all, reaching the great beyond. Into fear, doubt, loneliness…As the path stretches into darkness.”
As she is saying this, she is conjuring up the moon, which is definitely a sight to behold. The colors are bright and visually pleasing, and Ranni’s voice and words bring feelings of comfort, hope, and promise as you take in what just happened. You just fulfilled your duty to Ranni, and you and her will hopefully bring this world the peace it deserves.
As Ranni finishes the spawning of the moon, she turns and walks towards you. She looks at you, and as the camera pans down, we see she is extending her two right hands, asking us to join her in this journey. The cutscene ends with Ranni beckoning us to follow her, saying;
“Well then. Shall we? My fair consort, eternal.”
FAQ
Question: Where can I find Ranni’s hat?
Answer: Ranni’s hat can be found in a chest in Renna’s Rise, so if you missed it initially, go back and check!
Question: Is this quest worth it if I’m not a sorcerer?
Answer: Yes, this quest is very much worth it for all people. You will already kill some bosses that overlap, like Rhadan, but you also get to fight some optional but fun bosses and enemies.
Question: Can we save Blaidd from his fate?
Answer: Sadly, I haven’t found a way to save our buddy. His fate is unavoidable when doing this quest, so just think of it as you doing him a service.
Looking for more interesting readings? Check out: