

- Lords of the Fallen Review – Fallen for You - November 17, 2023
- Dark Souls 3 Strength Build Guide - June 17, 2023
- Dark Souls 3 Cathedral of the Deep Guide - June 12, 2023
For those looking for a spooky, flaming-hot getaway, Volcano Manor is your best bet. This fiery mountain plays host to an assassination cult, a serpent Demigod, and a slew of volcanic enemies hellbent on your destruction. If you want to roleplay as a bad guy in Elden Ring, step forward and join the Volcano Manor; wealth and power await.
In this Elden Ring Volcano Manor Guide, I’ll review finding Volcano Manor and completing its tricky quest. As a bonus, I’ll detail how to find the Manor’s secret Dungeon and beat its challenging boss.
Bottom Line Up Front: Head up Mt. Gelmir and take the right exit at the Mountain’s peak to reach Volcano Manor. Talk to Tanith and complete her assassination questline to fight Rykard and claim his great rune.
- Quest Location: Mt. Gelmir
- Quest Giver: Tanith
- Requirements: Grant Lift of Dectus Medallion, Rold Medallion
- Length of Quest: 1 Hour
- Difficulty: Average
Volcano Manor: Mordor’s Evil Twin
Brimming with lava, salamanders, and evil, Volcano Manor is one of the more sinister locations of Elden Ring. The tarnished presiding there have given up on reclaiming the Elden Ring and have turned to assassinate others bent on saving the world. While joining this covenant makes us the enemy of the Erdtree, it also provides several rune shards and the Rykard’s great rune.

Equipment and Rewards
- Armor:
- Scaled Set – Decent medium armor with solid protection against non-physical attacks; the Scaled set is excellent armor for those looking to block magic attacks. We get our hands on this armor after invading and defeating Old Knight Istvan in Limgrave.
- Hoslow’s Set – Richly embroidered armor with a ram’s head, Hoslow’s set is perfect for players roleplaying as nobility. We receive this armor set after invading and defeating Hoslow in the Mountain Tops of the Giants.
- Weapons:
- Serpentbone Blade – Coated in a particular poison, the Serpentbone Blade is an excellent katana for those looking to wear down their enemies in a battle of attrition. Tanith gifts the Serpentbone Blade to us for defeating our second target. I recommend combing the status effects of this katana with scarlet rot and bleed to maximize our status effect damage.
- Serpent Hunter – Almost necessary for defeating the Rykard, the Serpent Hunter deals extra damage against serpents and snake-like foes. This spear essentially trivializes the fight against Rykard with additional damage, enabling lower-level players to beat the challenging Demigod easily. I recommend using the spear against Rykard and other snake-like foes, then ditching it for superior equipment later.
- Blasphemous Blade – This unique faith/dex/strength weapon recovers a small portion of health for every enemy you kill. While you must hold the Blasphemous Blade to gain the health regen, enemies killed by other players or spirit summons still provide the regen. I recommend using this blade with Rykard’s great rune and the Taker’s Cameo to regain a large portion of health for each enemy slain.
- Consumables
- Remembrance of the Blasphemous – We can trade this powerful boss soul to Enia at the Roundtable for the Blasphemous Blade or Rykard’s Rancor. Alternatively, we can consume this remembrance for 50,000 runes.
- Rune Shard – This powerful consumable grants us the passive effects of the currently equipped Great Rune upon use. While rune shards are fantastic for providing powerful buffs to beat back bosses and foes, their loss upon death and extreme scarcity make their utility more situational. The Volcano Manor Quest grants us a total of three rune shards for every assassination target slain.
- Spells
- Magma Shot – Throw a ball of lava at your foes and watch them burn! AHAHAHAA! Tanith rewards us with this wicked sorcery after defeating our first assassination target. I recommend using this sorcery for intelligence/faith builds against giant, stagnant foes.
- Rykard’s Rancor – Unleash a torrent of explosive spirits against your foes. Rykard’s Rancor is excellent for high int/faith builds that want to deal massive DPS. We can acquire this spell after trading in the Remembrance of the Blasphemous to Enia at the Roundtable.
- Talisman
- Crepus Vial – Silences our footsteps, enabling us to run past enemies unaware. This Talisman is excellent for players looking to stealth past enemies and explore without fear of enemy attacks. I recommend combing this Talisman with the Unseen Form sorcery to go entirely undetected by sight and sound. We obtain this Talisman after invading and defeating Rileigh the Idle in Altus Plateau.
- Taker’s Cameo – Absorb the lifeforce of our fallen foes and make it our own! The Taker’s Cameo enables us to employ vampiric builds, regaining hp after defeating enemies and beating back the battle of attrition. I recommend this Talisman for braving the large legacy dungeons or as an alternative to estus and miracles.
- Gestures
- Hoslow’s Oath – Give a solemn oath, then murder your foes! At least you showed them respect! Hoslow gives us this gesture the first time we invade him.
- My Thanks – Show your appreciation with a meaningful bow. Volcano Manor’s ghost gives us this gesture after defeating Rykard.
- Great Rune:
- Rykard’s Great Rune – Restores a significant portion of hp for every enemy killed. This Rykard’s great rune is perfect for players looking to explore large dungeons brimming with dangerous foes. After defeating Rykard and heading to his tower in the Altus Plateau, we can restore this great rune. I recommend using this rune with the Taker’s Cameo Talisman to recover extra health.
Paths to Volcano Manor:
Path A: Straight to the Manor
- Time: 5 min
- Difficulty: Easy
Easily the most straightforward path to the Manor, taking this route requires the least amount of sidetracking and offers a relatively direct approach to Mt. Gelmir. Starting from an Erdtree grazing hill grace, approach the Mountain from its eastern side, galloping up a section of stone.

Eventually, we’ll arrive at several ladders we’ll have to climb to reach the Mountain’s peak. Each set has enemies gathered around the base, so quickly head up each ladder before we’re attacked and plummet to the ground.

After climbing four sets of ladders, we’ll reach a small bridge and a spiritspring jump we can take to find a Falling Star beast inhabiting the Mountain’s peak. Instead of fighting this challenging foe for a meager +5 Somber Smithing Stone, head right across the stone jutting out.

Continuing onwards grants a relatively short path to the Manor on our left. While a few foes and a giant guard the entrance, we can effortlessly run past them to reach the Manor’s interior.

Running past these foes and through the Manor’s hall affords us access to a grace and Tanith resting on a luxurious throne. We can rest at the grace to save our progress and talk to Tanith to initiate Volcano Manor’s quest. Ready yourself, wealth, combat, and power await!
Path B: Mt. Gelmir Loop
- Time: 10 min
- Difficulty: Medium
While this path’s end puts us towards the beginning of Path A, it also has a few novel boss encounters and Iron Fist Alexander if you’ve progressed his quest far enough. Starting from the Erdtree grazing hill grace, approach Mt. Gelmir directly.

As we head up, we encounter a Tibia Mariner aiming to bring our volcanic quest to a watery end. Run past this apparition, through the Wyndham Ruin, into a small opening slightly on our left.

Following a short rest at the nearby grace, gallop past several small volcanic eruptions. Take care to avoid these eruptions at all costs; they can quickly spell the end for you and Torrent.

After getting past these eruptions, we run past several foes at war with each other and a grace to mark our progress. After resting at the grace, gallop past a giant salamander boss to find Alexander sitting amidst the lava. Talking to Alexander progresses his quest and earns you a powerful summon for the Fire Giant bosses ahead of you.

Continuing past Alexander, we encounter a ruined town and a Demihuman sage guarding the Comet Asur Sorcery, one of the best sorceries throughout the game. After picking up the potent sorcery, gallop across the narrow stone ledge to reach the end of Path B. Heading leftwards will deposit you near Path A’s section of ladders which lead towards Volcano Manor.

Path C: Rya’s Questline
- Time: 30 seconds
- Difficulty: Very Easy
Perhaps the easiest and most undiscovered path to the Manor has us talk to Rya to warp into the Manor. This step requires that we’ve completed her quest by giving her the two pieces of her necklace. After doing so, we can find her atop the Grand Lift of Dectus. Talking to her warps us straight to the Manor.

Path D: Abductor Virgin
- Time: 20 min
- Difficulty: Hard
One of the more tricky, hidden paths for entering mount Gelmir, this method serves as the quickest access to Volcano Manor. Starting from the Church of the Cuckoo grace in Raya Lucaria University, head out the left doorway towards the large elevator outside.

Upon reaching the lift, jump on the rising stone to reach the top, jump off, then take the descending stone down to get to the bottom.

Guarding this small chasm is an abductor virgin who can transport us to Volcano Manor if we die to its grabbing attack. To trigger the attack, stand close to the abductor’s front and wait for two grimy arms to pull you into the abductor, killing you.

After dying to the abductor, we awaken in Volcano Manor’s lava-filled Dungeon. We can continue further into the Manor or leave through a nearby tunnel. The tunnel takes us to grace, then a fight against two abductor virgins before we reach an opening to the Altus Plateau.

If we intend to reach the Manor’s interior, jump to the ledge on the other side of this gap to get to a small path heading up. From here, we can progress throughout the Dungeon to reach the Manor’s interior and Rykard, the Demigod of this region.

For more info on exploring the Dungeon, check out the section on Volcano Manor’s Dungeon below.
Volcano Manor Quest:
In one of the eviler, insidious quests, Tanith, the head of Volcano Manor, tasks us with hunting down several tarnished and grants us an audience with the Demigod of the Manor, Rykard.
Step One: Assassin’s First Kill
Upon reaching the Manor, we can head inside to find Tanith resting on her throne beside a silent armored bodyguard. Tanith gives us the option to join the Manor, forsake the Erdtree, and become one with the dark side. While this decision sounds ominous, there are no ill consequences for Volcano Manor.

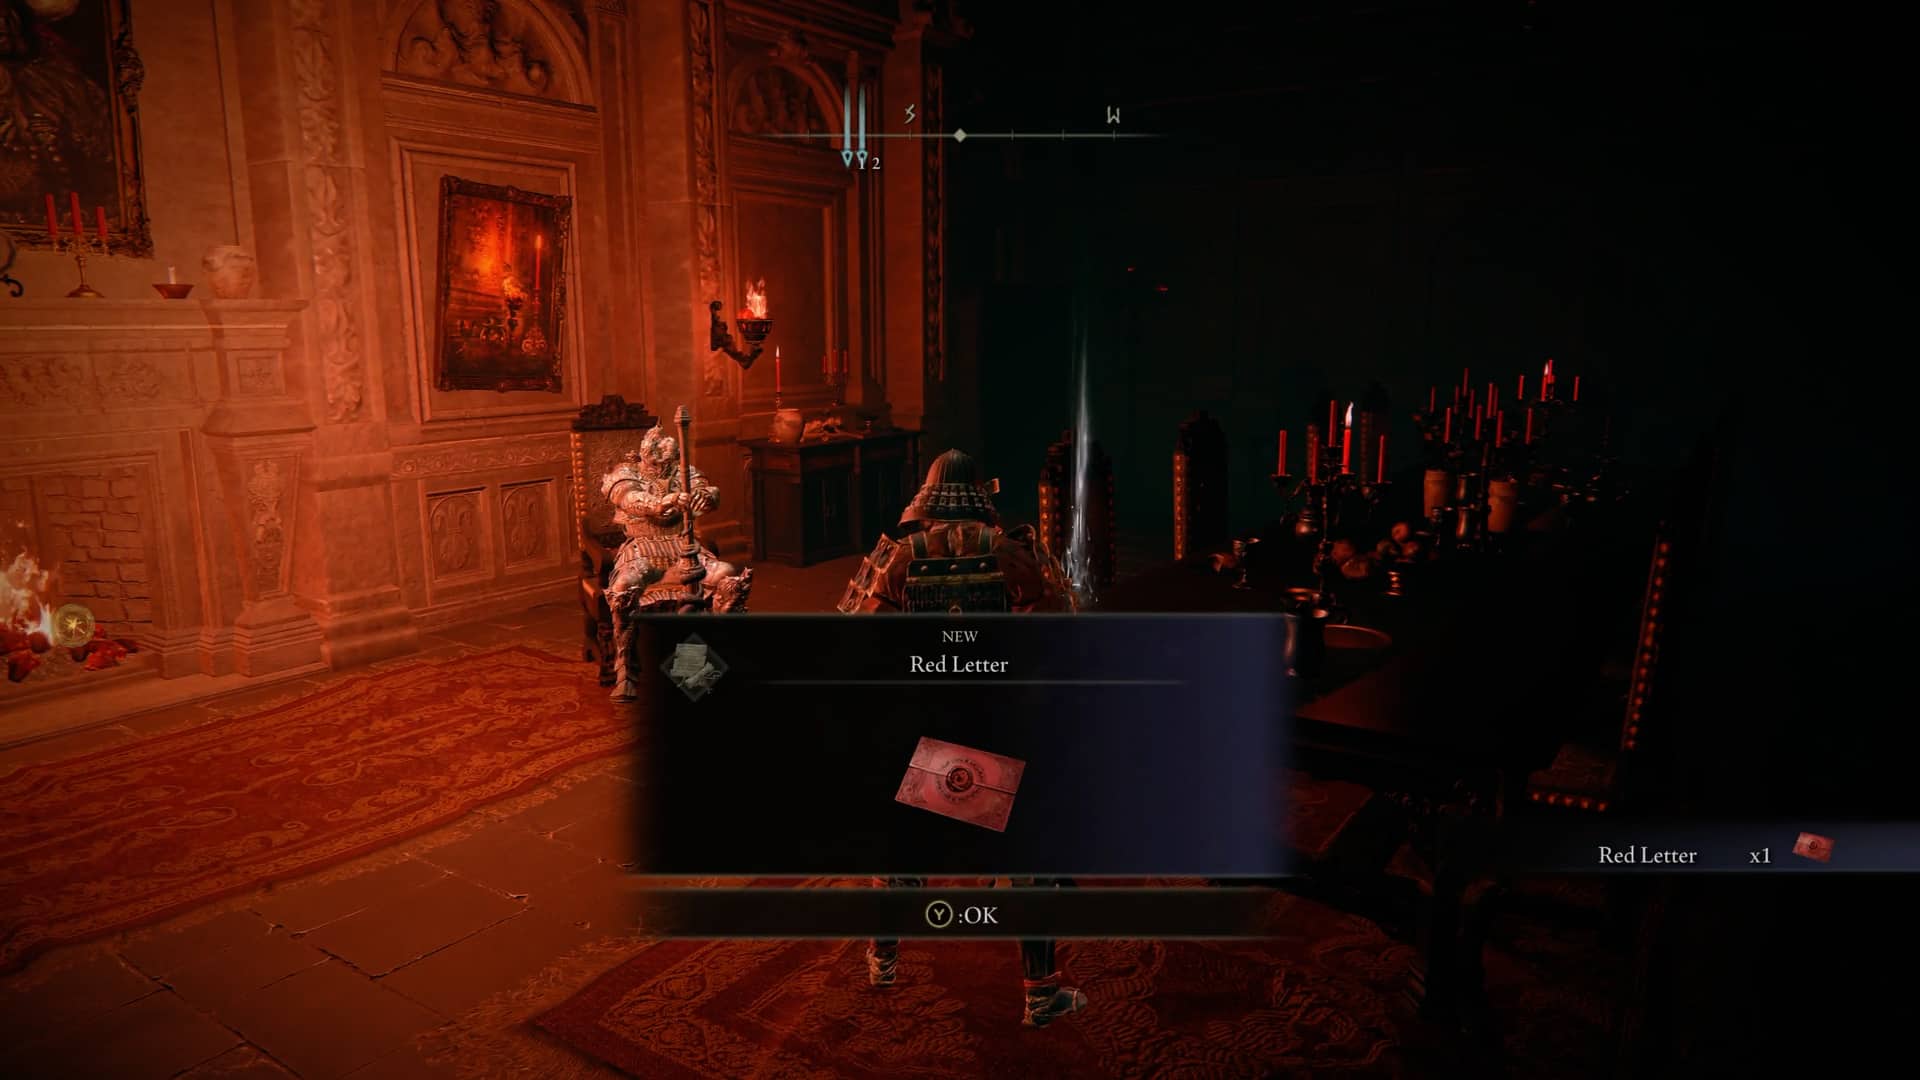
After giving in to our dark, primal urges and joining the evil covenant, Tanith gives us a key to a drawing-room that contains several characters and details on our first target. Upon picking up the letter and a recusant finger, a red bell appears on our map, revealing our target’s location in Limgrave near an abandoned coliseum.

Starting from the Stormhill shack grace in Limgrave, follow a dirt path eastwards towards the sea. Despite a few enemies guarding the road, like a lone Kaiden Sellsword, this path is relatively safe.

Continuing under a dilapidated bridge, we’ll notice a rundown coliseum with a small red sign signaling our invasion. Interacting with this sign sends us to a parallel world with our target, Old Knight Istvan.

Fight: Old Knight Istvan:
Despite the “old” prefix, Istvan is a relatively nimble fighter. Clad in scaled armor and wielding a longsword, Istvan immediately engages us, attempting to beat us into submission. Luckily for us, Istvan is relatively easy to stagger and is defenseless against ranged attacks. I recommend switching to a weapon that deals massive damage to pose or using a ranged build to quickly and safely take out this foe from afar.

After beating Istvan, the game rewards us with his armor, a rune shard, and several runes for our trouble. We can now warp to Tanith for even more goodies, like a Magma Shot sorcery, and head back to the Drawing room for our next quest.

Step Two: Close to Home
If we’re ready for our next target, we should head back to the drawing-room and pick up another letter. Picking up the letter highlights a new location outside the Manor on Mount Gelmir’s Eastern side.

On our way out of the drawing-room, however, a spectral man kneels outside, begging us to kill Rykard, the lord of Volcano Manor. While murder is wrong, this ghostly apparition asks very nicely, compelling us to proceed. He further details the location of a special serpent slaying weapon near Rykard that will put the Demigod down for good.

After meeting that strange ghost, we’ll warp to the Erdtree grazing hill grace to reach our mark. Head through the enclosed valley running along the Eastern edge of Mt Gelmir, galloping past a section of burnout trees.

As the path begins to narrow, look for a narrow aperture containing the summon sign for Rileigh the Idle’s world. If you have trouble locating the summon sign, try placing down a waypoint and following the glowing blue line to our target. Interacting with the sign throws us into Rileigh’s world, putting us into a fight with our 2nd target.

Fight: Rileigh the Idle
Unlike Old Knight Istvan, Rileigh is a ranged adversary wielding a punishing crossbow alongside a deft shortsword. Beating Rileigh is easiest up close, so I recommend approaching Rileigh with a melee build and prioritizing damaging-dealing over healing. If we attempt to heal from afar, Rileigh will stagger us with his crossbow, so beat the crossbow wielder to death before they win a war of attrition.

Defeating Rileigh rewards us with the crepus vial talisman, a few crossbow bolts, rune arc, and furcalling finger remedy for our trouble. After collecting these rewards, we can warp back to Tanith and accept her serpentbone blade katana as a bonus for our hard assassin work.

Following the assassination of Rileigh, we’ll have to progress Elden Ring’s main quest until we can undertake our subsequent assassination in the Mountaintops of the Giants. To reach the mountaintops, we’ll need to make it to the Elden Throne, confront Morgot, and collect the Rold Medallion to access the wintery hellscape.
Step Three: Blood in the Snow
Upon reaching the frozen badlands home to dead giants and darkness worshiping knights, we can finally complete our next task and confront Rykard. Like before, head to the drawing-room to pick up a red letter detailing our last target.
Reaching our target requires traversing a frozen stream to a shack at the world’s edge. Starting from the freezing lake grace, head down the frozen river’s path, taking care to avoid the massive stone giants guarding the waterway’s path. Before you leave, however, ensure you adequately allocate your flasks before the next fight. Our next target will be much more challenging than the last few and can instantly kill us in one to two hits.

While the foes inhabiting this region are incredibly dangerous, we can bypass them with Torrent to reach our destination without injury. Make sure we don’t get between the giant eagles and ferocious demihumans battling over custody and visitation rights; it’s nasty and uncomfortable.

Upon reaching the dilapidated shed, look for the nearby summon sign and warp into another world. Get ready for arguably the most challenging part of this quest.
Fight: Hoslow (aka WHIPZILLA)
Despite his elegant armor and good manors (he salutes us before dueling), Hoslow gives us some significant grief during this fight. The wayward royalty bears a deadly whip that’s difficult to avoid and can tear us to pieces within seconds. I recommend stacking up on crimson flasks before the fight, cautiously dealing damage, and then backing away to heal. If we’re lucky, we can stagger Hoslow before his whips attack and back away to avoid his revenge whip swing, eventually defeating the formidable foe.

Our victory rewards us with the usual rewards, plus Hoslow’s armor and incredible whip. I recommend using this whip in PVP if you’re a close-ranged dexterity build. Returning to Tanith grants us the Taker’s Cameo talisman and the opportunity to meet Lord Rykard.

Alternative Path: Volcano Manor’s Dungeon
If we’re too lazy to deal with Tanith’s quest and want Rykard’s great rune immediately, we can access Rykard’s boss right upon reaching Manor.
*Note: Dungeon Cancels Quest
Exploring the Volcano Manor Dungeon and killing Rykard before completing the Volcano Manor Quest ends our chance to complete this quest and obtain its rewards. I recommend exploring the Dungeon after finishing the questline if you still want the quest’s rewards.
Step One: Dark Backroom
After talking with Tanith and grabbing her key to the drawing room, open the first door on the right to find a corpse pointing towards an orange painting.

We can roll through this wall to find a darkened corridor containing snake-like creatures and a bloodhound knight. I recommend equipping a light source, whether a lantern, torch, or sorcery, to see through this darkened passage and make evading enemies easier.

After heading through this passage, down a set of stairs, and past a few enemies, we’ll find ourselves in a small church with a grace to save our progress.

Step Two: Lava Bath
Opening this room’s doors reveals the Volcano Manor’s grand majesty. We’ll need to reach the cathedral on the other side to fight Rykard.

To begin, descend floor by floor until we reach a corridor guarded by a small dog. We’ll need to defeat this dog and head down the stairs to the right to get to the lava safely.

To reach the other side, we can fat roll across the lava. I recommend stocking up on crimson flasks and equipping a fire buff to ensure the lava doesn’t kill us outright.

Alternatively, we can cut through the Manor’s nearby castle to reach the other side if we don’t have enough health.

After reaching the other side, walk up the staircase and take the left elevator up to the cathedral’s entrance. Heading inside the cathedral trigger’s a fight against a Godskin Noble, so make sure you open up the nearby drawbridge shortcut before entering.

Fight: Godskin Noble
The Godskin Noble is one of the more brutal enemies of Elden Ring. This foe’s severe range and black flames can kill you within seconds if their rolling attack doesn’t ground you into a paste first. I recommend summoning a friend or sturdy spirit ash and abusing status effects (poison, scarlet rot, bleed) to end the fight quickly.

Step Three: Last Church
After beating that problematic boss, take the stone elevator up to reach the Cathedral’s balcony. Take a moment to admire the view, then hop down into the lava below.

Proceed forwards until we reach another cliff. Look for a path beneath us, then take that path up to a new level.

Now we’ll need to head through the lava to reach a tight doorway beneath this fancy bridge. After running through, take a ladder up to get to the main pathway, then go left until the path culminates with a final church.

Beside the enemies worshiping a garden snake lies a stairway to a room outside. As we leave the last of the snake-worshipers, we’ll find a portal straight to a grace just outside Rykard’s boss room. Rejoice fellow Tarnished, we have made it!

Also, for those who haven’t accessed the Manor of Volcano Manor yet, i.e., we took the Abductor Virgin path, we can reach it here. Head through a gargoyle fog door nearby and jump down several cages to get to a room that dead-ends in the Manor’s center.

Rykard’s Fight – Preparation
Whether we completed Tanith’s questline or took the warp gate in Volcano Manor’s dungeon to reach Rykard, we find ourselves in the antechamber just before the boss room. I recommend allocating almost all of your flasks into crimson; we receive a special boss weapon that removes the need for ranged attacks, so save a few for its weapon art.

Entering the boss arena through a nearby fog door reveals a massive serpent gorging upon itself. Before engaging the beast, pick up the nearby weapon the ghost mentioned in Step two. This weapon, the serpent hunter, essentially trivializes the entire fight. When we’re ready, head forward, and the massive snake will rear its head in anger.

Fight: Rykard, the Serpent King
Part One: God-Devouring Serpent
In this first stage, we battle a massive serpent determined to make us its next meal. While this oversized reptile is deadly, with the serpent hunter, we can easily defeat this foe after several jabs from the spear’s weapon art. Still, I recommend watching out for a few of this sneaky snake’s moves and employing the following tips:

Venom Spit: Instead of engaging us directly, the Serpent can spit a venomous spit to force us to move our location. While the spit effectively compels us to keep moving, we can easily avoid the green danger if we stay at a comfortable midrange.

Gobble Gobble: One of the more terrifying, hilarious moves in its arsenal, the Serpent can snatch us in its jaws and slam us into the ground. While I’m comforted it chooses to spit us out, this attack still does heavy damage. If the Serpent rears its head in preparation for this attack, run away as fast as possible.

Serpent Hunter: The weapon we pick up in the arena makes this fight a cakewalk. Abuse the long-ranged capabilities of this spear’s powerful weapon art to stagger the beast and finish it off within a minute.

Part Two: Rykard, Lord of Blasphemy
After defeating its snake form, Rykard emerges from the Serpent to convince us to join him and devour the gods together! Unfortunately, his idea of joining means letting the man-serpent consume us and become part of its snake-like mass. Instead of submitting ourselves to death, we can defeat Rykard’s second form by employing a few quick tips.

Avoid his Sword – In this next phase, Rykard wields a massive sword to close the distance between him and us. If we see Rykard wind his arm back for a swing, prepare to dodge or get out of the way! Alternatively, staggering Rykard with the Serpent Hunter weapon art is an effective means to halt this attack.

Death from Above – Partway through the fight, Rykard slams his weapon into the ground and channels several ghostly skulls to charge at us from above. These skulls deal massive damage and approach from every direction, so ensure you keep swiveling the camera once this attack starts. Some of these attacks target you even after beating Rykard, so watch out!
After beating Rykard, we’re rewarded with the Lord’s remembrance, a great rune, and many runes to celebrate the occasion. While returning to Tanith ends the quest, essentially disbanding Volcano Manor, she promises that one day Rykard shall rise again.

More importantly, we can return to the Spector who gave the sweet Serpent hunter from before to receive the “my thanks” gesture. We shall never forget this strange ghost man as a true friend that compelled us to kill a giant snake in the Manor’s depth. Who knows, maybe we’ll see him again in DLC asking us to bring an end to Queen Marika’s ferocious puppies.

Related Quests
- Tanith – Essentially following the entirety of the Volcano Manor questline, Tanith tasks us with hunting down three fellow tarnished and meeting Lord Rykard. While Tanith fires us after defeating Rykard, she is grateful that we showed her how weak Rykard was and how strong he shall become when he rises again. We can find Tanith in Rykard’s boss’s room following her quest, munching on Rykard’s corpse to acquire his strength.
- Patches – Complementing Tanith’s questline, Patches tasks us with hunting a Tarnished by the name of Great Horned Trogoth. While Patches’ quest precedes and follows Volcano Manor, Patches’s presence at the Manor essentially confirms he’s a no-good scoundrel. But we already knew that.
- Rya – A strange quest following her snake-like origins, Rya tasks us with gathering her amulet and exploring the Manor to uncover her past. While her search is long, complicated, and has several endings, we can use the first part of Rya’s quest as a quick way to teleport into the Manor. I recommend holding off on confronting Rykard if we want to complete Rya’s quest. Confronting the Demigod too early prevents us from assisting Rya.
Characters:
Rykard (Ruling Demigod) – The one responsible for Volcano Manor’s founding and rule, Rykard eschewed his claim on the Elden Throne to wage war against the Erdtree. Despite his determined intentions, Rykard eventually became one with a massive serpent and began eating his foes and comrades. We can confront and kill Rykard at the end of Volcano Manor’s questline.

Tanith (Defacto Ruler) – While Rykard rules through title alone, Tanith essentially serves as the actual governor of Volcano Manor. Throughout our stay, Tanith recruits us, gives us missions, and manages the whole of Volcano Manor. While the Manor disbands following our triumph over Rykard, Tanith remains, believing in the Manor’s one-day resurrection.

Patches (Mischievous Scoundrel) – An adherent of Volcano Manor and a deadly troublemaker, we can find Patches as a merchant and quest giver at Volcano Manor. Don’t be fooled by his cheery facade. Patches wastes no time pushing us off cliffs, teleporting us to the middle of nowhere, or ambushing us into caves. I recommend adhering to his advice with extreme caution.

Rya (Adopted Snake-Daughter) – Sneaky, kind, and woefully misguided, Rya (aka Zorayas) is a princess serpent adopted by Tanith, functioning as a recruiter for Volcano Manor. Despite her initial human appearance, encountering her later in the Manor reveals her true form as a serpent creature. While we can help Rya uncover the details of her horrific origins, it only brings her misfortune and misery. Of all the characters of Volcano Manor, Rya is the one most deserving of our friendship.

Conclusion
That covers the breadth of Volcano Manor. This strange mountain resort took us on a fiery journey through death and lava, culminating in an epic showdown against a God-Devouring Serpent. While we’ve officially put an end to the Manor, we can keep the mission of Volcano Manor alive by invading other players and ruining their day. It may have been an evil, detestable faction, but for a brief time, we could call Volcano Manor our home.

FAQs
Question: How do I get to Volcano Manor?
Answer: We can reach Volcano Manor either through two trips around Mount Gelmir or progressing Rya’s quest and interacting with her atop the Grand Lift of Dectus.
Question: Where is Volcano Manor’s Dungeon?
Answer: Located behind several illusionary doors, we can access Volcano Manor’s expansive Dungeon by rolling through a door adjacent to the drawing room. Follow player messages if you’re having trouble finding the exact pathway.
Question: How do I defeat Rykard?
Answer: Use the special Serpent Hunter weapon left in the area. This weapon deals extra damage to the boss, and its weapon art staggers the boss into submission.
Question: Where is Rykard?
Answer: We can find Rykard at the Manor’s lowest depths by exploring the Dungeon or completing Volcano Manor’s quest. Defeating Rykard before we finish the Volcano Manor’s quest locks us out of any of the quest’s rewards.
Looking for more interesting readings? Check out: