
- Tower of Fantasy Best Teams Guide - October 2, 2022
- Tower of Fantasy Beginner’s Guide - September 29, 2022
- Tower of Fantasy Best Relics Guide - September 29, 2022
Once you dive into the cyber world of Tower of Fantasy, you will realize that you need more than weapons to complete the exploration. Sure, there are vehicles to ease the grind of exploring, but Relics are a crucial part of the gameplay. Relics are tools you will gradually obtain in the game and stick with you throughout your journey.
These Relics will help you explore faster and assist in combat that would otherwise have been impossible. I often found myself taking the aid of these relics to complete challenging tasks that would have been a pain to deal with without them. Whether you want to explore faster, solve a puzzle, or even reach a place, you need Relics.
I will go over all the relics available in this Tower of Fantasy Best Relics guide. You may ask, but why all? Well, because all the relics are best in niche situations, skipping over even a single one may decide your fate, and I want you to have all the tools to succeed. Plus, I’ll guide you through the sometimes obtuse terminology within TOF, so you won’t be staring blankly at the screen wishing you knew how these things work.
You can say it’s more like a “Best Relics in a situation” guide because I will discuss how you can use a particular Relic in a rigid situation. In my opinion, no Relic is bad at all because eventually, one way or another, you have to use all of them. As you progress through the game, you will notice your favorites changing over time with the ever-changing game modes. So, Get ready and jump on that Jetboard because we are about to glide over Relics now!
Relics, What Are They?
Relics are tools or gadgets that you can use in the game. It’s as simple as that. If you have played a game like Genshin Impact, you must have noticed the Gadgets section in the inventory. However, Tower of Fantasy’s relics are quite unique in their use cases. Some relics are a must-have to complete some puzzles, and others are all-purpose tools for multiple situations.
Early in the game, you will receive a Jetpack relic that you will continue to use everywhere in the overworld. Its use is so beneficial for exploration that it’s a no-brainer to have it equipped all the time. Want to go to the top of a cliff? Use the Jetpack. Want to reach that Black nucleus near the roof? Use the Jetpack. However, there are game modes where its use is restricted, and you have to resort to other relics. In short, you will need a stacked bag of tricks to ensure you never come unstuck.
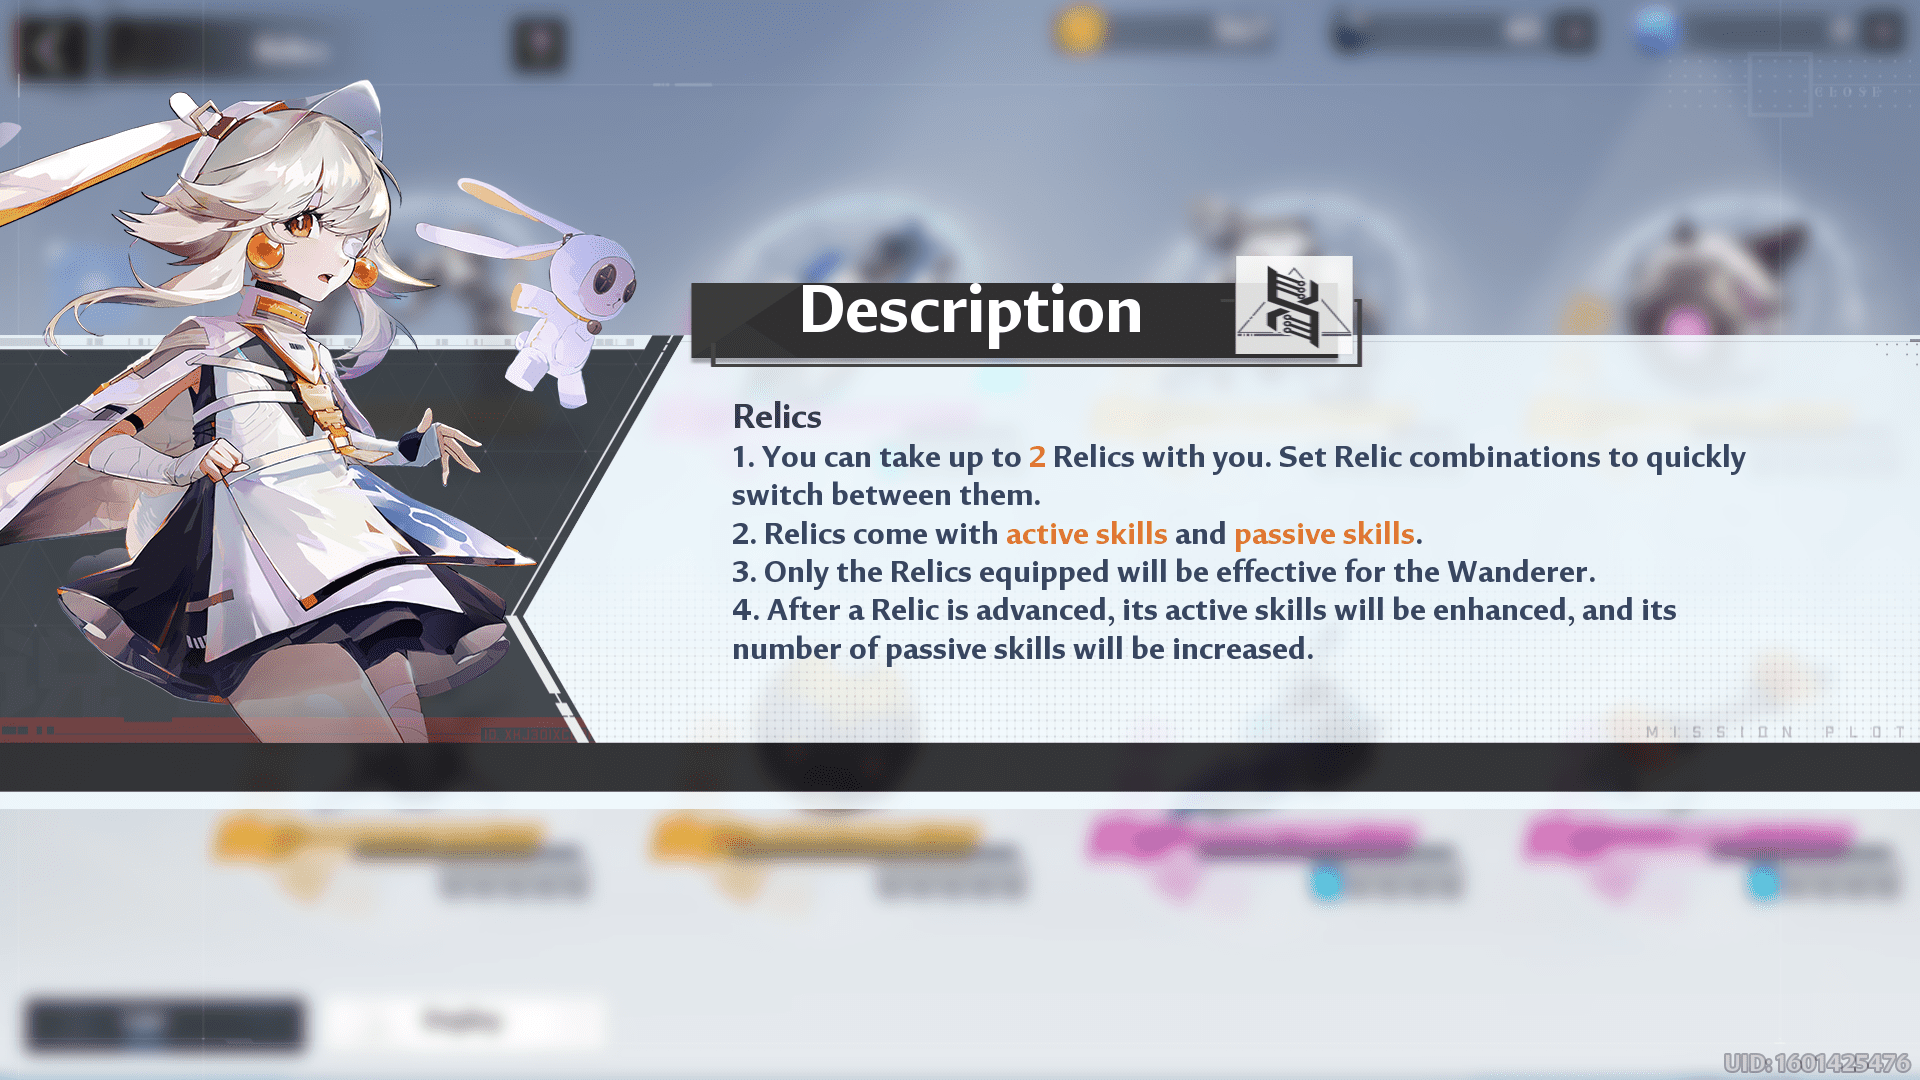
Equipping Relics
Honestly, the menuing in this game can be a little complicated, but once you are used to it, it serves its purpose quite well. Like other options in the game, you can see the Relic menu item on the game screen by pressing the ESC key. Once the screen opens up on the right side, you can go into the Relic menu and skim over all the featured Relics.
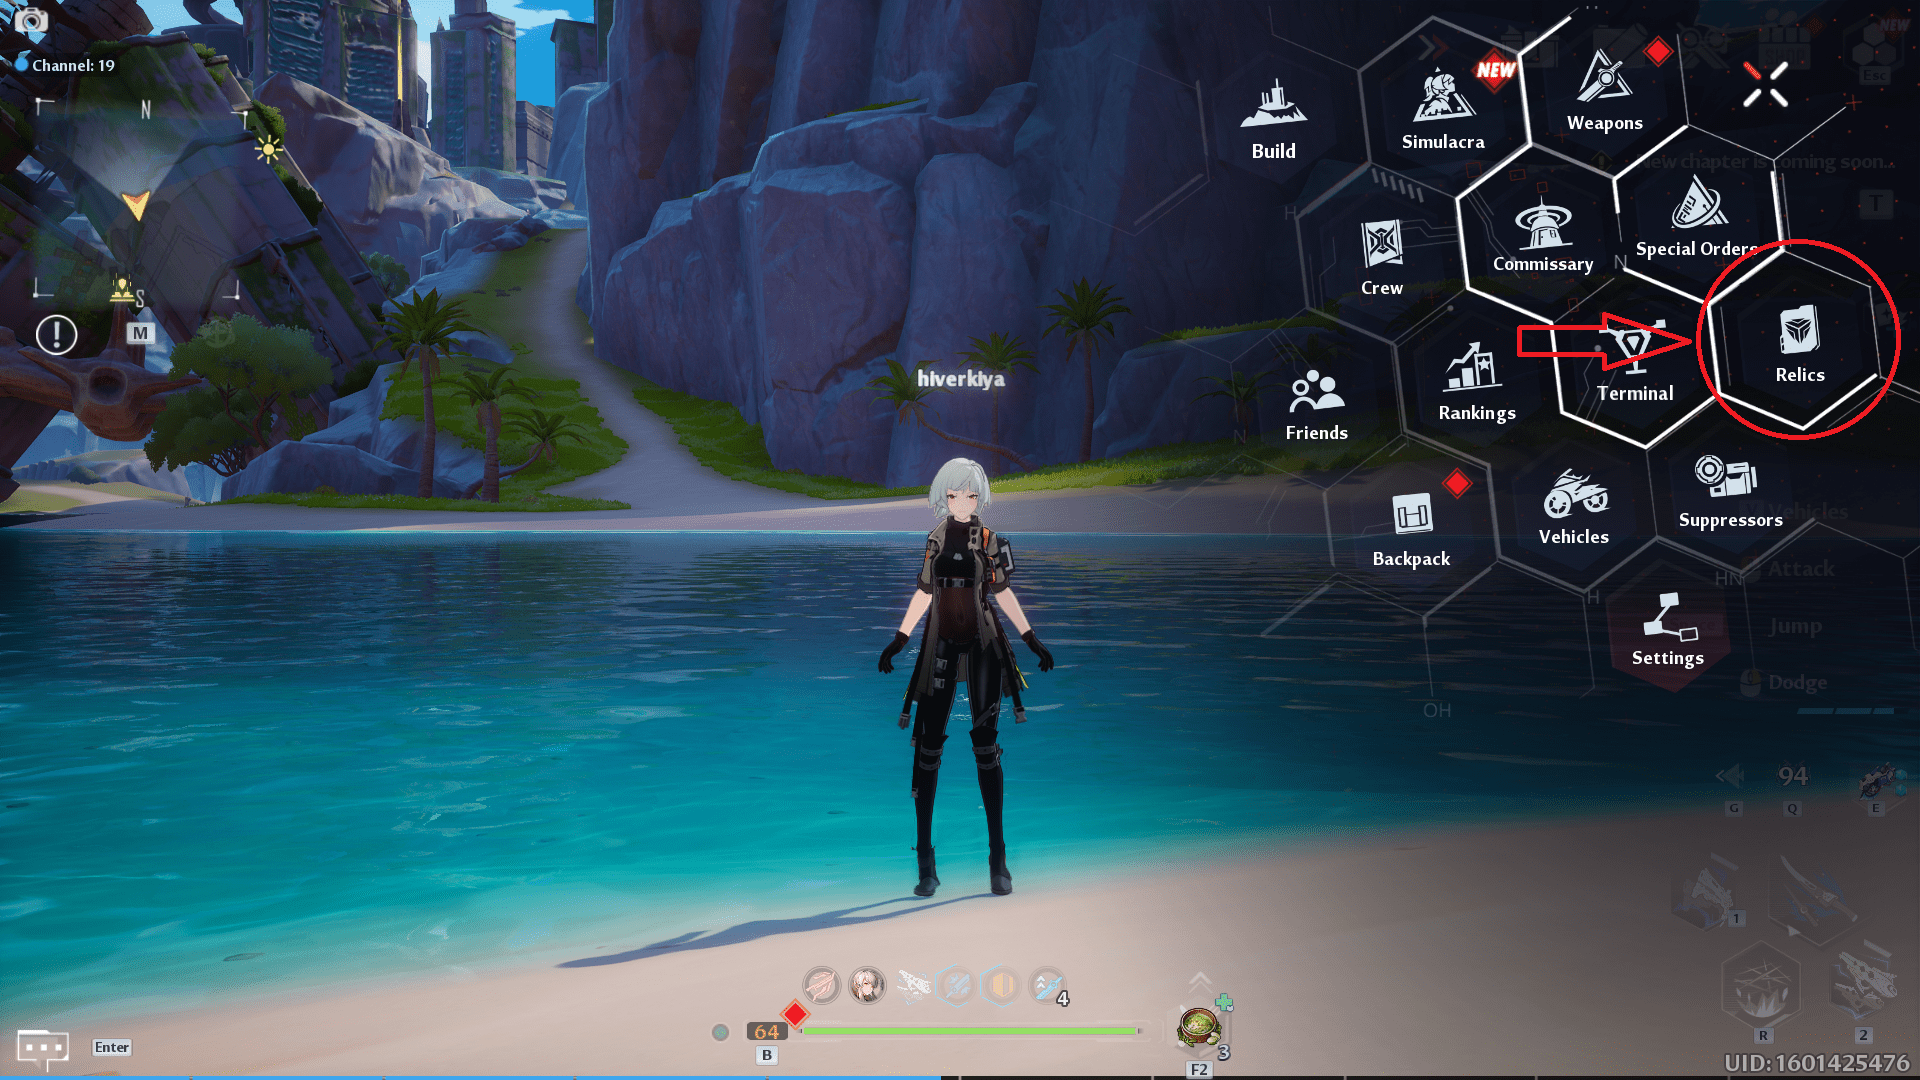
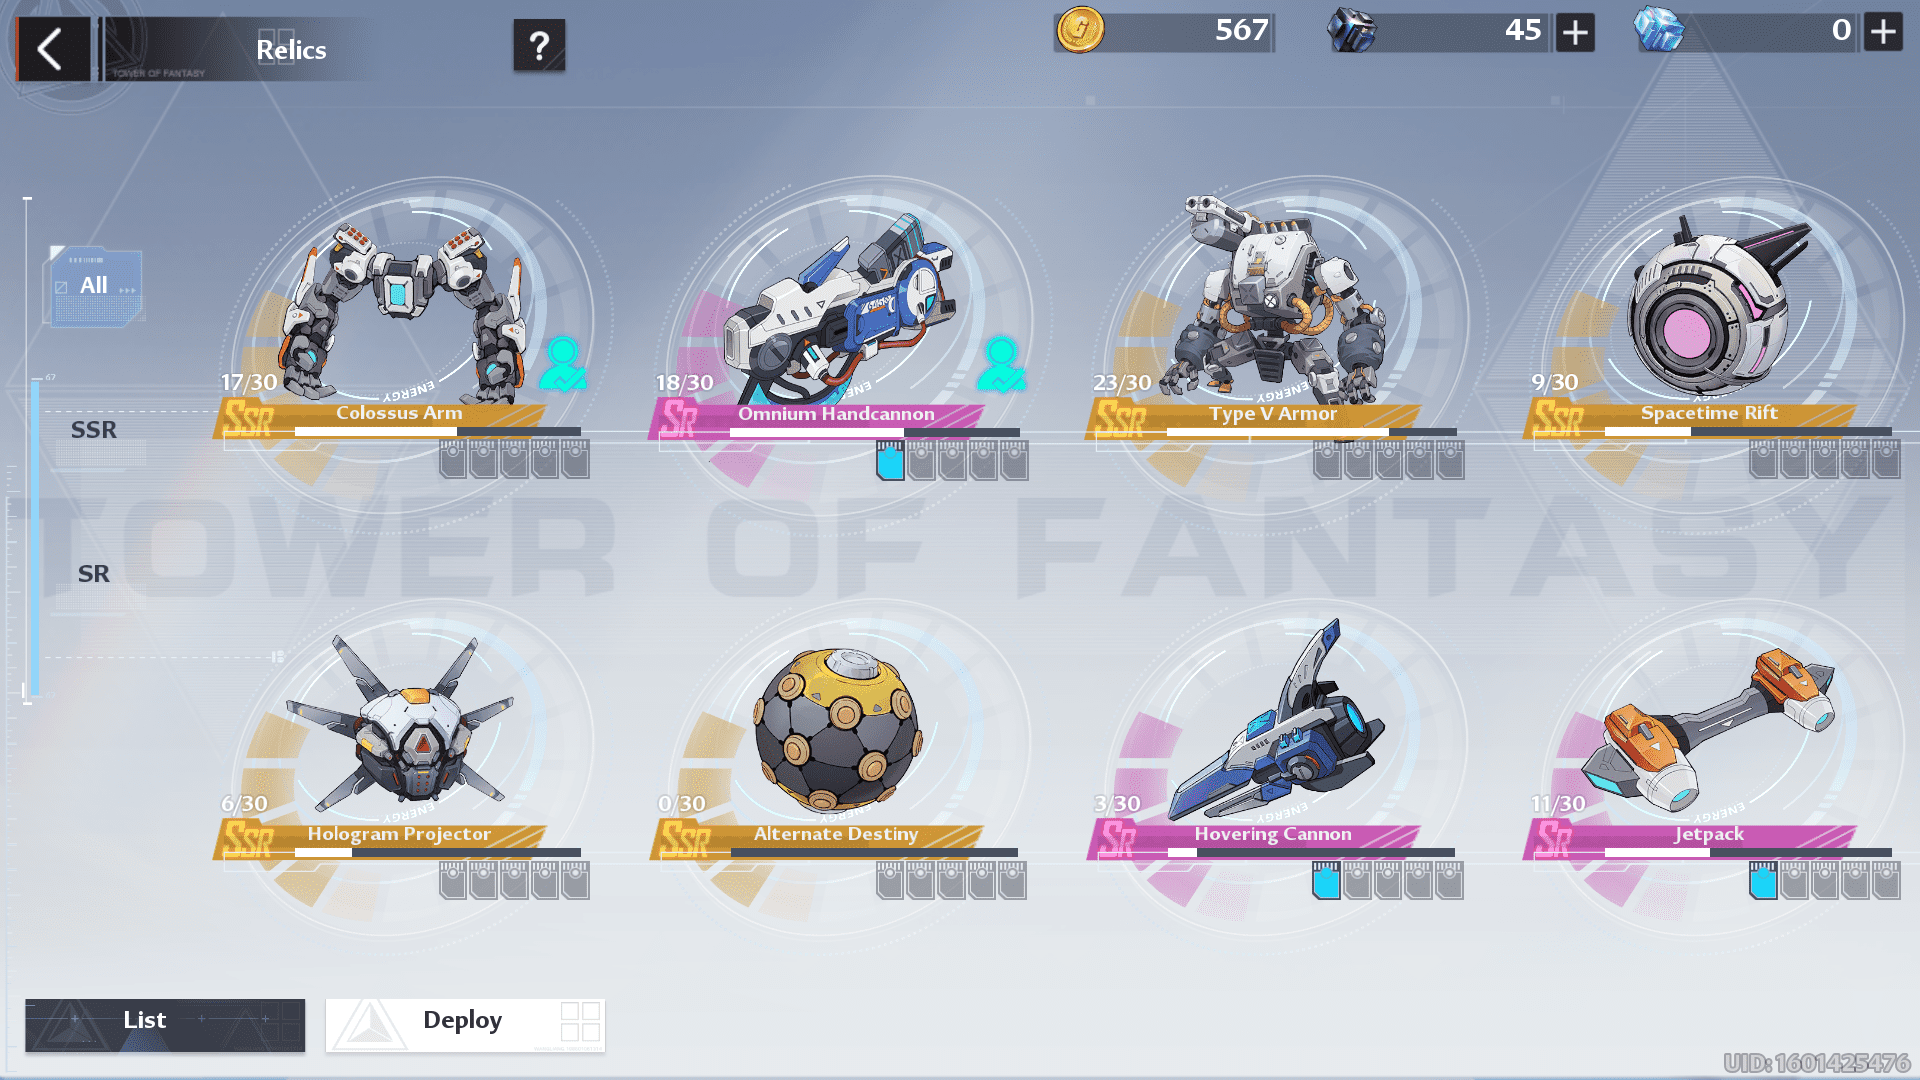
Notice that there will be Relics that aren’t available to you because of a lack of shards. Still, the available ones are ready to deploy. You can either deploy them into one of the sets or click on a specific one to read its description. Once you are done with setting up Relic sets, you can close the menu and go back to your usual gameplay. If you want to switch between Relic sets, then press the G key and use your cursor to switch between them. I found this key mapping a bit late, but now that I’ve found it, I always prefer to switch my relics when needed. But remember that you cannot switch Relics in combat. Whichever Relic set is active will be in effect until combat ends.


Now, let’s go over the uses of Relics in different PvE and PvP situations. Do note that some modes are hybrid modes, and technically any relic can be used in any game mode, except the ones which are restricted in particular game modes like Ruin exploration.
Player vs. Environment
Player vs. Environment, abbreviated as PvE, are game modes where you battle against AI NPCs and don’t have to interact with other players in any way. Players can team up with others to ease the difficulty of this mode, so you don’t have to be super careful when it comes to relic selection. However, categorizing will give you an overview of the type of enemies you will be fighting and which Relics will give more bang for the buck there.
Strange Cube (SR)
- Description: Using the strange cube helps you attack the enemies and suspend them in midair. It alters gravity in a small area around you and deals 120% of the attack as damage.
- Cooldown: 30s
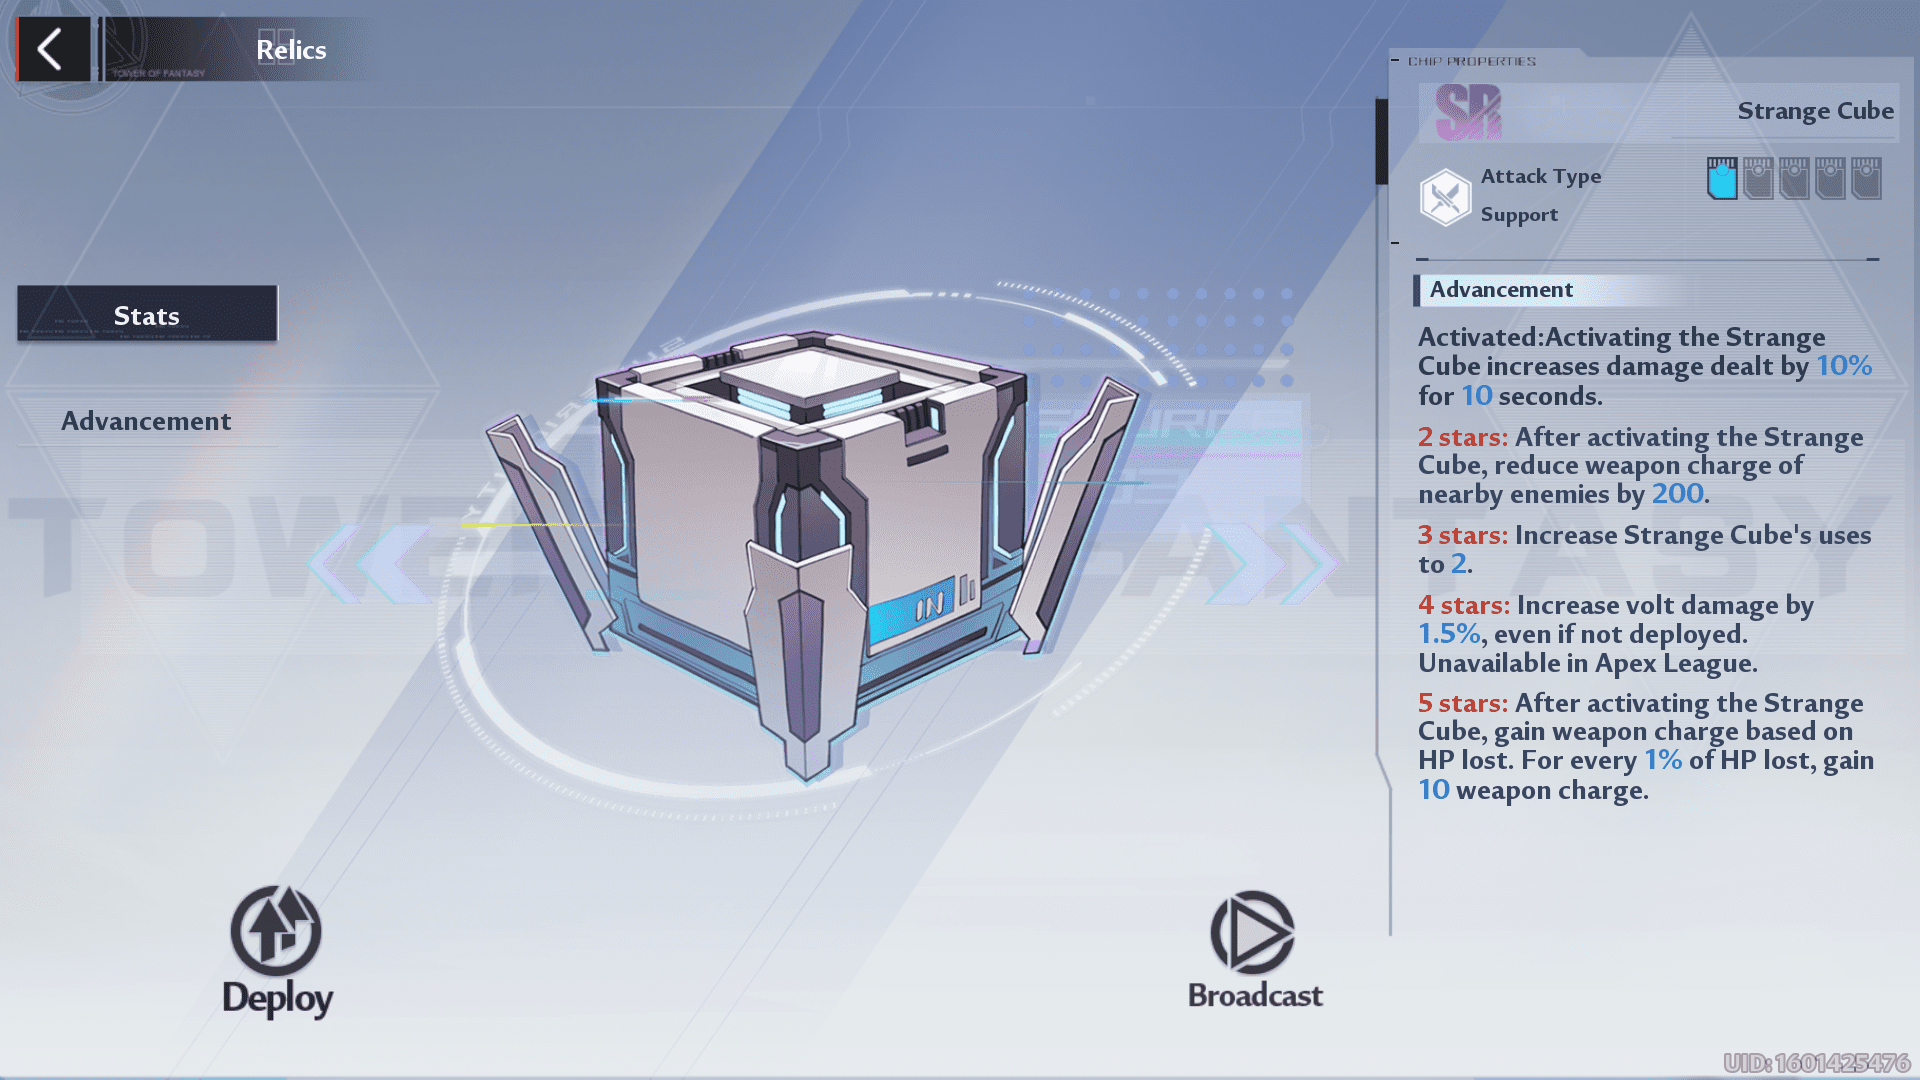
- Uses: I call it “Another Dash Relic” because of its ability to suspend you in the air for a short period of time. Let me present an example of where I accidentally found another use for this relic. Suppose you have to cross an area that requires four dashes to cross. Now, you know that once you are using dashes in a row, they cannot be recharged unless you stop and rest. Stamina and dash are both mechanics that act independently from each other.
So, if you are consuming stamina, this doesn’t mean that dashes will be used. Using this logic, you can use three dashes in a row and use this relic to get one extra dash. The caveat is that you must start the dash sequence from a higher elevation to reach the location successfully. Double jump or Omnium hand cannon can help you to achieve that goal.
Besides this, Strange Cube’s main utility is to move around or destabilize objects. You will encounter many exploration objectives where you have to displace an object or move around an item in a ruin. The only relic that can help you there is Strange cube, so I always recommend you keep an eye on those objectives.
- Advancement Opinion: On maximum advancement, the Strange cube acts as a support Relic that buffs your damage and energy recharge but also affects nearby enemies’ charge. I would say a decent utility if you use this relic, but quite situational.
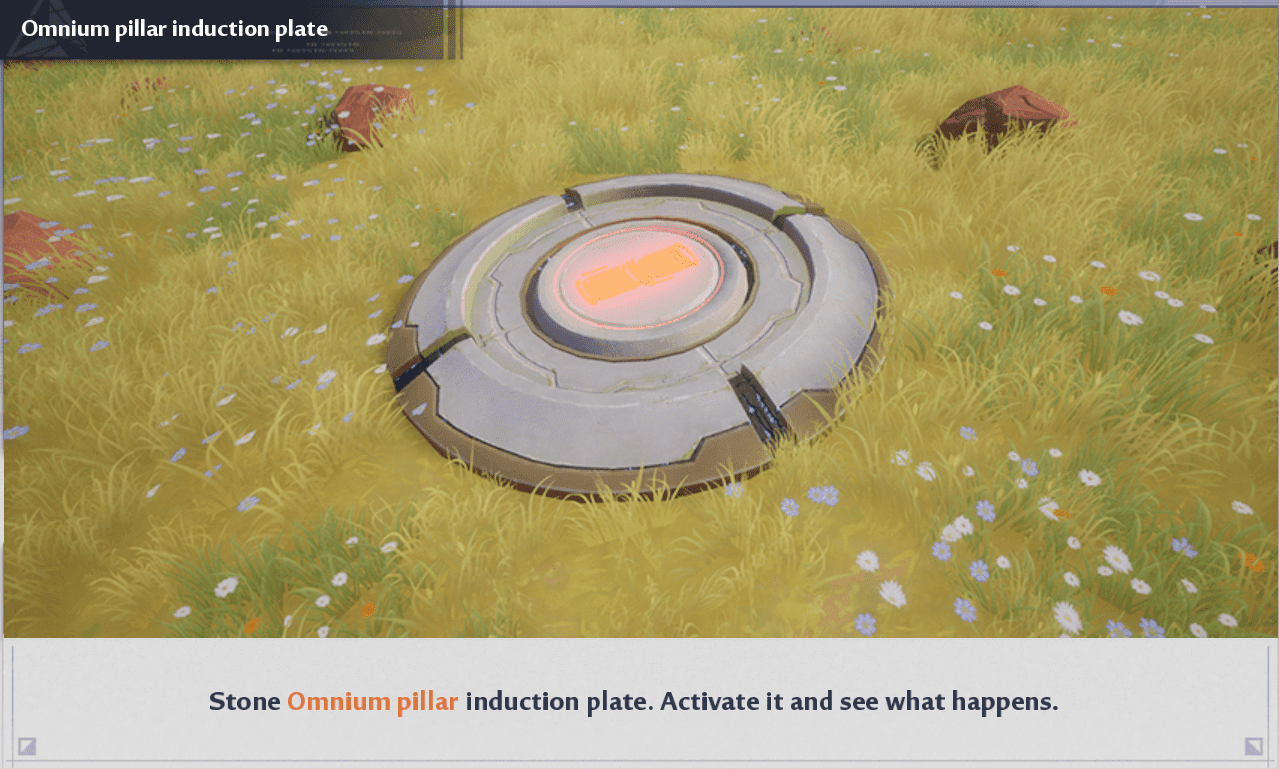
Omnium Handcannon (SR)
- Description: You can launch an Omnium bomb at a location where you can summon an energy pillar. Depending on the terrain, the pillar rises perpendicularly. The cannon initially has a maximum of two charges.
- Cooldown: 50s

- Uses: The Best thing about Omnium Handcannon is that you can deploy it on any surface, and it will rise from the place of deployment. You can use it like a deployable stair that you can throw anywhere and jump over it to reach your destination. The Omnium Handcannon is also very helpful in solving exploration puzzles.
- Advancement Opinion: The only benefit I see at maximum advancement is that you get better endurance regen coupled with increased usage of this relic. Though it may seem redundant when you are against a world boss like Apophis, who throws an energy blast, the pillars can help you to shield from incoming damage.
Lava Bomb (SR)
- Description: The player can throw a lava bomb at a location that launches the target into the air and deals 567% of the attack as damage.
- Cooldown: 45s
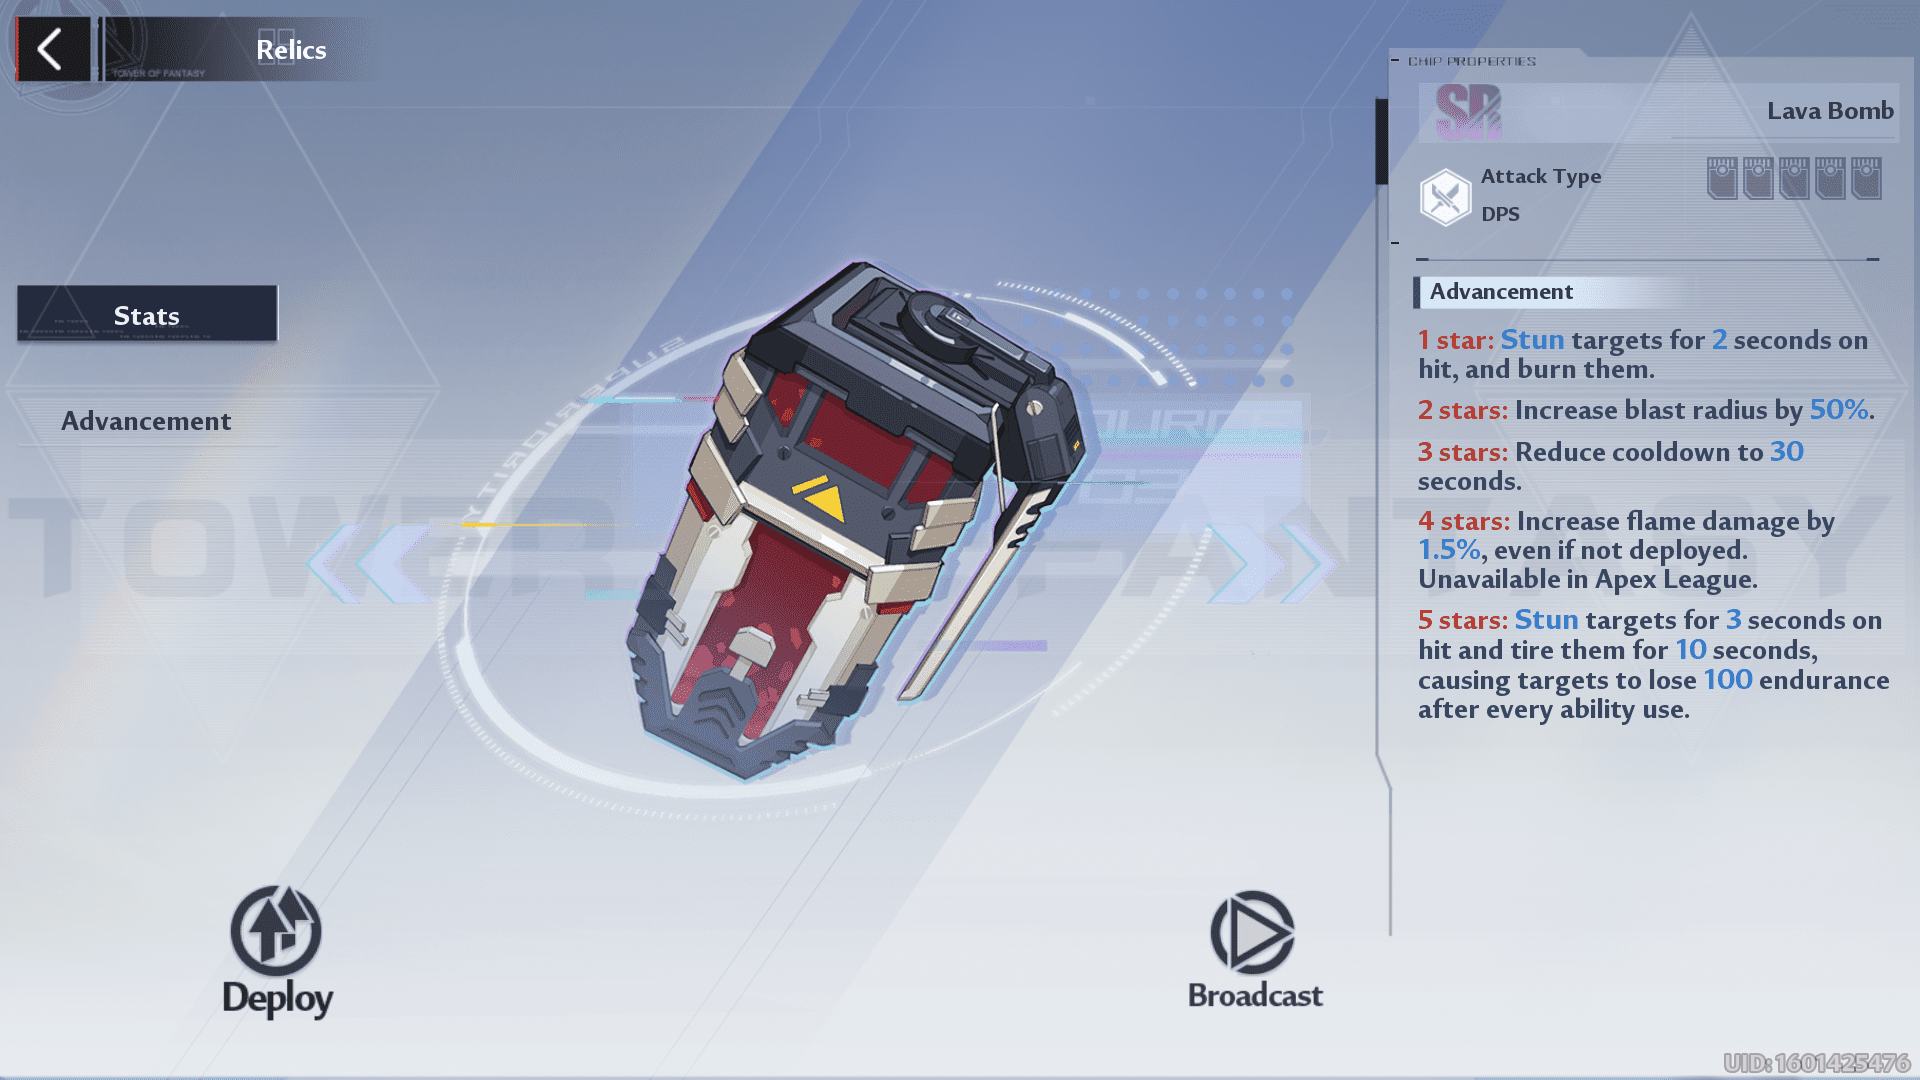
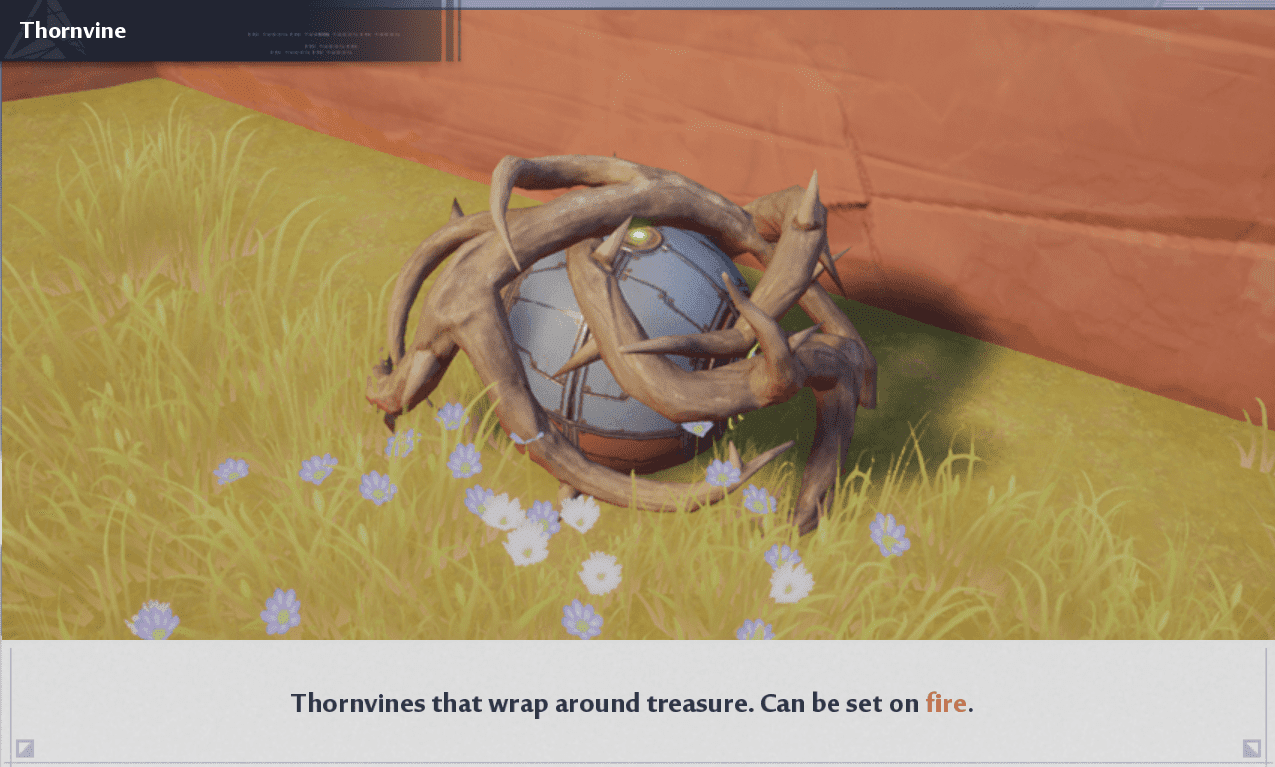
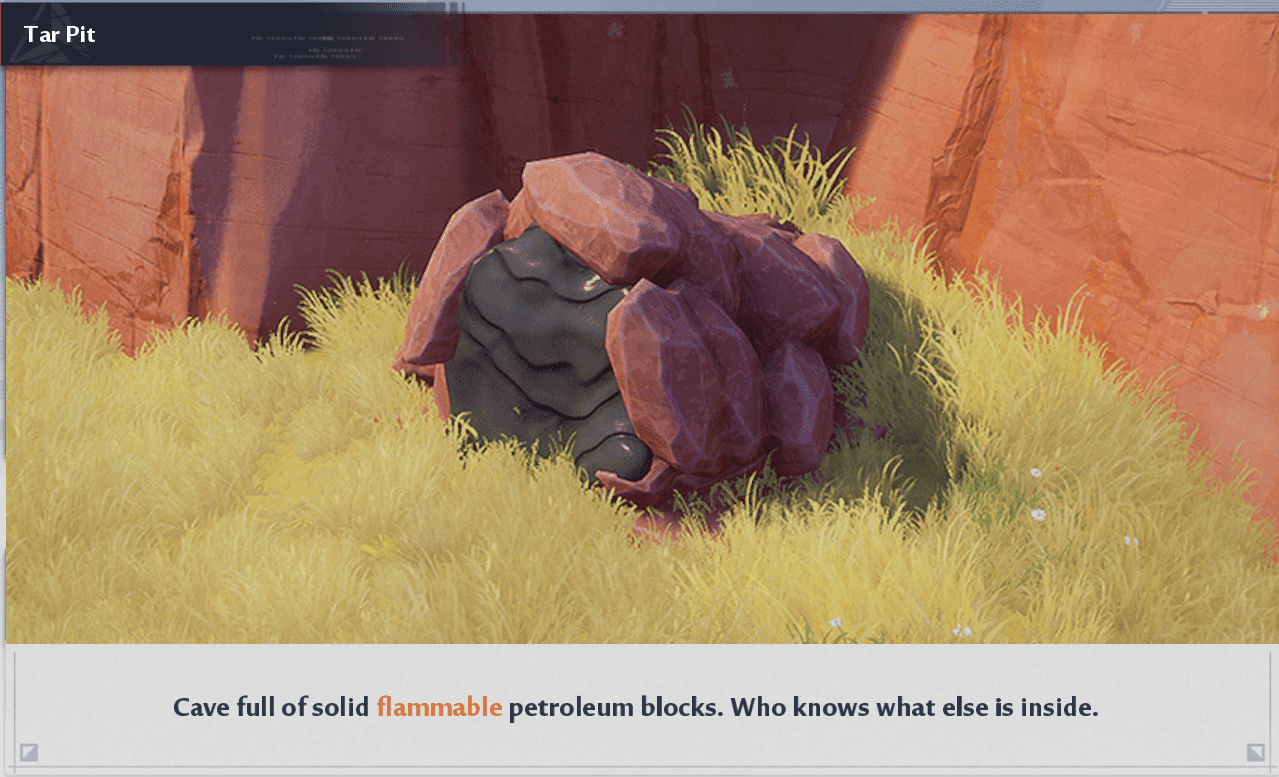
- Uses: A very situational relic. You can use this relic if you don’t have a Flame applicator. Suppose you encounter a tar pit exploration objective or a supply pod entangled in branches; you can easily aim at them and burn away the substance to make the Black Nuclei visible.
- Advancement Opinion: This will stun the enemies and gain a better blast radius at maximum advancement. However, if a player is skilled, then they can easily dodge your attacks, but this can still come in handy in PvE modes if you don’t have other offensive relics at your disposal.
Jetboard (SR)
- Description: You can use Jetboard to dash forward for some distance, launch targets into the air, and deal 380% of attack as damage. Eventually, the Jetboard slows down to a halt if not accelerated. It can also be used in the water or while swimming.
- Cooldown: 90s
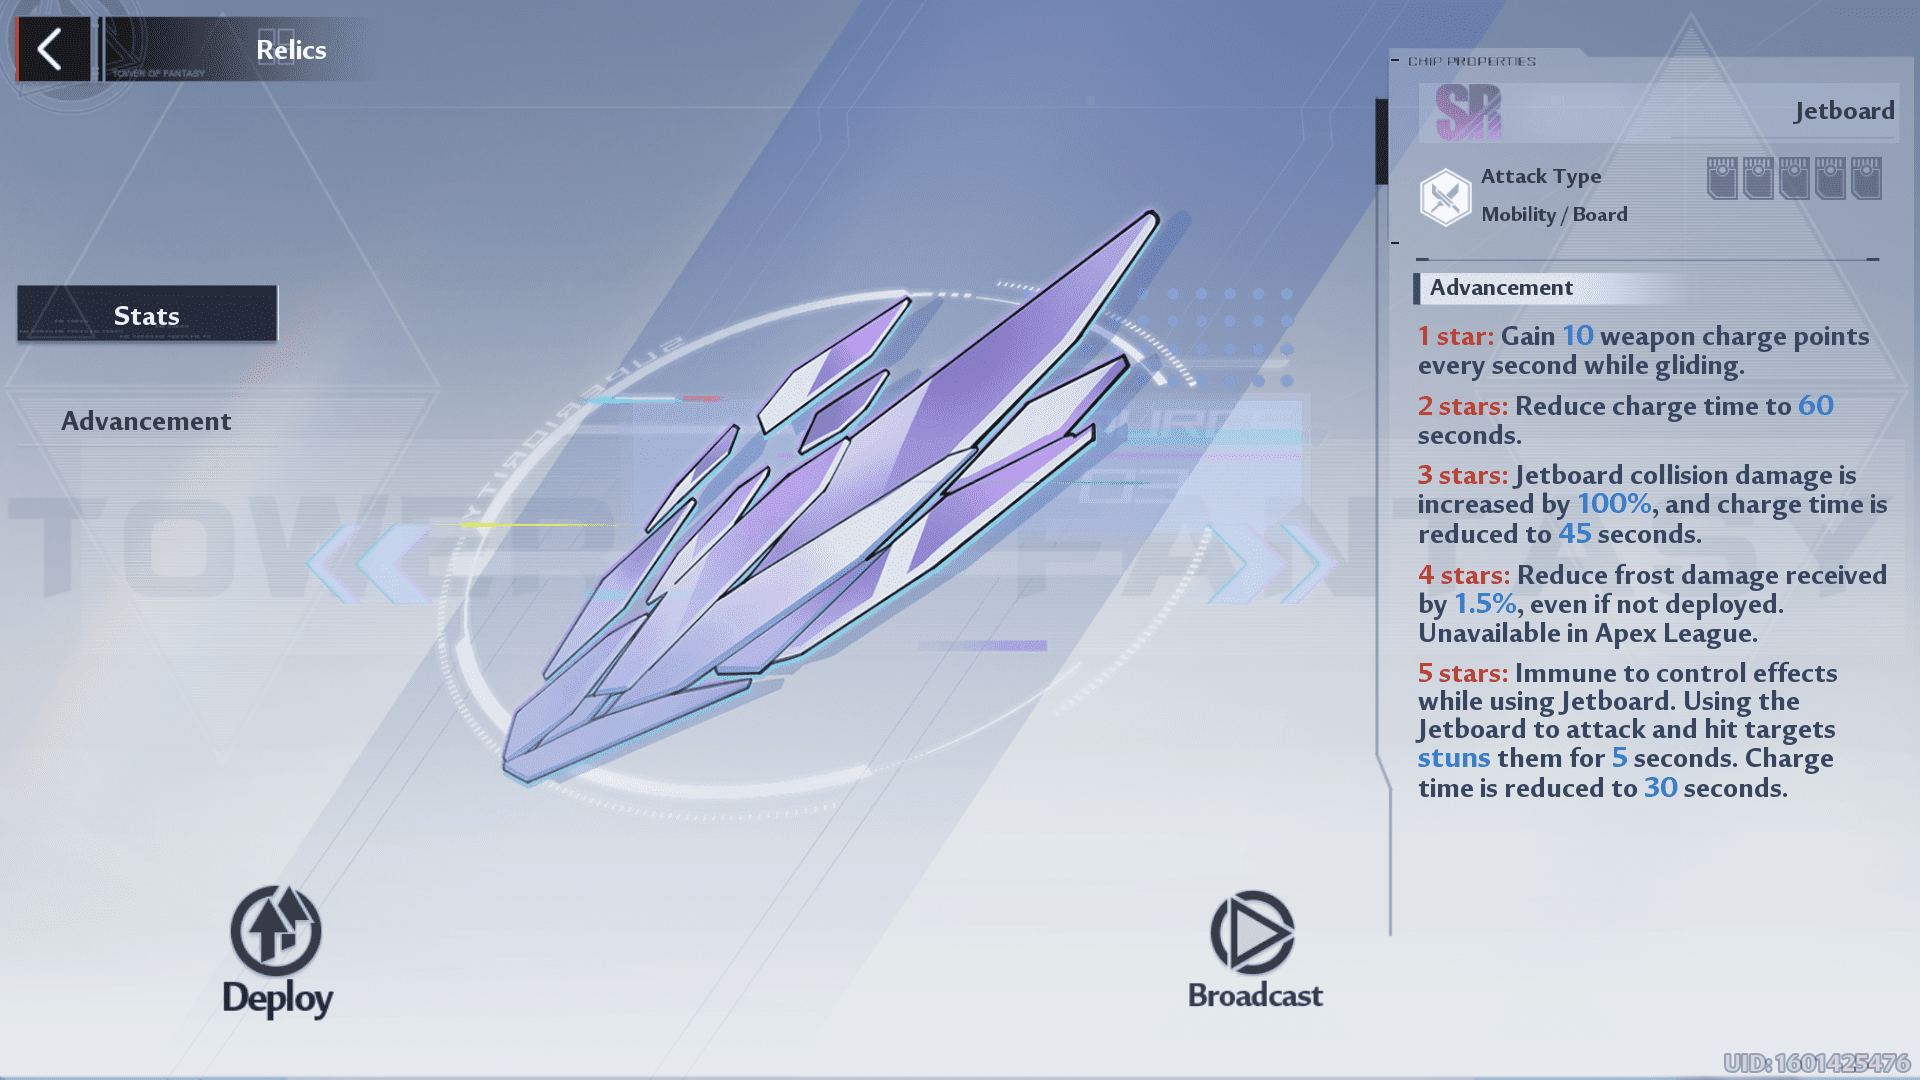
- Uses: Jetboard is a really good Relic that will pay you off in the long run and help you to explore even the farthest parts of the map. A bunch of Nuclei hovers over water bodies, and you can easily jump on the Jetboard to grab them. Also, some of the supply pods, Nuclei, and NPCs are located on structures on water, and the Jetboard is a good option to use to travel there. Also, the best thing about the Jetboard is that it has no cooldown when you are in the water, and you can continuously ride on it as long as you want to.
Another workaround is that you can use Jetboard on the land with a jumping trick. If you don’t know what it is, head to our Tower of Fantasy Beginner’s guide to find out more about it. Sadly, the Jetboard is not a suitable Relic for PvP modes because there’s not much use for it. However, if you are in a Joint Operation facing Devourer, it will come in handy as that boss fills up the whole arena with water. - Advancement Opinion: The maximum advancement doesn’t bring much to the table in terms of offense but does enhance the gameplay experience in other game modes.
Jetpack (SR)
- Description: You can aim in a certain direction by holding the Relic key and dash forward for a short distance that eventually lets you go airborne and glide in the air. It consumes ten units of endurance every second and initially has two charges with no effect on gliding by the cooldown timer.
- Cooldown: 120s
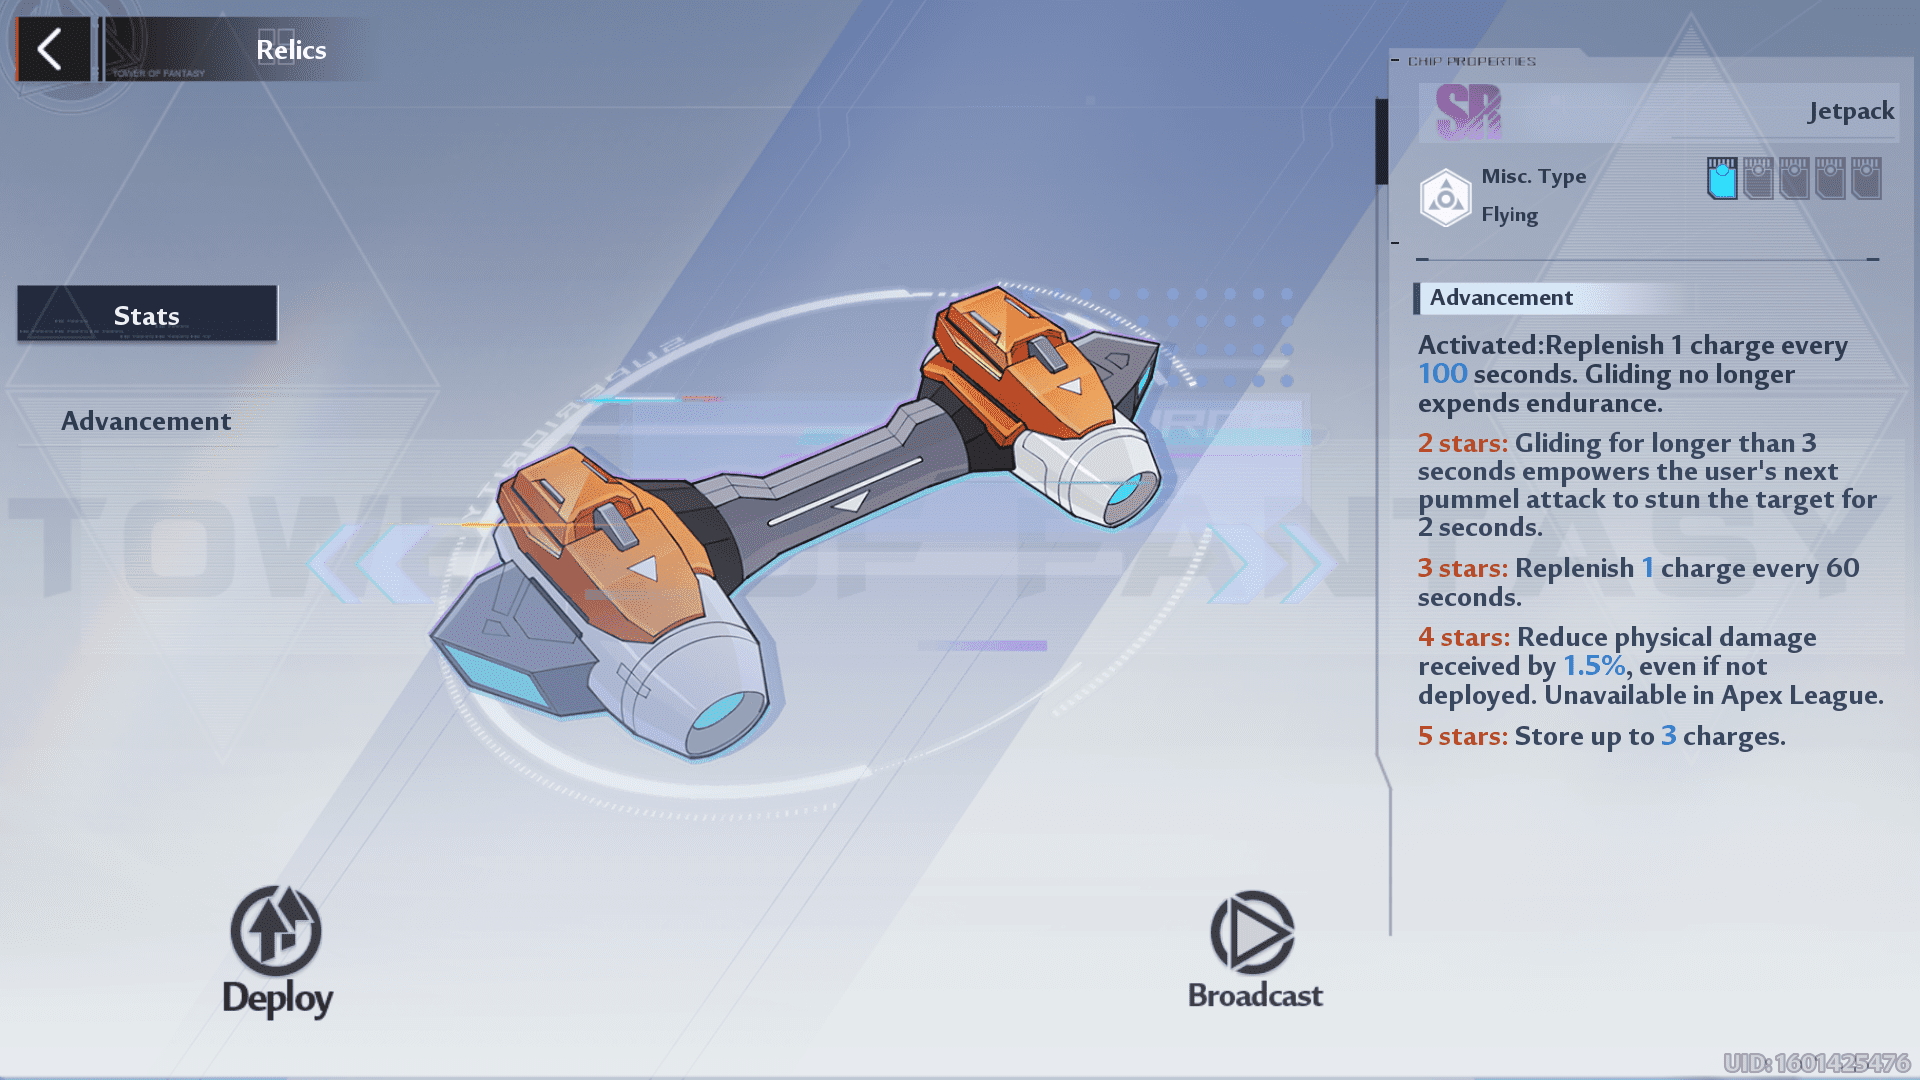
- Uses: If you love to use air attacks, then Jetpack is a really good option. Crow has an amazing combo with this relic, and a lot of Crow players like to use that. Also, you get a QoL change where gliding doesn’t consume stamina, which helps you cover a lot of distance.
- Advancement Opinion: Jetpack is a decent relic at higher advancements; however, most of the changes are QoL-oriented. Thus, you need not focus too much on grinding shards for it’s advancement.
Cybernetic Arm (SR)
- Description: A unique relic that fires off a Cybernetic arm to pull the target towards you or vice-versa. It helps to regenerate weapon charge by 300 units, suspend the target and deal 100 % damage upon impact. You can easily use this to access hard-to-reach areas, and it initially has two charges at a time.
- Cooldown: 30s per charge
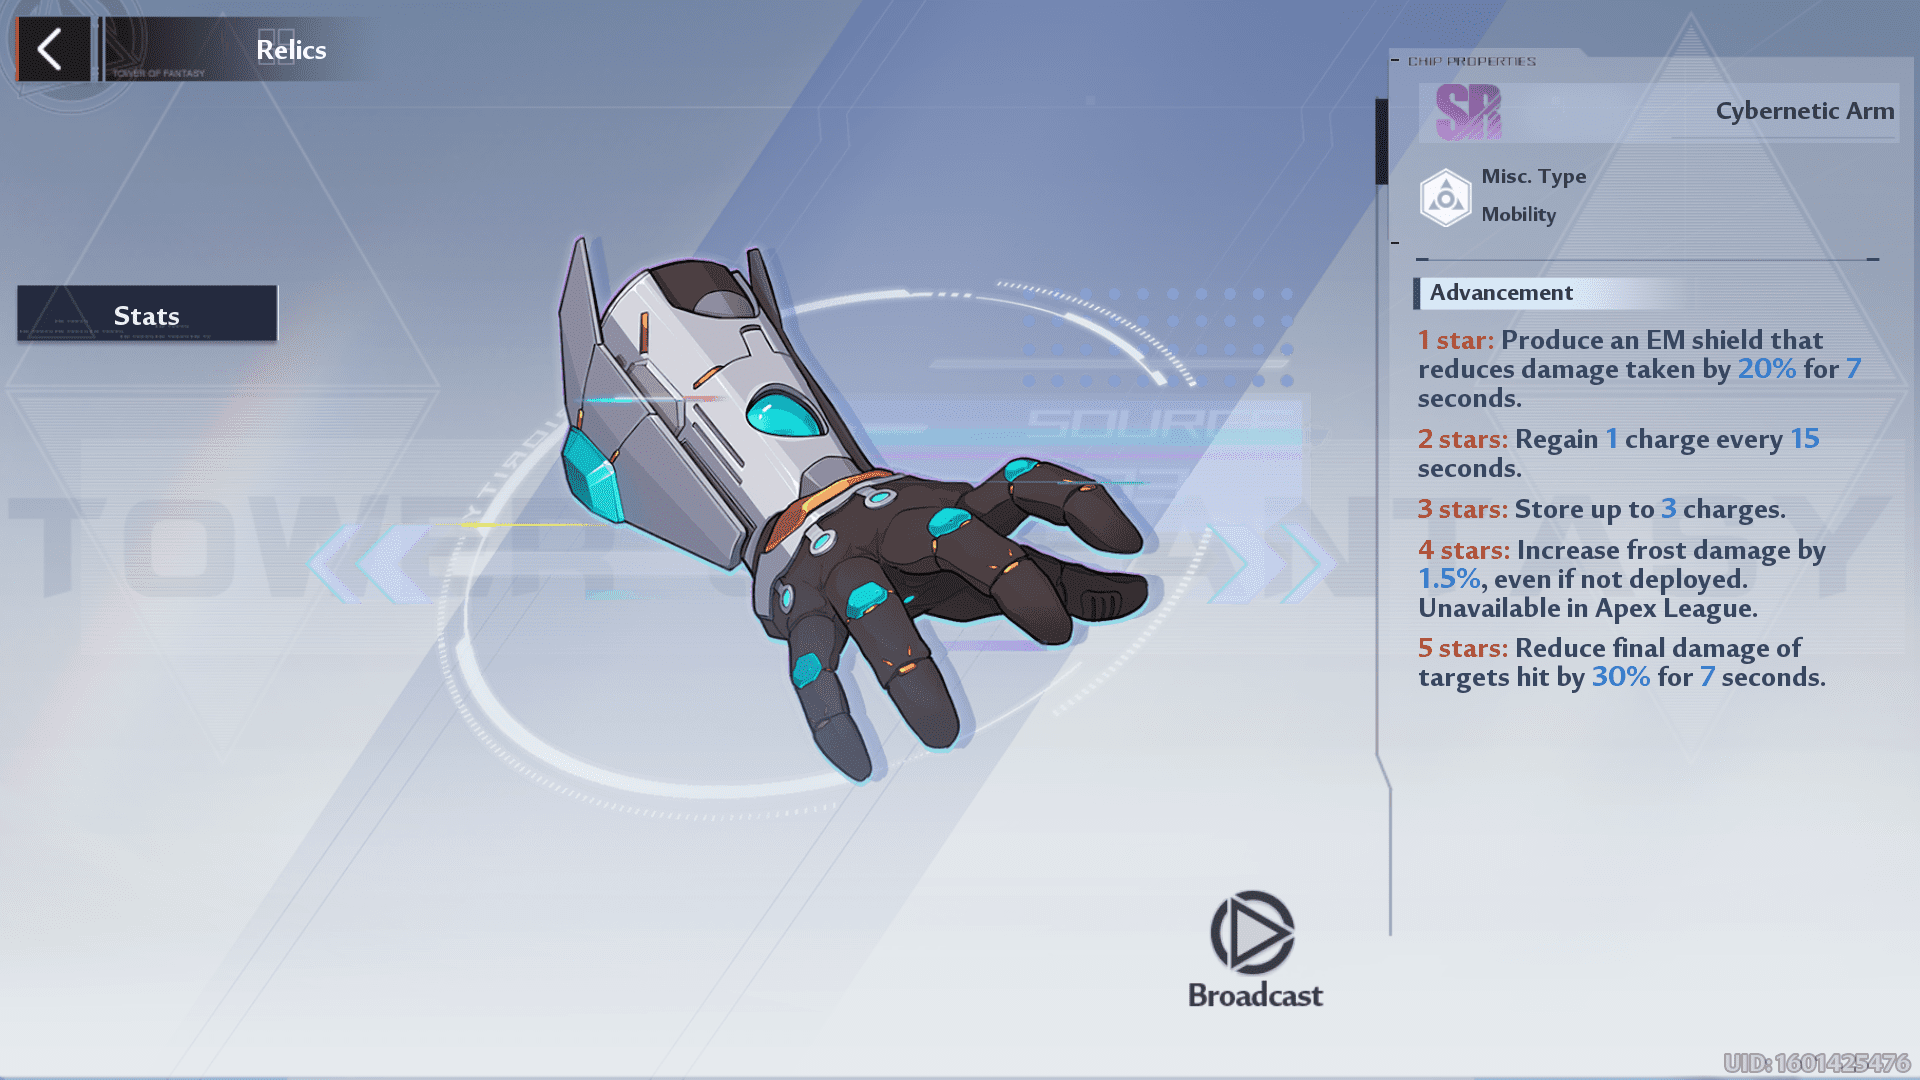
- Uses: A cybernetic arm is a Relic that requires skill to use. Sure, it’s easier to deploy in the overworld, but when it comes to PvP, it has some shortcomings. If you like to surprise your enemies by using stealth attacks, then the Cybernetic arm is a good option for that. Quantum cloak and Cybernetic arm seem like a good combination to me.
- Advancement Opinion: You can easily close the distance between you and an enemy using this relic and benefit from damage reduction and suspend the target at the same time. I would recommend going for its advancements if you love Sparring in the overworld.
Type V Armor (SSR)
- Description: You can pilot a droid to a battle that’s immune to hitstun for 30 seconds. It also features an aimed shot that rapidly deals 44.4% of attack per hit, and once you exit the droid, it blows up.
- Cooldown: 200s
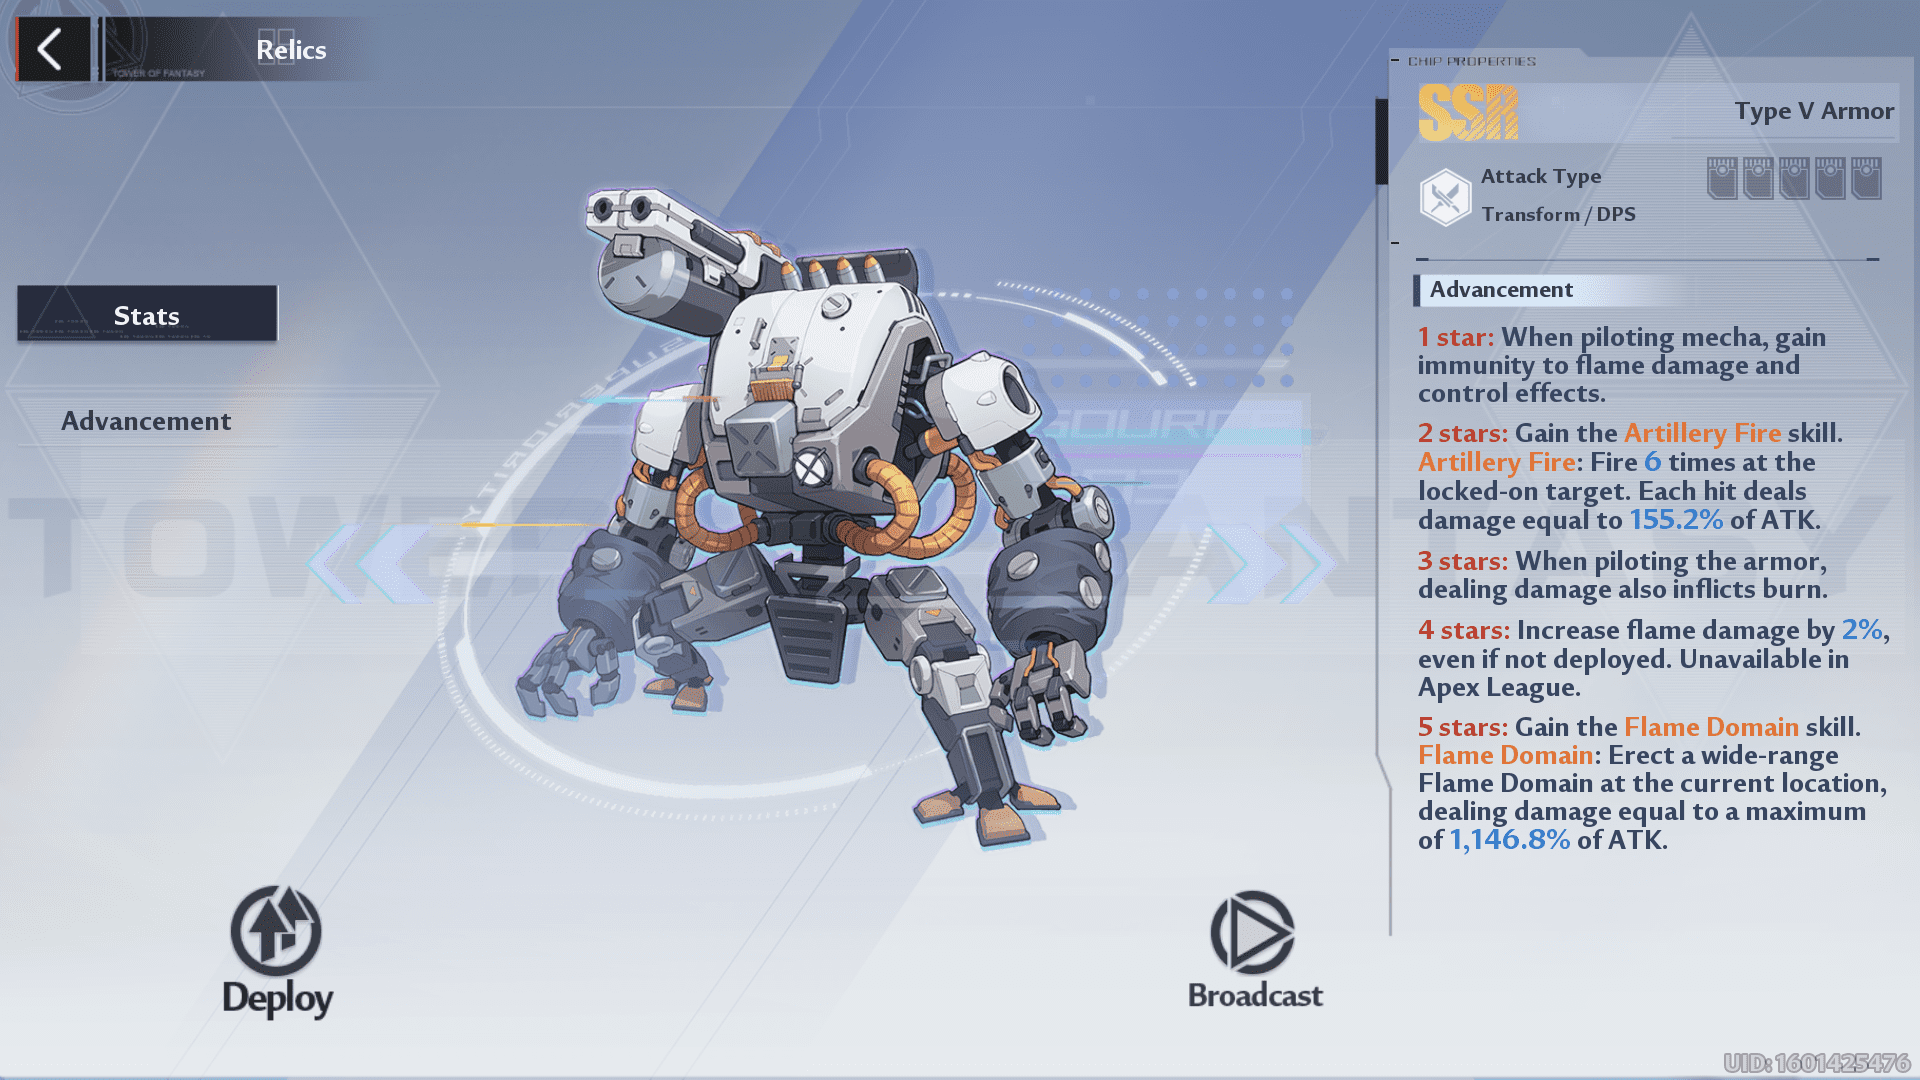
- Uses: Frankly speaking, I don’t advocate the use of this relic in a high-pressure situation because you are “technically” locked inside and cannot dodge incoming attacks. But, when it comes to boss fights, and you are underpowered, then it’s a good option to equip this relic.
- Advancement Opinion: With advancements, you get immunity to flame damage and crowd control effects, but I don’t think it’s viable to use this relic at all in PvP. But, if you lack the firepower and have better damage output with this relic, then it’s better to equip it on your character.
Omnium Shield (SSR)
- Description: Deploy an Omnium shield that blocks projectiles for 10 s and initially has the energy to 200% of the player’s maximum health.
- Cooldown: 90s
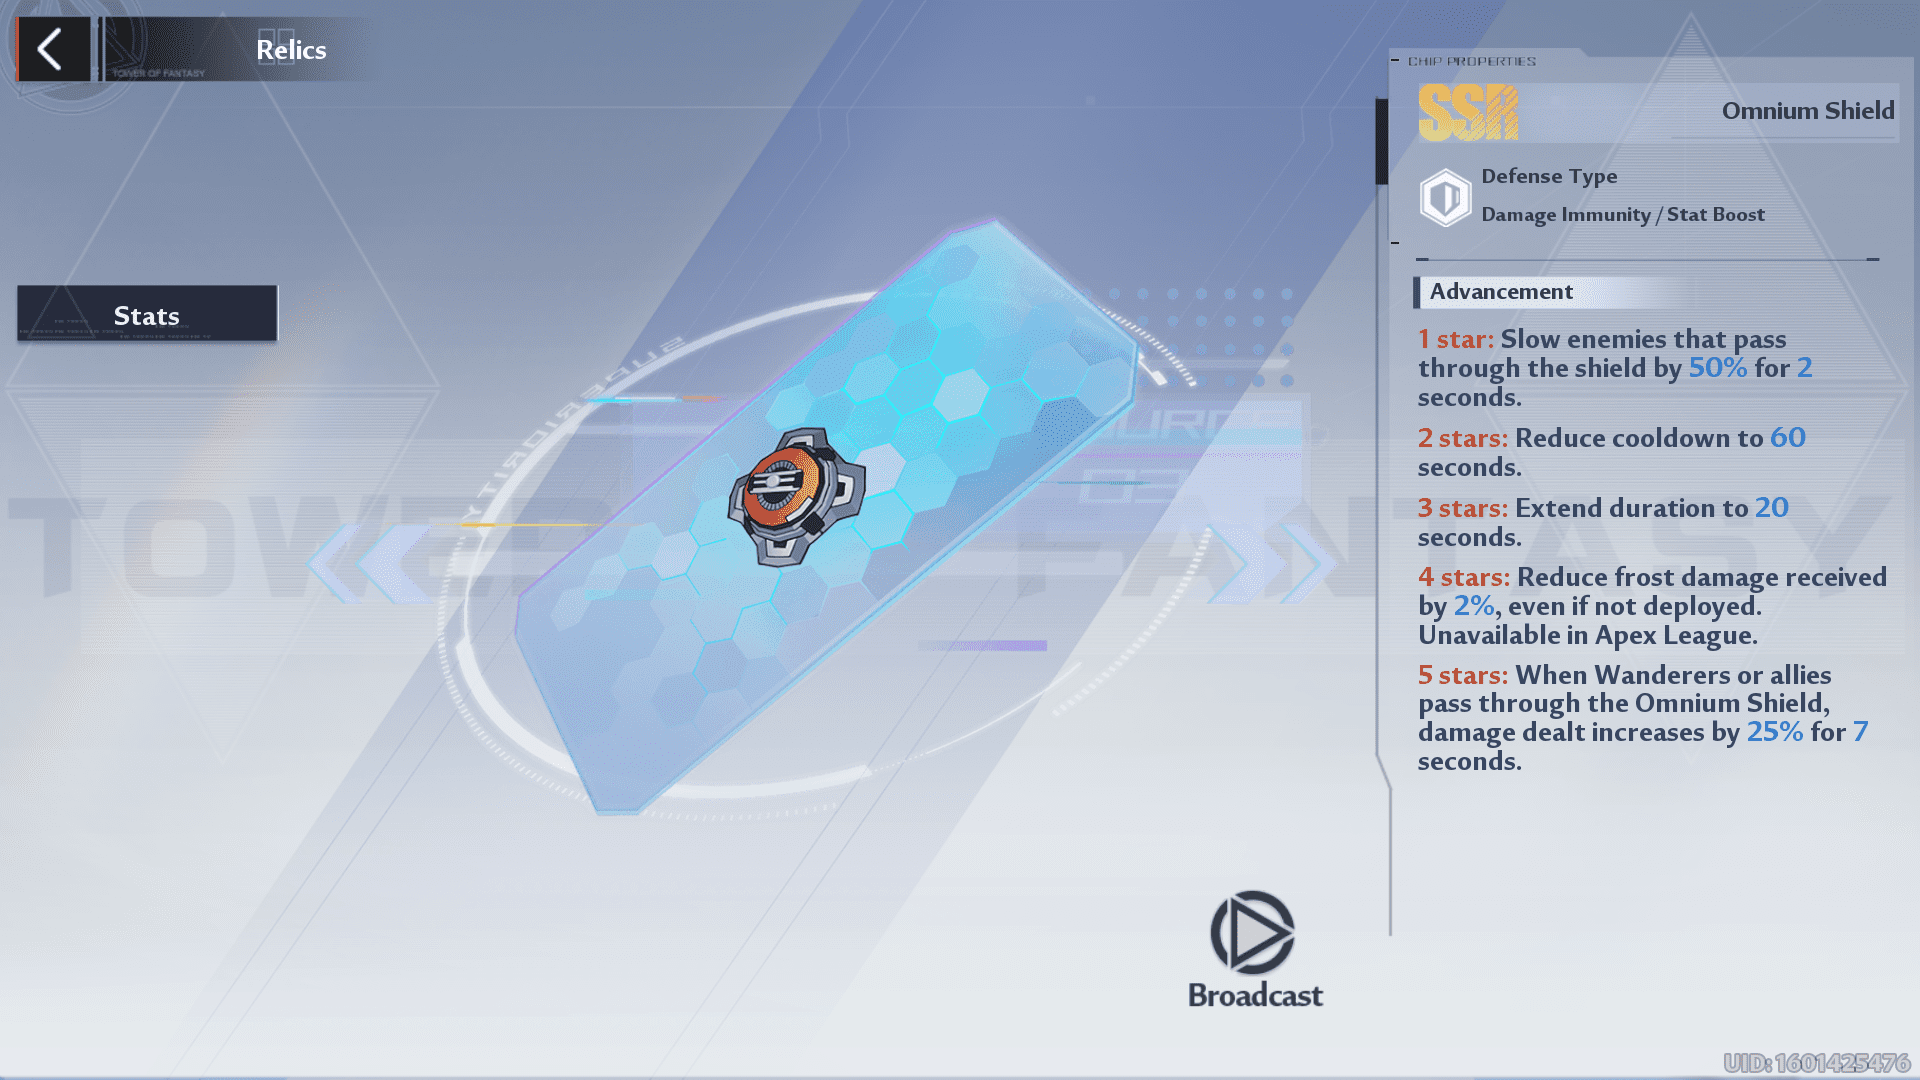
- Uses: You can buff your team’s damage, slow down enemies passing through this shield, and defend yourself against incoming damage from opponents. Though the relic is usable in Apex League, a time-limited PvP mode, humans are smart enough to bypass the shield and come directly at you.
- Advancement Opinion: Once you consider Omnium shield’s advancements, you will realize it’s an awesome Relic for support characters. Support characters rely on their passives, skills, and relics to heal and boost their teammates. And, using the Omnium shield on a support character like Coco ritter can massively enhance her healing potential and survivability.
Alternate Destiny (SSR)
- Description: Create an area where allies gain hitstun immunity, and health will not drop below 20 % for 8 seconds. The buffs will be removed after leaving the pocket dimension, and once you have spent 8 seconds in the zone, you can’t be re-buffed.
- Cooldown: 90s
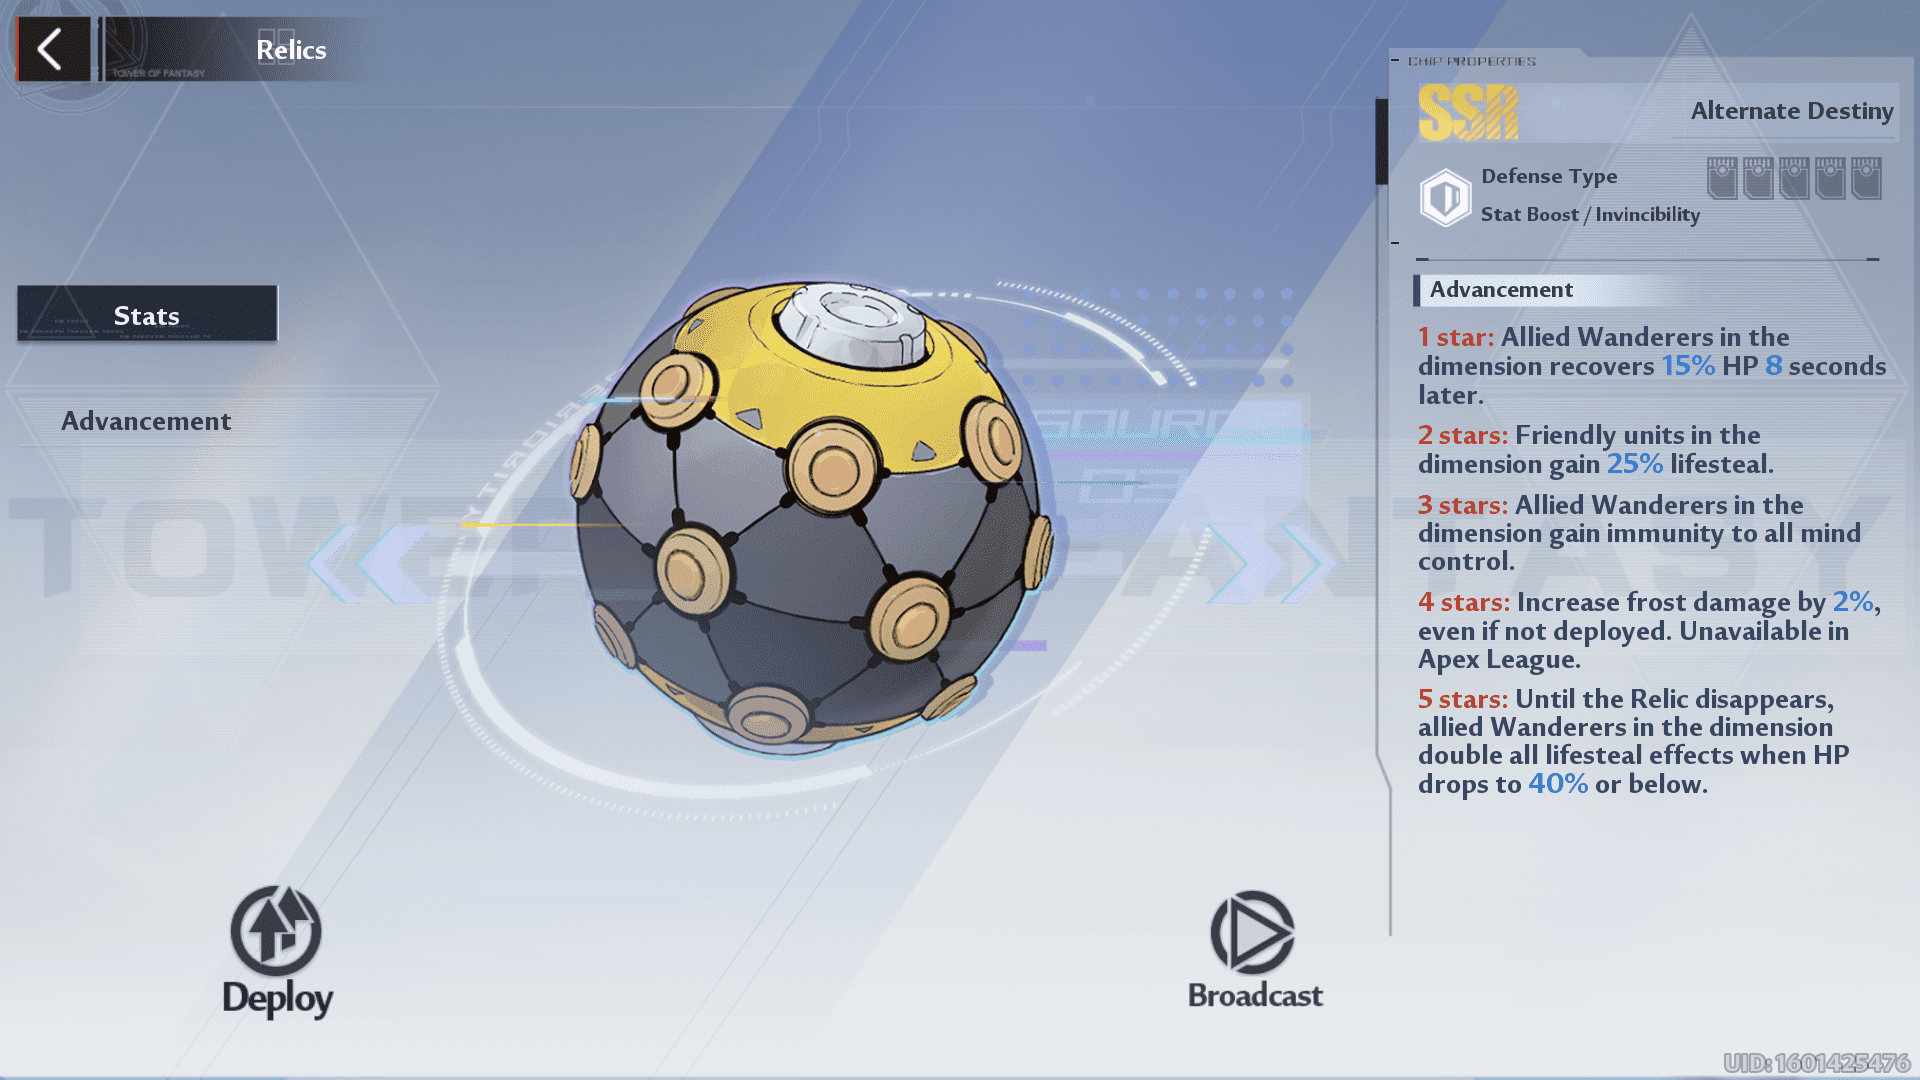
- Uses: I recently got this relic, and I must say it’s a must-have for players who want to play support characters in a high-tension Raid boss. Recently, Scarlet Apophis has been available as a Raid boss, and only a party of 8 players can participate in an arena. So, players who want to support their team can use this relic to save from an instant kill and provide lifesteal, healing, and mind control immunity at the same time. Even after the relic disappears, players will get lifesteal effects that will help to sustain them.
- Advancement Opinion: The best use case of this relic is to increase the chances of your team’s survival. A boss like the Interdimensional Frostfire dragon can one-shot a dozen of players at the same time; that’s a time you can deploy this relic to save getting insta-killed and buff the teammates at the same time. Honestly, advancements for this relic are priceless.
Player vs. Player
In PvP, there are game modes like Apex League, where your Weapons and Relics are temporarily maxed out for a battle, and you don’t have to worry much about being under-equipped. This is the most balanced PvP mode, but there are modes like Sparring where you can fight an opponent in the overworld where every piece of gear you have is accounted for. Here is a look at the PvP-specific relics in ToF:
Couant (SR)
- Description: The relic summons a droid that generates a shield around the player for 5 seconds. The shield goes away after the mentioned time or is struck by opponents once. It will stun enemies for 2 seconds if broken within 1 second of being deployed, deals around 100% of attack, and knocks back nearby enemies after disappearing. Shares the cooldown with Couant 2.
- Cooldown: 30s

- Uses: You can reduce an attacker’s speed, increase damage output and speed, and reflect damage at the same time. It screams itself as a PvP relic. Couant 2 is a relic that is yet to launch in the global version of the game.
- Advancement Opinion: A solid relic for Sparring in the overworld with other players that gives you a ton of combat benefits. I suggest you level this up until Couant 2 launches in the future.
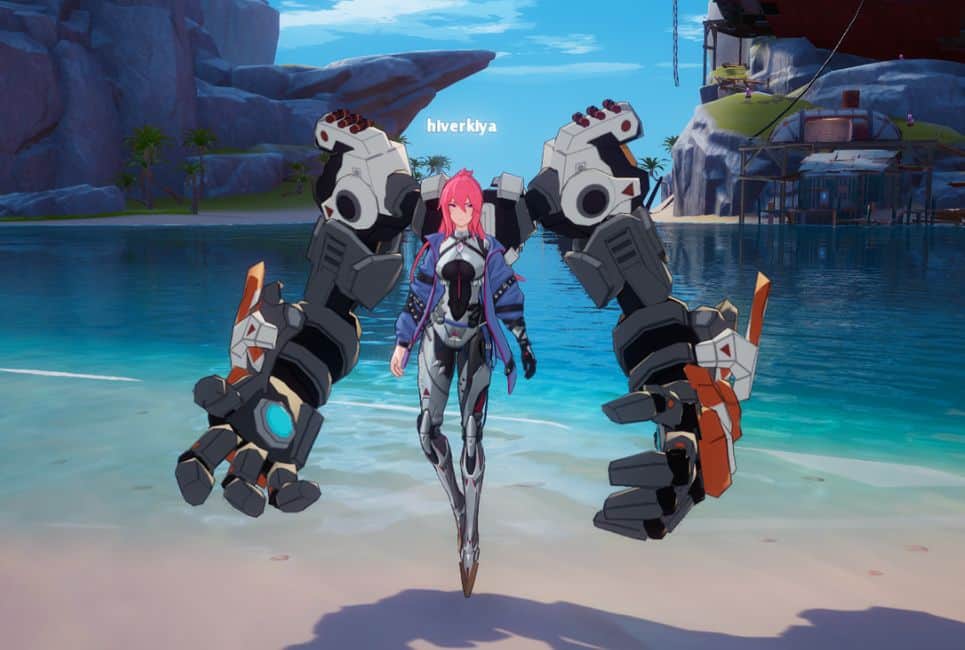
Colossus Arm (SSR)
- Description: You can summon a Colossus arm to combat for 20 seconds, granting hitstun immunity simultaneously. Normal attacks deal up to 1,387.7% of attack damage and launch enemies in the air, whereas the skills deal 453.5% of attack as damage and suspend enemies. You can tap the relic key to cancel.
- Cooldown: 300s, Skill cooldown: 10s

- Uses: If you have a high attack, then this relic is a deadly tool. It may happen that you are out of energy juice and cornered by the opponents; that’s a perfect time to pull up this relic and counterattack with all your might. You will get reduced damage and dish out some serious Physical damage to your enemies.
- Advancement Opinion: A good relic but may lack in potential when the enemies have Physical damage resistance to them. I would suggest you get shards for other SSR relics.
Drone (SSR)
- Description: Summon a drone on the battlefield for 15 seconds, and increase final damage reduction by 5 % every 5 seconds.
- Cooldown: 120s
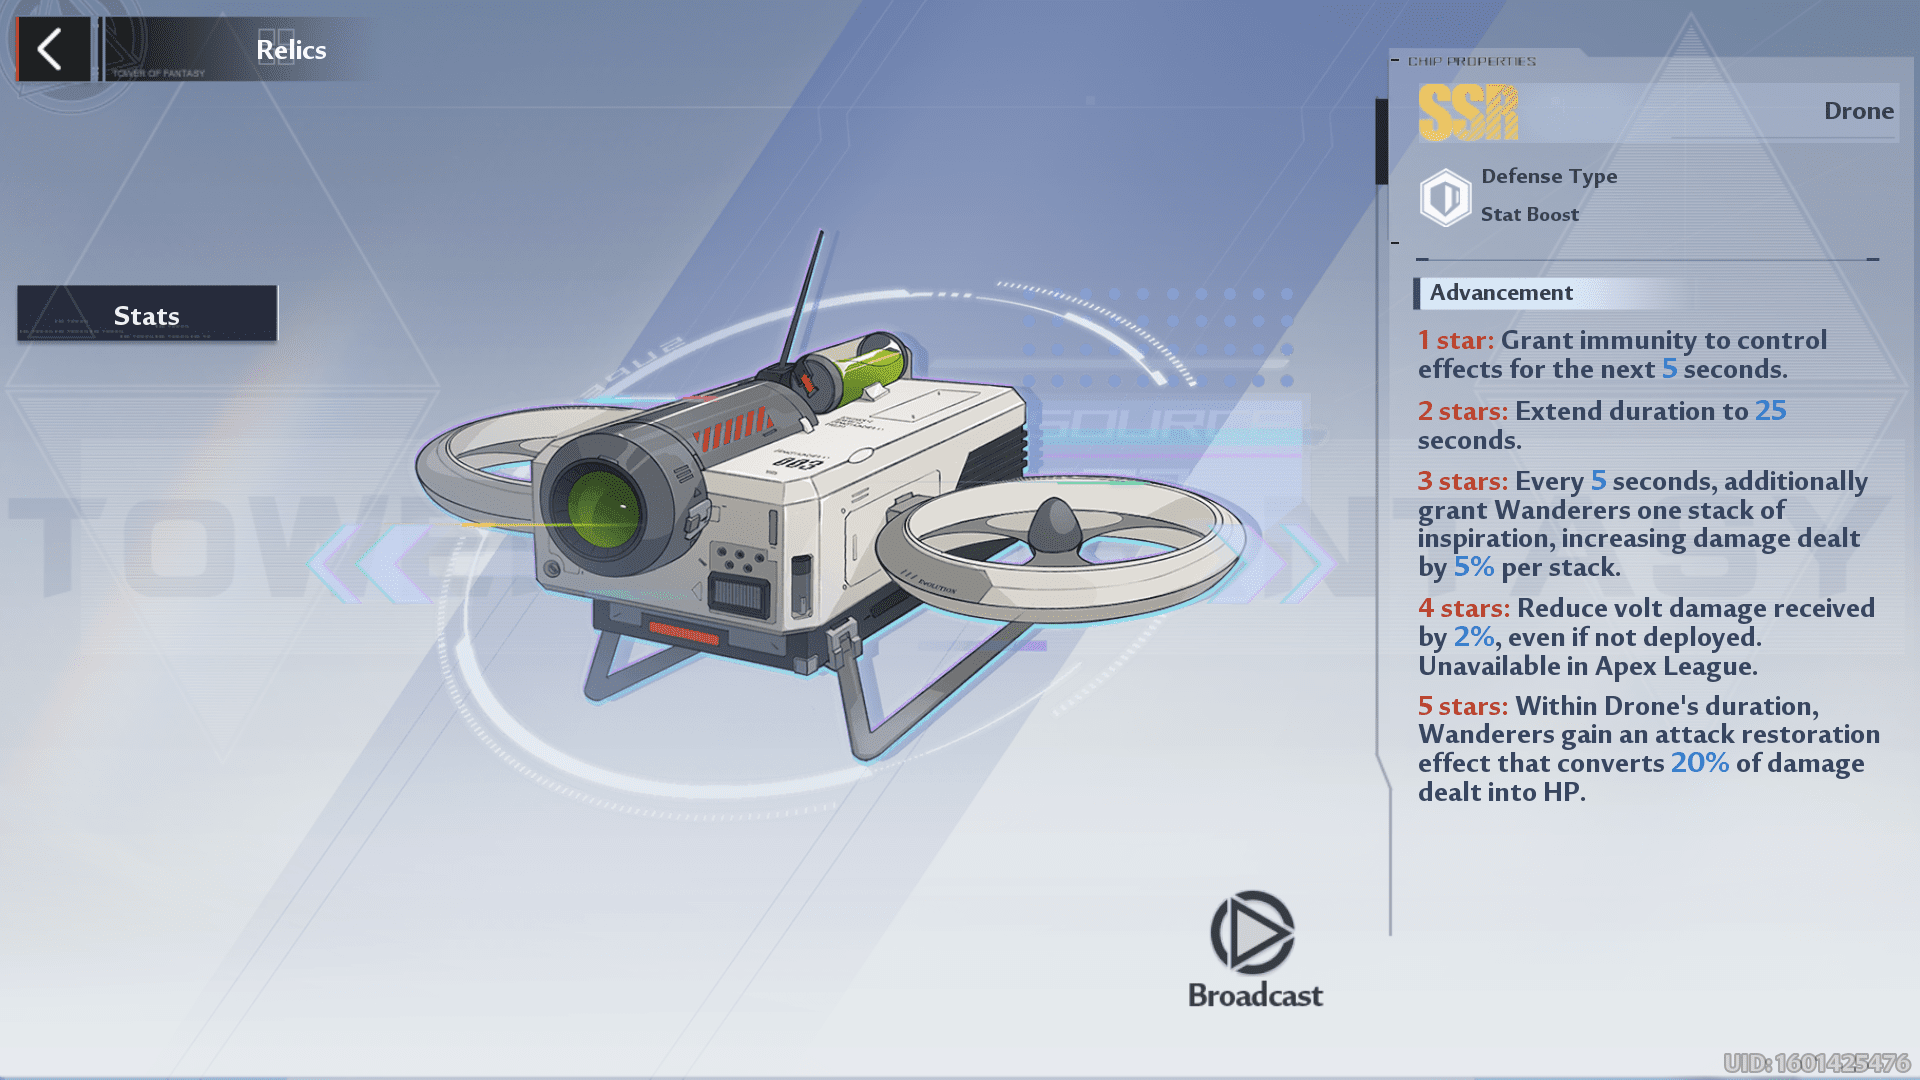
- Uses: An amazing relic that can help buff your damage, grant immunity to control effects, and heal your character simultaneously. Over the duration of this relic, you can obtain a 25 % damage boost, which is really decent for a DPS character.
- Advancement Opinion: Drone is a relic worth investing your time and resources in because of its immense personal damage benefits. The advancements will make it stronger, and you will be able to pass through formidable enemies with its buffs.
Spacetime Rift (SSR)
- Description: You can launch a proton bomb at a location that creates a collapse in the time-space and pulls enemies in for 10 seconds. The enemies in the center will get 39.6% of attack every 0.5 s as damage after 1.5 seconds of being caught.
- Cooldown: 100s
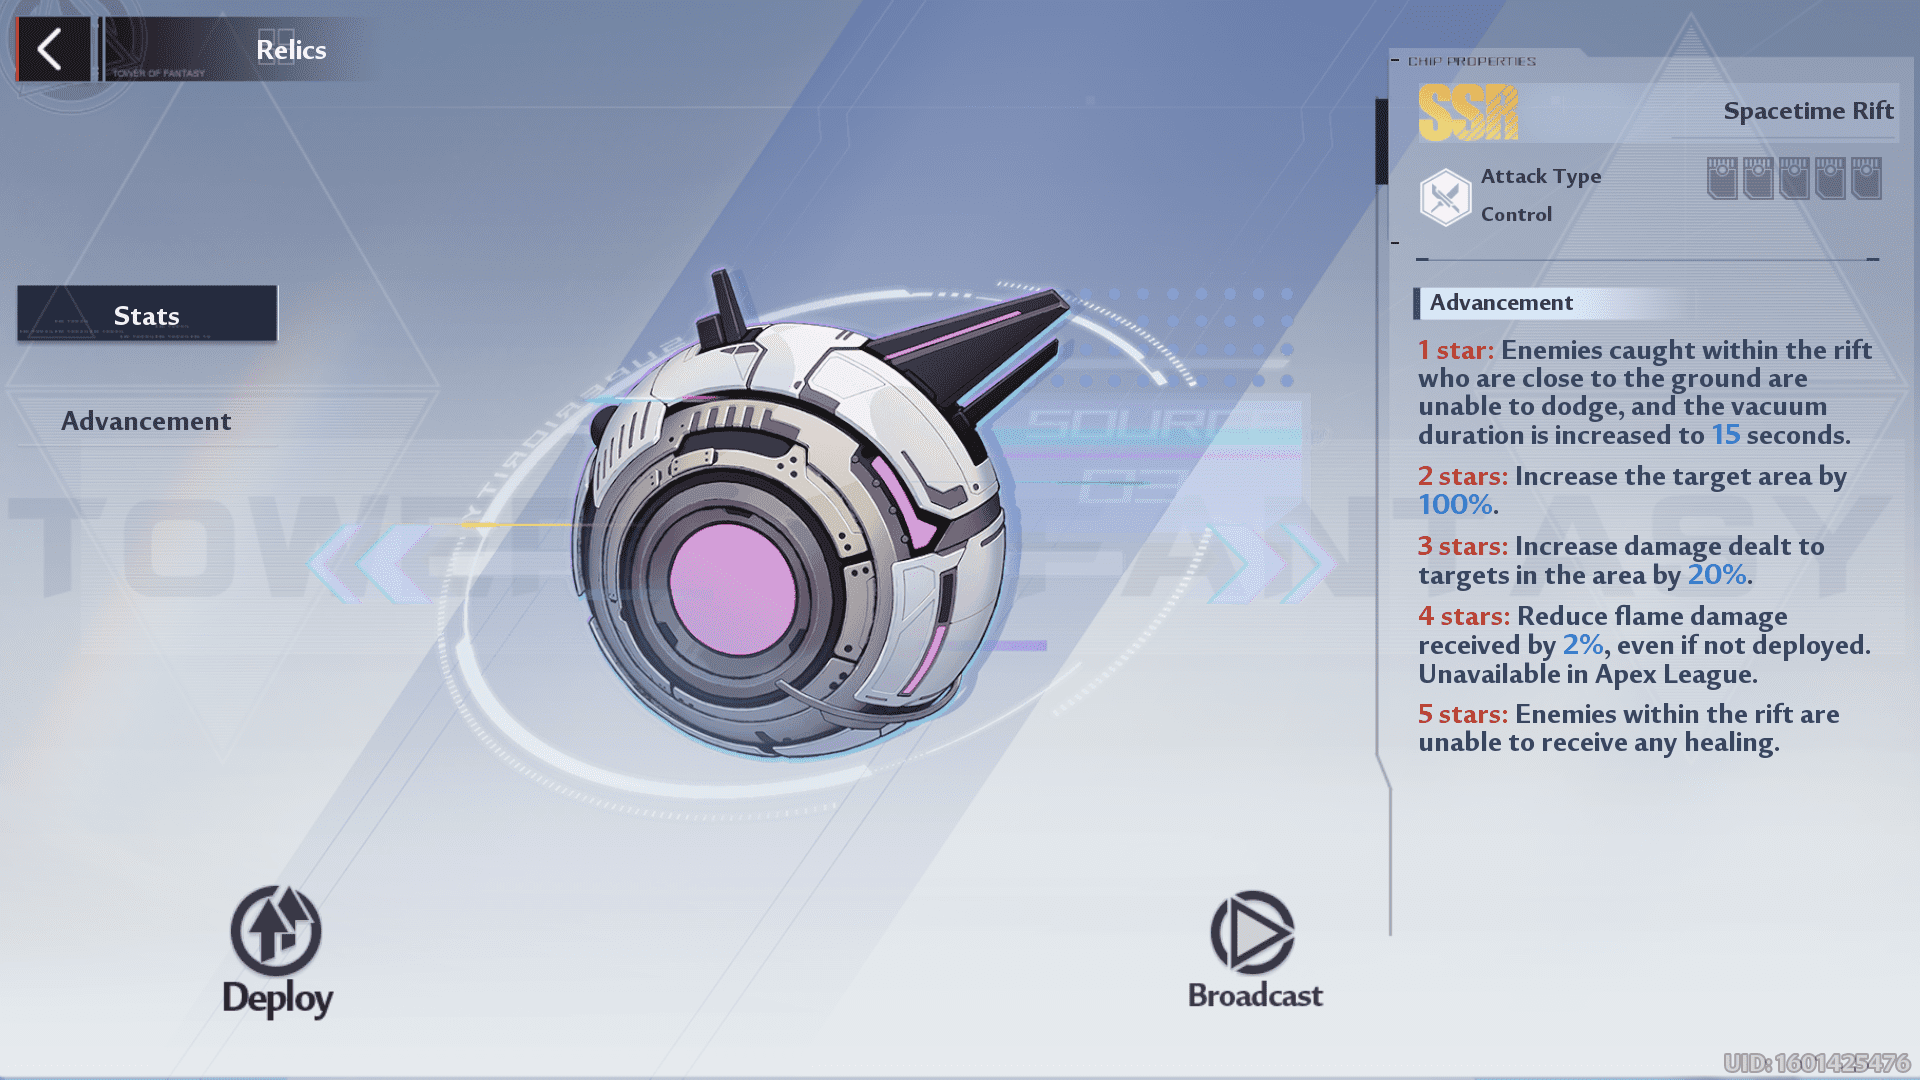
- Uses: This is a relic that shines in both PvE and PvP content because of its ability to group up enemies at a single location. You can easily deploy this relic to crowd-control your enemies in both Bygone Phantasm and Apex League game modes.
- Advancement Opinion: With advancements, this relic starts to show its’ true potential. Your enemies will be pulled at one place and won’t get healing or get out of it. At that point, they are like a sitting duck and on your mercy.
Confinement (SSR)
- Description: You can create an area of imprisonment that has a radius of 7 meters where energy pulses for 10 seconds. Based on the weapons’ element type, the pulses will deal 73.4% of attack as damage every second, and targets that touch the boundary will get a stunning effect for 2 seconds.
- Cooldown: 240s
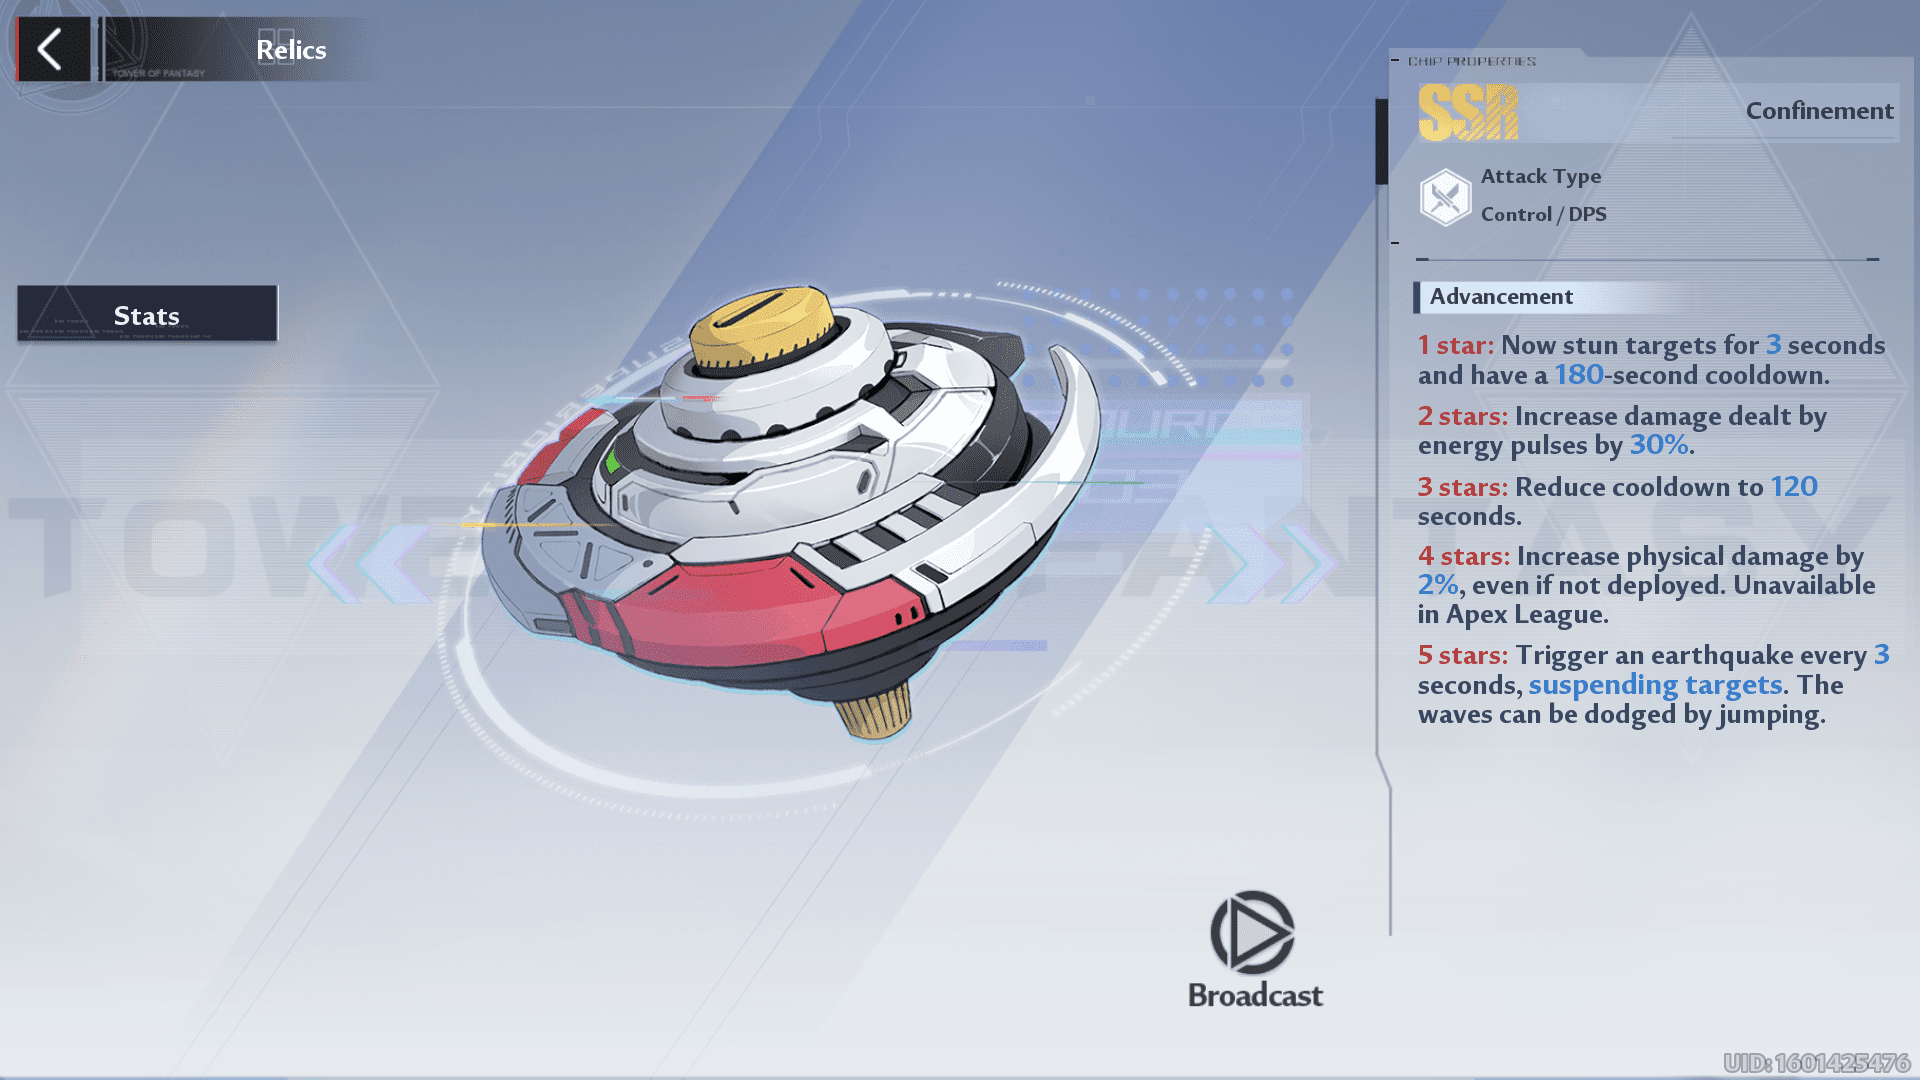
- Uses: An amazing Relic if you want to suspend enemies and stun them in an area from where they cannot get out. The key perk of this relic is to deal elemental damage as energy pulses that depends on your weapon’s element.
- Advancement Opinion: Unless your opponent has a crowd control resisting relic, its’ hard to get out of Confinement’s grasp. I must say this is a relic that can make a difference in a match of Apex league.
Hologram Projector (SSR)
- Description: The relic helps to project a hologram of the player that performs the player’s attacks synchronously and deals 35 % of the player’s damage.
- Cooldown: 180s
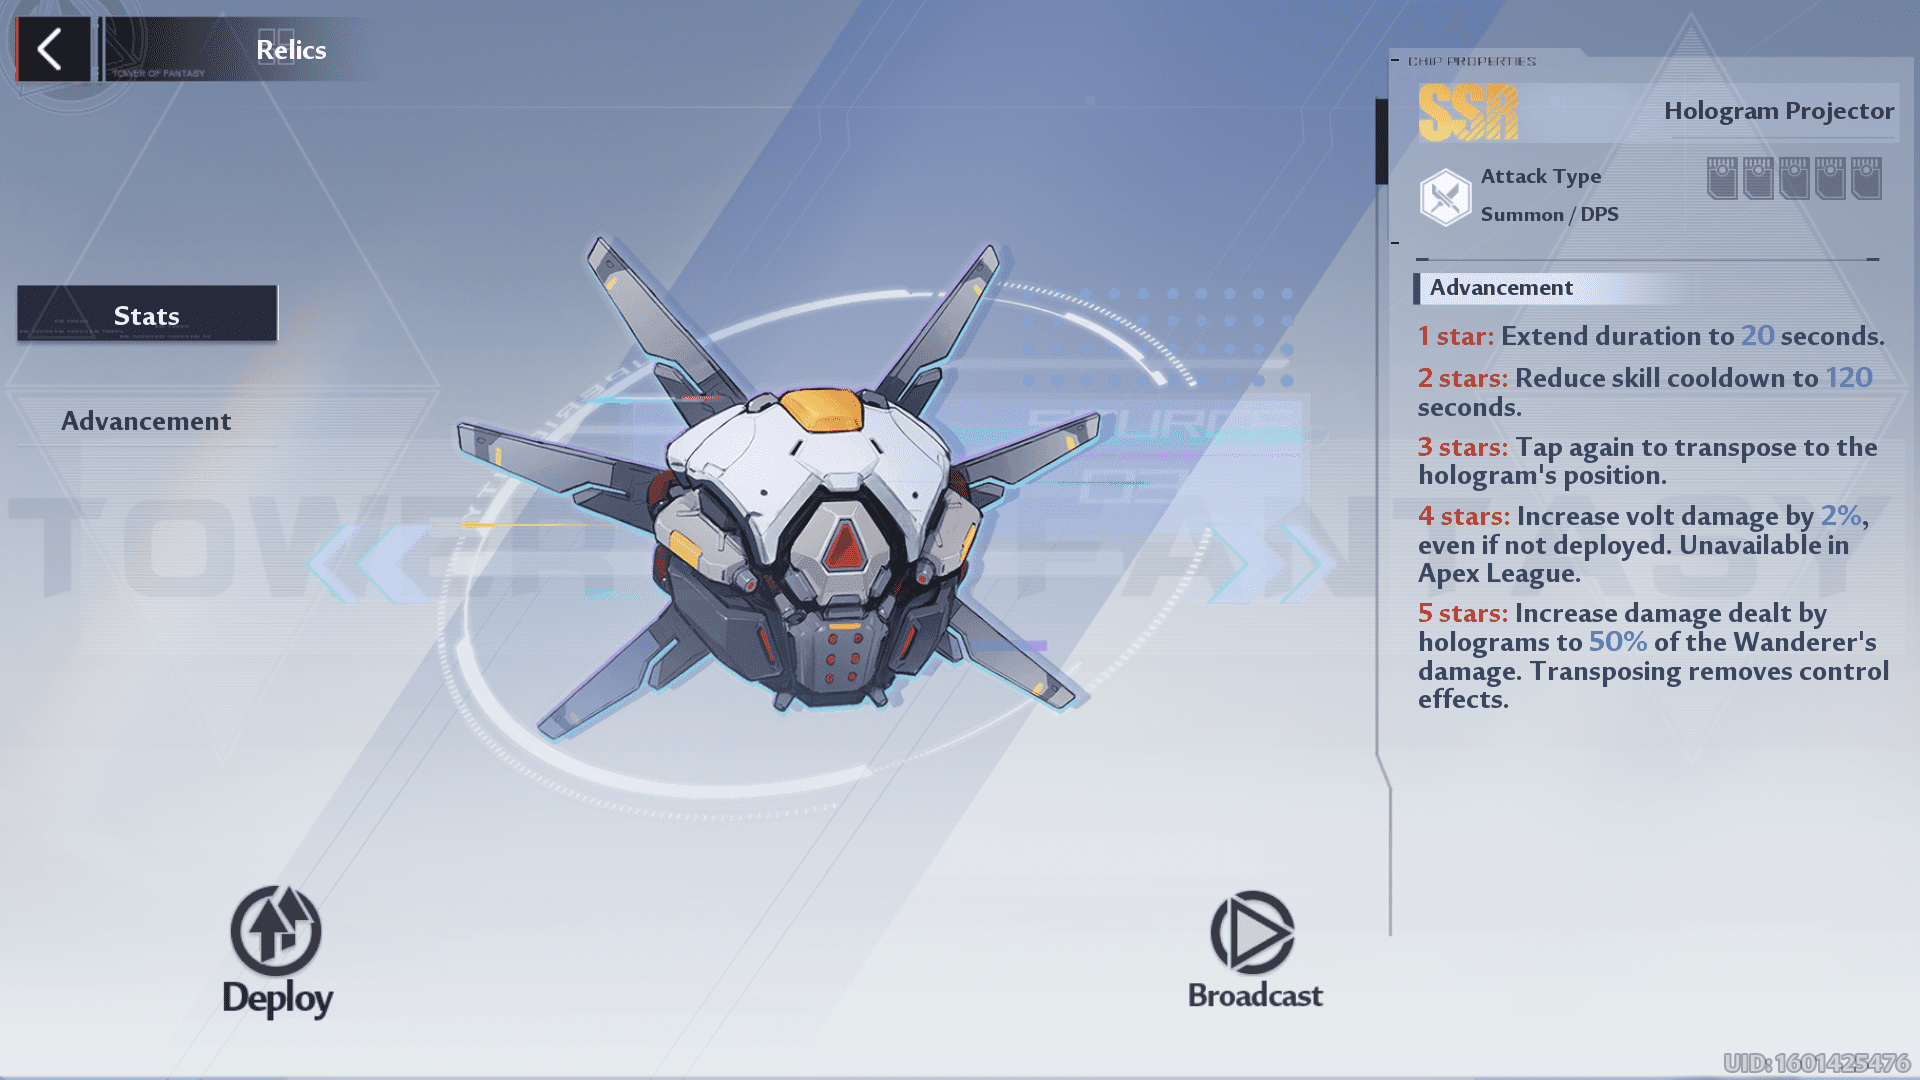
- Uses: A hologram projector is a good Relic that can help you dish out a decent amount of damage by taking the aid of your character’s hologram. The attacks will sync with each other, and you can easily melt enemies’ health bars by using this relic.
- Advancement Opinion: A really, really good relic that you can use to burst down enemies in a short duration of time. I’ve started to collect its shards from exchange shops already because its advancements are no joke when it comes to damage output.
Magnetic Pulse (SR)
- Description: The relic blasts a magnetic bomb that launches enemies into the air and deals volt damage equal to 38.8% of the attack. Also, you get hitstun immunity for 5 seconds.
- Cooldown: 35s
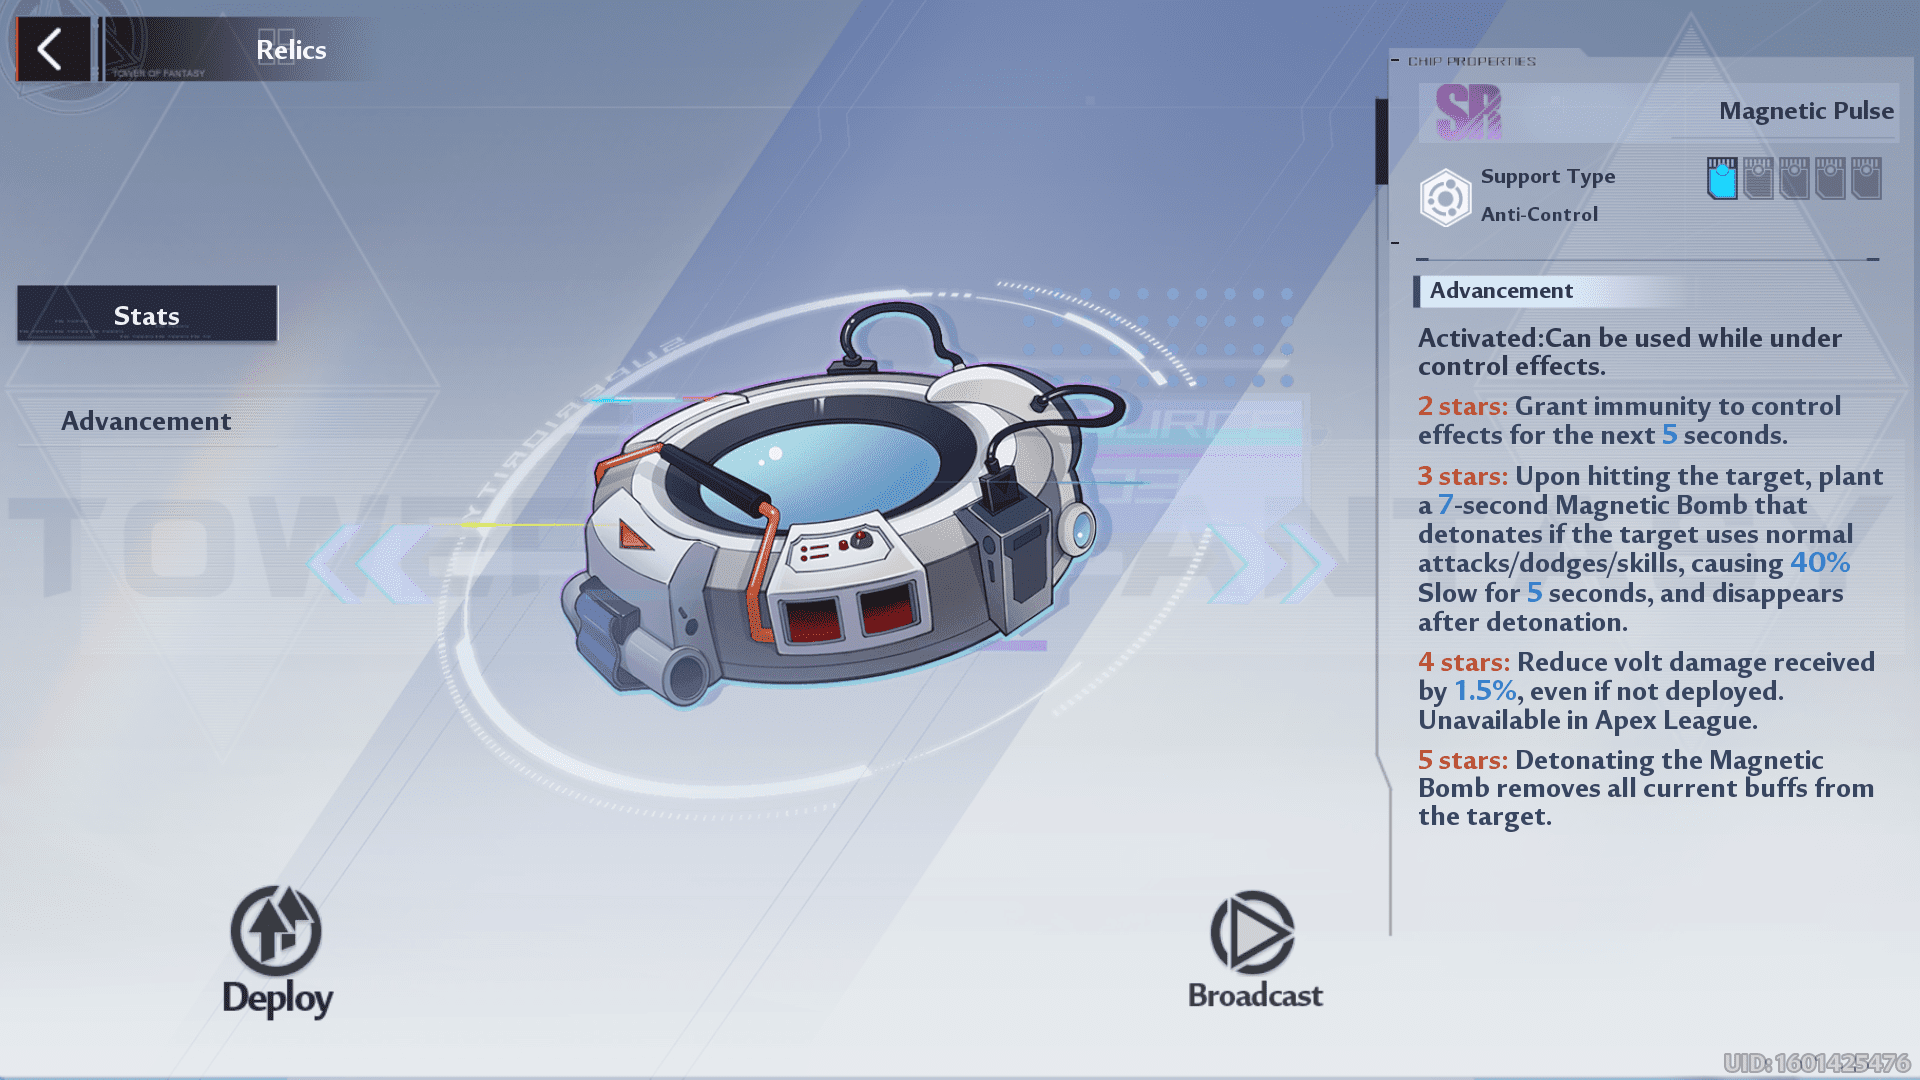
- Uses: Honestly, this is a good relic for high-tension combat situations or enemies with crowd-control weapons. Most of the time, I lost the matches where I was put under crowd control and could not dodge them. Had I known this relic’s good, the tables would have been turned by now. But worry not; now you know how beneficial this relic is because it can be used under crowd control, grants immunity to them, and removes buffs from the target on detonation.
- Advancement Opinion: The most annoying attacks are the ones that apply crowd control effects. Hitstun, mind control, or freeze, these attacks can chain you to a place while your opponent shreds your apart. Magnetic Pulse is an anti-control relic that will break you out of annoying crowd control effects and give a time window to restructure your combat strategy.
Quantum Cloak (SR)
- Description: The player can enter a quantum state that enemies for 10 seconds cannot detect, but the moment you attack, the state goes away.
- Cooldown: 120s
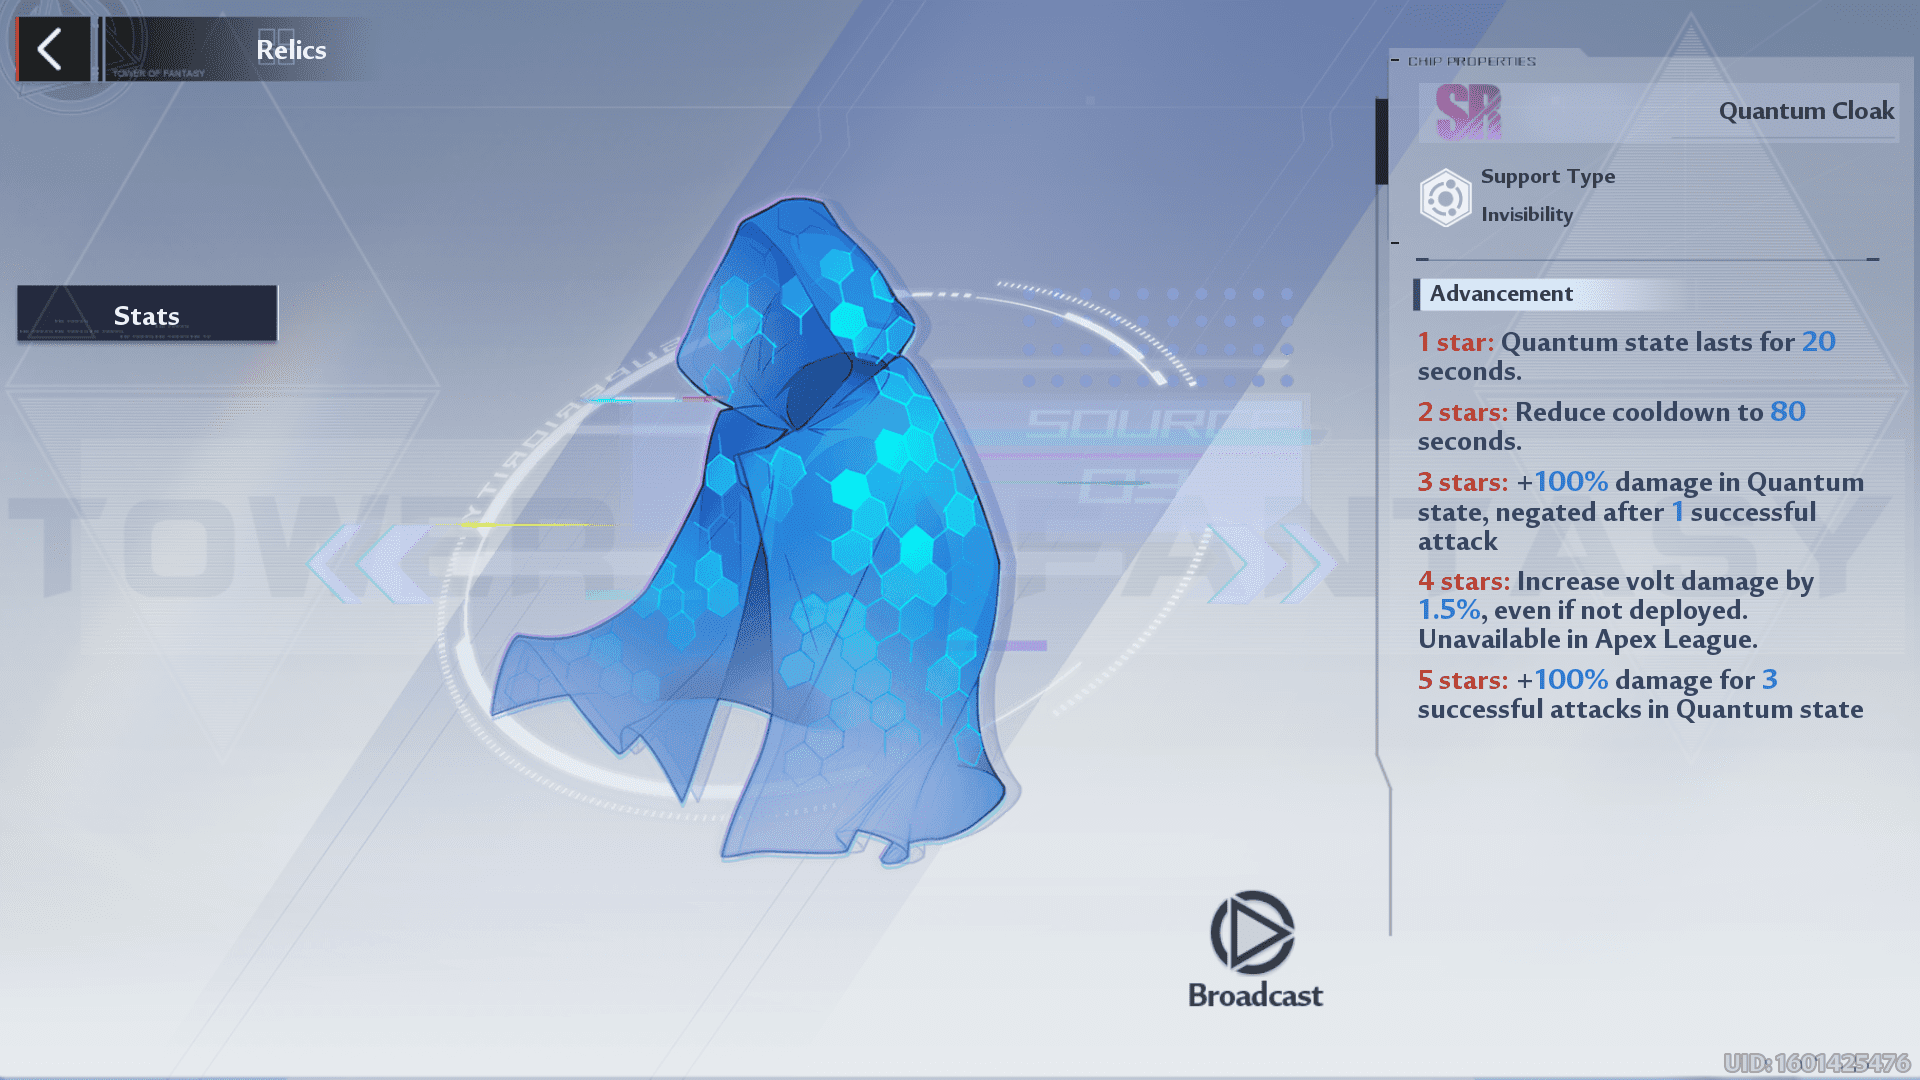
- Uses: Though it might seem like a not-so-used Relic when it comes to PvP stealth attacks, this relic is a must-have. Knowing Crow players, they love to perform stealth attacks or the ones where they can have high mobility. Quantum Cloak is a really good option if you want to sneak into the arena and pop up behind the enemy to catch them off guard.
- Advancement Opinion: If you love to sneak behind your enemies and secure a stealth kill, this is a tailormade relic. You should avoid advancing this relic unless you want to opt for that gameplay.
Hovering Cannon (SR)
- Description: You can summon a Hovering cannon for 20 seconds whose skill, Laser beam, deals 5.6% of attack damage to the target each time.
- Cooldown: 240s
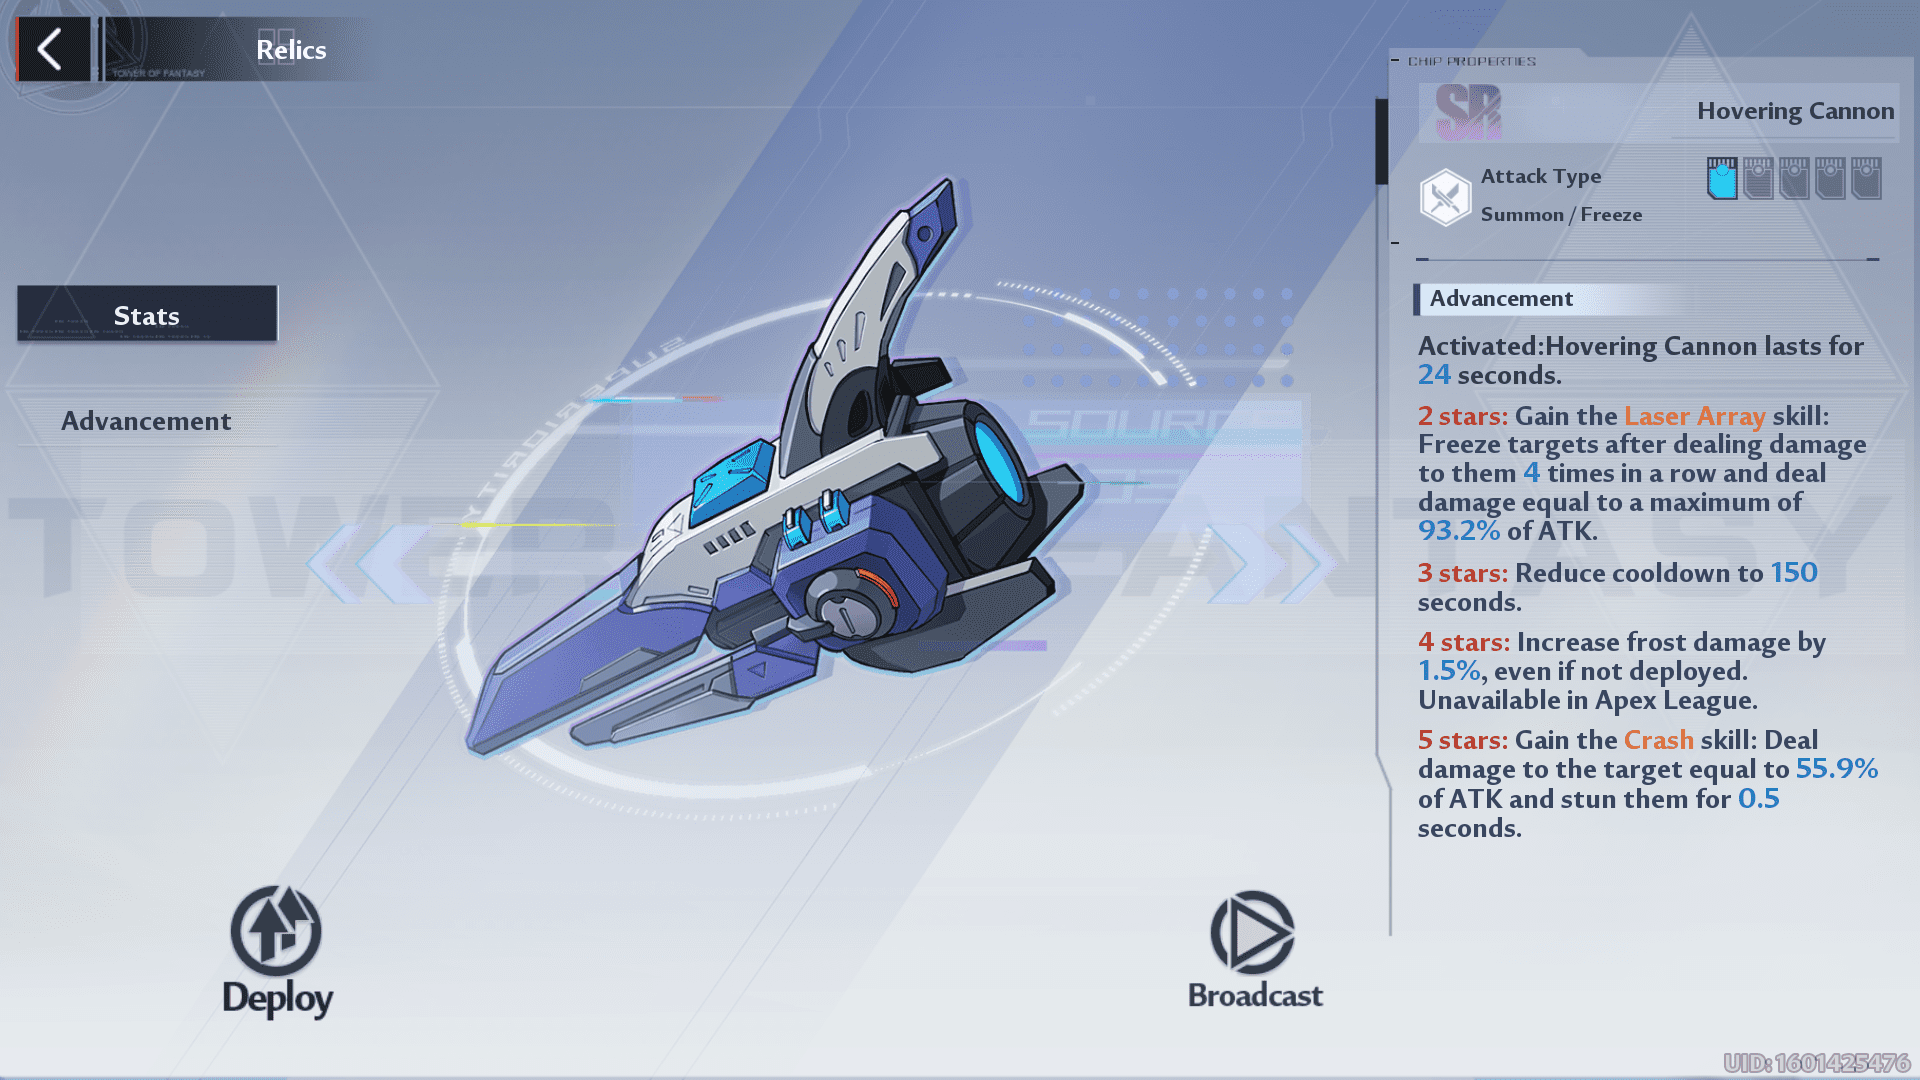
- Uses: If you want a passive Relic that can stun and freeze enemies, then Hovering Cannon is a good choice. Not every player has all the characters, so it’s good to have a Relic that can somewhat fill that gap.
- Advancement Opinion: I won’t recommend buying its shards; however, if you are getting them from some ruins, you should advance this relic. Otherwise, just let it be as it is and use it in the Apex league if you don’t have other powerful options.
Missile Barrage (SR)
- Description: The player can summon a missile launcher for 8 seconds that fires missiles at nearby enemies. Each strike deals with 34.8% of attacks.
- Cooldown: 60s
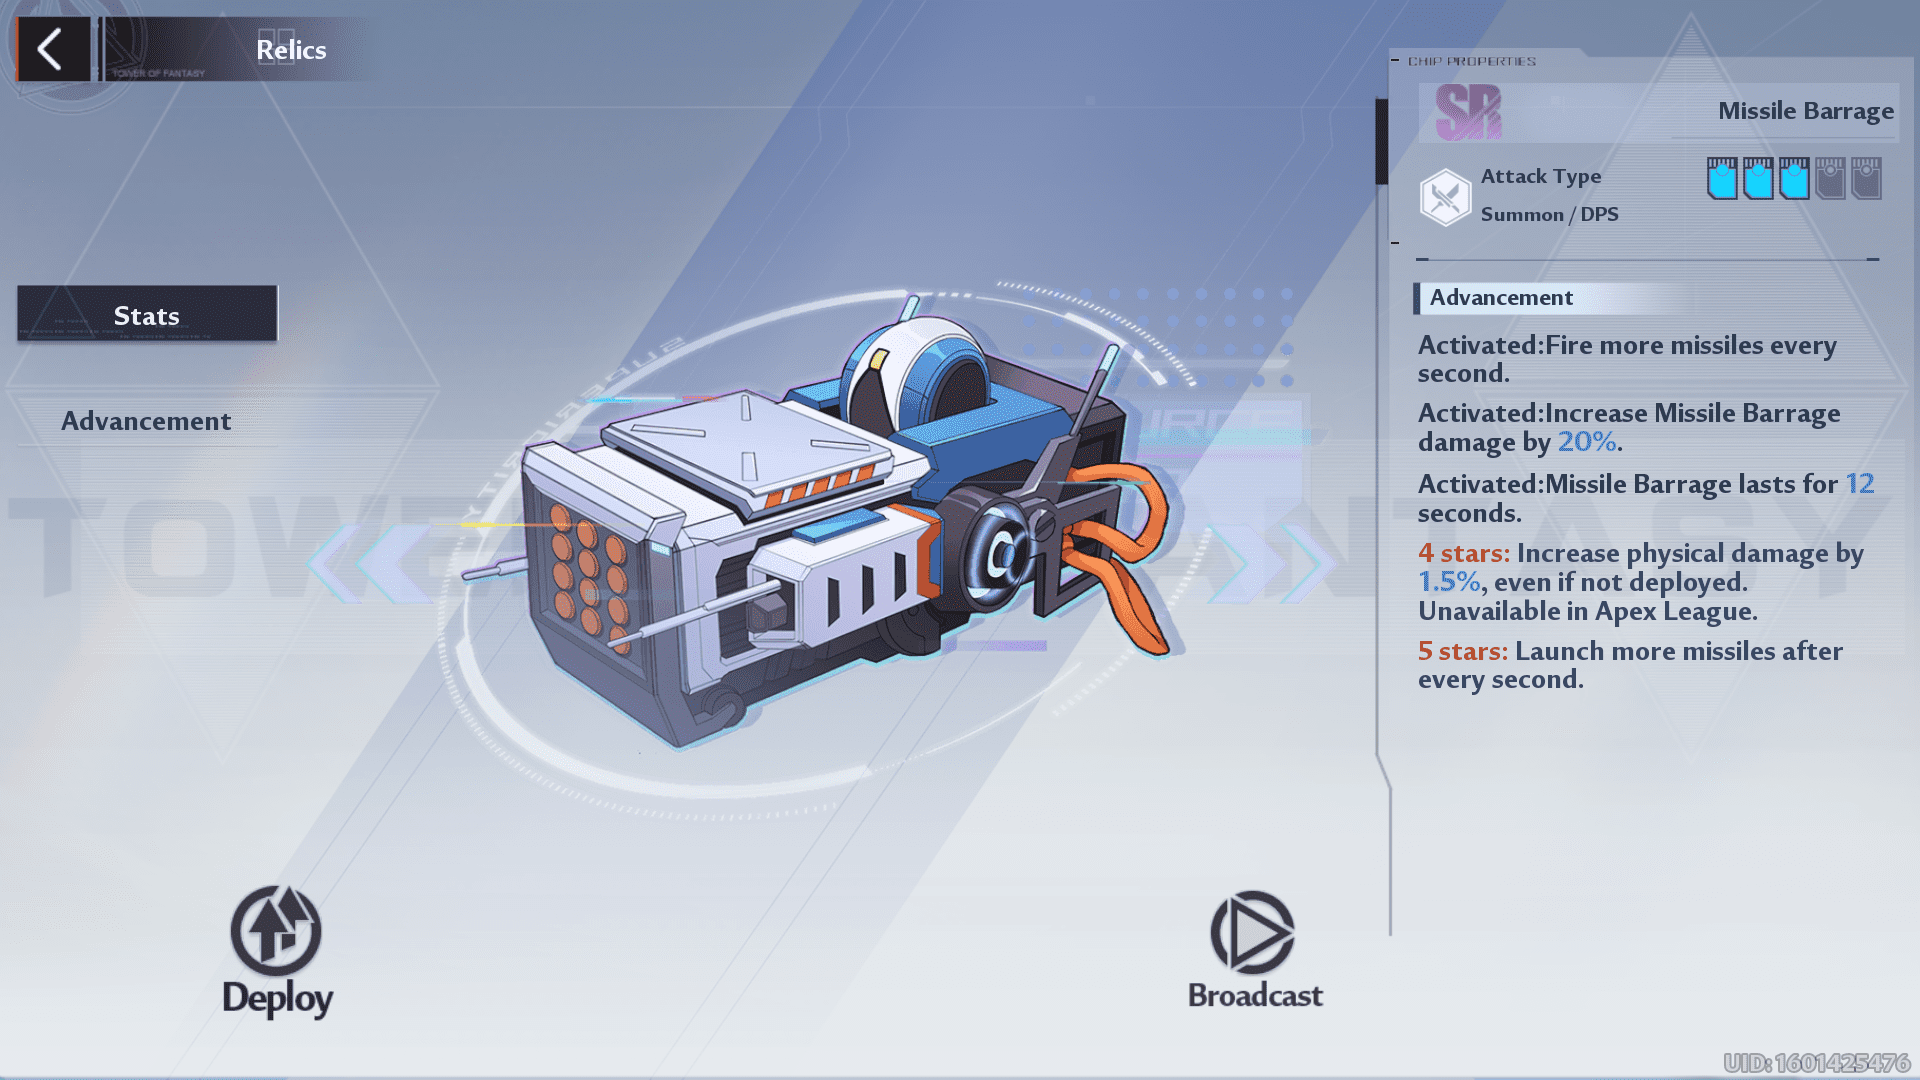
- Uses: It may look like not a lot of damage, but it is a good source of passive damage to the enemies. With increased damage and more missiles, you can expect to melt enemies’ health bars if you have a high attack.
- Advancement Opinion: Unless you have better SSR relics, you can use this relic to dish out the damage that scales on your attack. However, the key con it has is that the enemies can easily avoid its’ range, and you have to chase them to let the missiles hit. Also, sometimes this relic attacks supply pods without any reason, eventually wasting a lot of damage.
Magnetic Storm (SR)
- Description: The user can unleash one electro tornado that travels randomly on the battlefield, throwing opponents in the air, and deals 186.3 % of attack every second for a duration of 10 seconds.
- Cooldown:100s
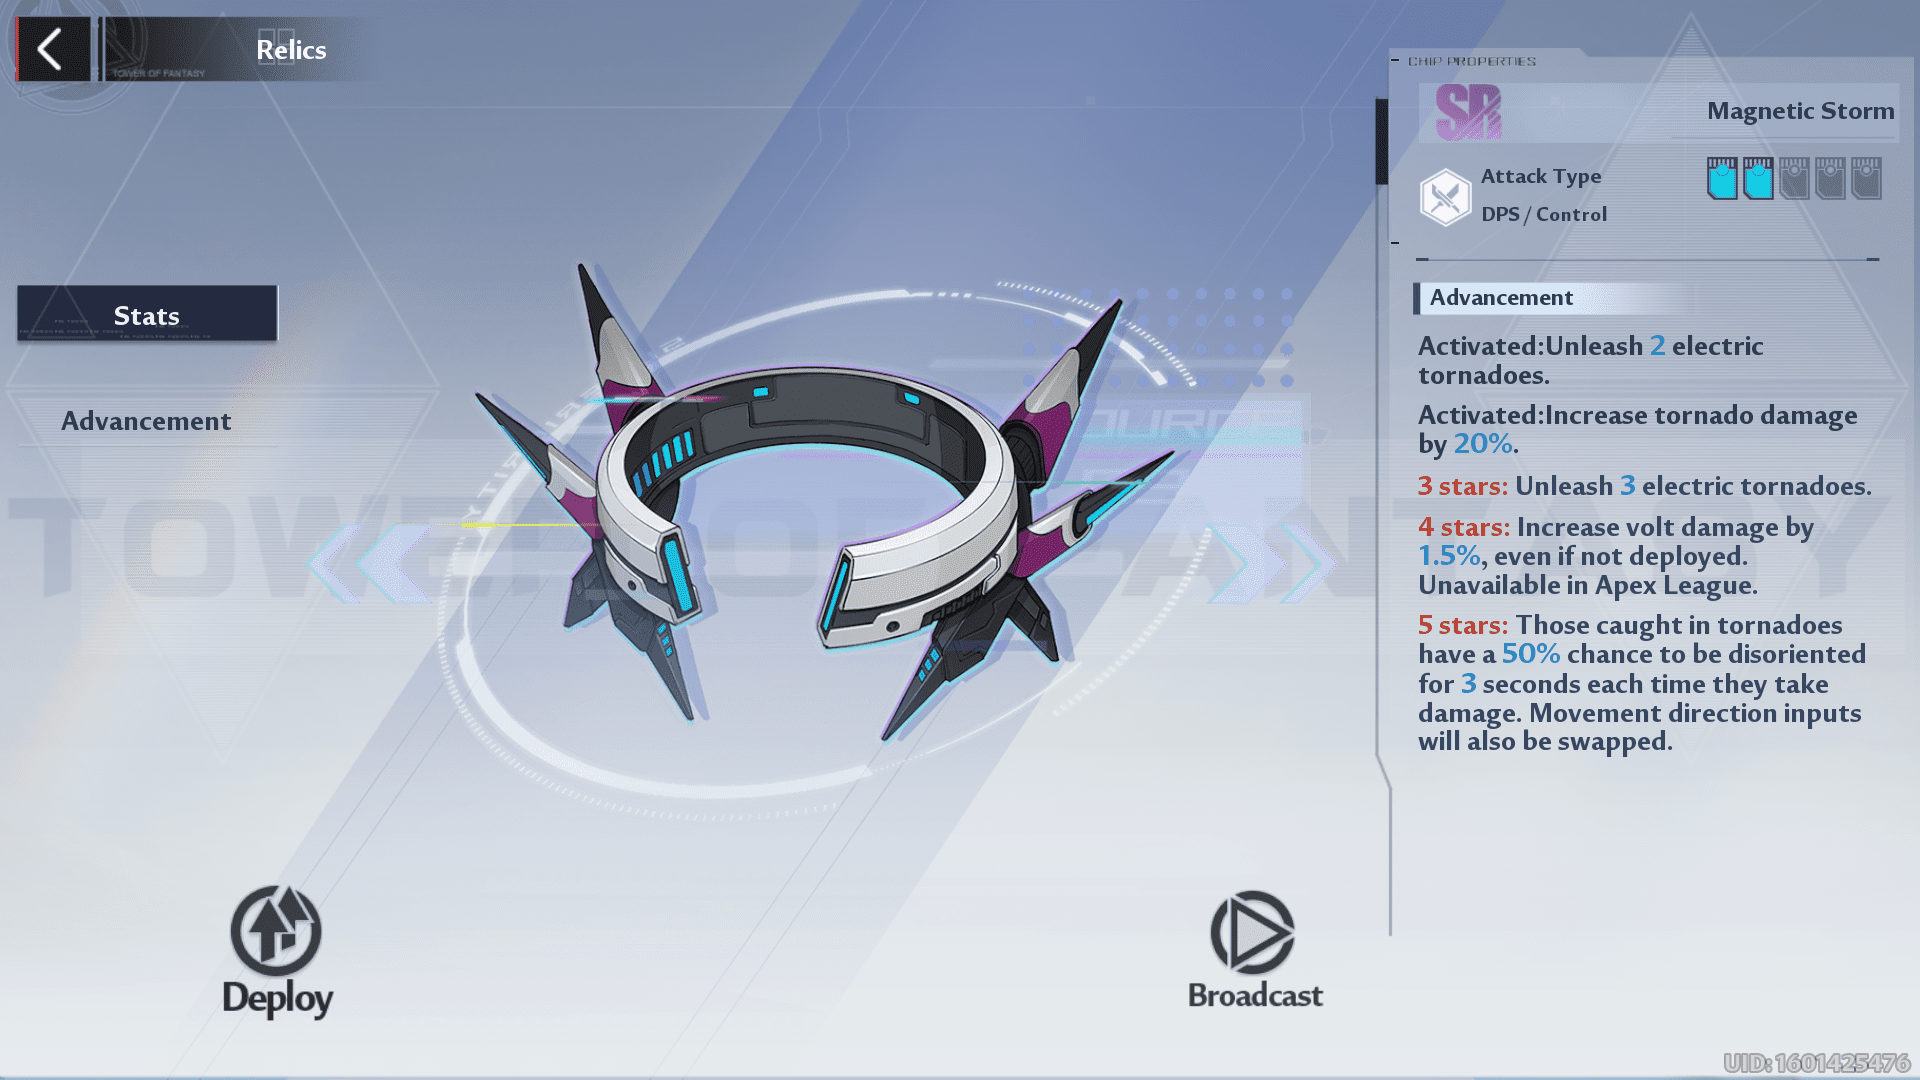
- Uses: Another amazing Relic that can disorient and deal damage to your enemies at the same time. The best thing about this relic is that it can engulf the battlefield pretty fast and limit enemies’ movement speed. But, I must say this should be used once your enemies at under some crowd control effect, as the tornadoes might spawn randomly and miss the target.
- Advancement Opinion: In my experience, this is a good option among all SR relics if you want to surround your enemies in volt tornadoes and disorient them to deal passive damage. I would say the advancements for this relic are totally worth the shot.
Relic Questions
Question: What are your go-to relic sets for exploration?
Answer: I prefer to use Jetpack or Jetboard all the time in one set so that I can easily reach a place. I don’t have a Cybernetic arm yet, but if I had that one, I would use it with the Omnium Handcannon. And as for my last set, I would have put Strange Cube and Magnetic pulse to debuff myself from crowd control effects that some enemies use. But yes, feel free to use any relics that can help you to explore faster and more efficiently. There’s no shame in using offensive relics if your characters lack firepower. I used Missile Barrage till I eventually got SSR relics that suited my needs. And, if you want to see how these relics work, then go to the relic menu, select a relic, and tap on the broadcast to view their demo.
Question: I’m scared of PvP modes like Apex league. Can I just avoid them?
Answer: Yes, you can, and if you feel that will make you anxious or stressed, it’s better to avoid them. I’ve played a couple of competitive games in the past and have even secured server ranks, but unfortunately, I don’t get the vibe in Tower of Fantasy’s PvP mode. It’s just my view despite the mode being balanced. For the time being, I’m sticking to Bygone Phantasm as I don’t have much time on hand, while I’m also playing Genshin Impact at the same time and avoiding PvP modes.
Question: Which relic should I choose from the relic box?
Answer: Cybernetic arm! The only choice. I didn’t know about this relic at all in the beginning and got some other relic. But, I would highly suggest you get this relic because even though I’m making good progress, I’m yet to get shards for this relic. Well, this is regret for the time being, but don’t make the blunder I made. Get this relic, and you are a techno spiderman. Zip-zap!
Thoughts on Relics
Relics are a core part of Tower of Fantasy because of their influential role in the gameplay to help complete a lot of tasks. Whether it’s an exploration objective or combat where you need a little boost, Relics will always come in handy. Once you get the hang of them, you will realize how cumbersome it would be to play without them, and they will become an integral part of your character.
These relics will aid you in story missions and team battles where you have to show the full potential of your character, and hopefully, you will be able to ace them with flying colors.
If you want to know more about Tower of Fantasy, feel free to check out other Tower of Fantasy guides, and don’t miss out on the other guides. Who knows? Maybe you find a game that piques your interest, and your next stop will be there.