

- How to Make Money Fast in Like a Dragon Gaiden: The Man Who Erased His Name - January 6, 2024
- How to Get Sunshot in Destiny 2 - December 18, 2023
- Where Is Hawthorne in Destiny 2 - December 16, 2023
Honkai: Star Rail is the latest and greatest from HoYoverse, the geniuses behind Genshin Impact. Even though it’s turn-based, Honkai: Star Rail shares many similarities with HoYoverse’s mega-hit, but some mechanics and terms can be confusing if you’re a newcomer.
Equilibrium Level is one of them. In this guide, I’ll explain everything you need to know about Equilibrium in Honkai Star Rail; What it is, what it does, and how to increase it.
What is Equilibrium?
Equilibrium is a gameplay mechanic that increases the level of enemy encounters and raises the cap on your characters and Light Cones. The best way to imagine Equilibrium is as a ‘global level’ that affects the entire game. At certain Trailblaze Level thresholds, Trials of Equilibrium are unlocked, and upon completing those trials, your Equilibrium level increases.
Equilibrium acts like a soft ‘cap’ on enemy strength, but it also limits your characters. Several gameplay mechanics, like Relic Synthesis, are also locked until you raise your Equilibrium past a certain level.
Enemies getting stronger is a bad thing, right?
Tougher fights may seem like a drag, but as your Equilibrium Level increases, so does the reward quality. Some players try to carefully pick when to trigger the next Equilibrium Level to make progression easier, but this is a flawed approach.
I recommend increasing your Equilibrium level as soon as you’re able to. It might immediately make the game a little harder, but the higher quality rewards and increased level caps make it worthwhile.
How do I increase my Trailblaze Level?

Your Trailblaze level can be increased by completing story and side missions. Even if you’ve completed those, you can still tackle most of the following tasks daily for a boost:
- Daily Training Missions – If you’re out of story activities and side quests, Dailies offer the most reliable source of Trailblaze EXP. Even if you’ve got nothing else to do, it’s worth logging in daily to complete these tasks as they give over 1200 Trailblaze EXP.
- Treasure Chests – Treasure Chests are always worth seeking out as they provide valuable resources. This is doubly true if you’re not spending. Chests give a small amount of Trailblaze EXP, but it’s negligible, so don’t rely on these.
- Spending Trailblaze Power – You’ll have Trailblaze Power to consume daily. This resource replenishes at a rate of 1 point every 6 mins. Spending Trailblaze Power is a great way to earn EXP, and it can be spent on Calyx’s, Stagnant Shadows, and Caverns of Corrosion. You can access all of these from the Interastral Guide menu.
- Simulated Universe Runs – Simulated Universe runs give meager Trailblaze EXP relative to the time it takes to complete them. Still, they are absolutely worth doing, and you should aim to hit your weekly quotas for the rewards. Trailblaze EXP is part of the ‘Immersion Rewards,’ which you won’t see until you reach Simulated World 3.
This screen will appear if you try to do an activity that would put you below zero Trailblaze Power (pictured below).

If you have any Fuel, feel free to use it, as it serves no other purpose. I’m holding a small stockpile in case I want to level up something quickly, but it’s unnecessary. You can replenish your Trailblaze Power with Stellar Jades if you don’t have Fuel, but please don’t do this! Under no circumstances should you ever waste Jades on Trailblaze Power.
As good as Honkai: Star Rail is, it’s still a gatcha game with many mechanics that prey on your impatience. Stellar Jades are much harder to come by than Trailblaze Power which will replenish itself by the next time you log in.
Beat the Trials without breaking a sweat!
The Trials of Equilibrium are a DPS and gear check. You should have strong enough gear to beat the Trials by the time you reach them, but this may be an issue if you’ve been squandering resources. Feel free to skip this section if you’re confident, but if you’re struggling, try the following:
Level up your Light Cones
Light Cones are critical to increasing the potency of your characters and can be leveled up at the same rate. To give an idea of how vital your Light Cones are, the pictures below are of the ‘Cruising in the Stellar Sea’ Light Cone. The top image is level 1, and the bottom is level 60!


Check your Traces
Leveling up your Traces is resource heavy and time-consuming. Traces are meant to be grindy, and you’ll slowly acquire the items you need through Calyx’s. You won’t be able to max these out immediately but ensure you frequently check them. Hunting for the required resources is a great way to spend Trailblaze Power.
Level up your Relics

Relics make a tremendous impact on your damage output and survivability. Leveling up your Relics increases the stats and can even unlock brand-new ones. New stats are random, which gives plenty of room to roll the dice and min/max.
Don’t worry about the stats too much until you start earning gold relics, but prioritize leveling them up.
Make sure your team is max level
Your character level, as with the rest of your gear, makes a huge difference. If you’ve just Ascended a character and increased their level cap, ensure you spend resources to max them out immediately.
Try Natasha
If all else fails, I recommend adding Natasha to your team. Natasha is incredible because she restores your team’s health and is the only character who can do so early in the game.
Natasha’s Ultimate ability is a powerful AoE healing burst that targets your entire team and can keep your squad alive through the toughest content in the game. If you find you’re always dying and March’s Shields aren’t enough, you can’t go wrong with Natasha.
Trials of the Equilibrium

In this section, I’ll explain what happens in each Trial and strategies for the battles. The enemies you’ll encounter are formidable but nothing you can’t handle when you unlock them. These events act like a gear check, so if you’re struggling, refer to the ‘Beat the Trials without breaking a sweat’ section above.
If the Trials appear locked in your Mission screen, you’ve not progressed through the story enough to attempt them just yet. Every Trial is beatable with F2P characters, so don’t worry if you’ve been unlucky with Warps.
Trial of the Equilibrium: Part One

Location: Robot Settlement – Jarilo-VI
Trailblaze Level: 20
The first Trial consists of 2 fights against enemies you’ve fought multiple times across Jarilo-VI. The only difference between this and a standard battle is that you must defeat your foes without Auto-battle.
Fight One
Incineration Shadewalker LV29
Searing Prowler LV29
Fight Two
Ice Out Of Space LV29
Everwinter Shadewalker LV29
Frustratingly, every enemy in this Trial has completely different weaknesses. Try for Breaks if you can, but you should be able to overpower your foes even without the correct elements. Your Technique Points (points spent to activate abilities in the Overworld) increase upon completion.
You’ll also unlock Ascension Level 2, increasing your characters’ level cap and Light Cones. Finally, you’ll gain access to Crimson Calyx’s, which grant new rewards.
Trial of the Equilibrium: Part Two
Location: Corridor of Fading Echoes – Jarilo-VI
Trailblaze Level: 30
There are a few things to unpack in this Trial, and the Guardian Shadow can wreck your entire team if you’re not paying attention. Remember, you can spend Technique Points before battles but can’t eat once you’re in the Trial. Here’s what you’re up against:
Fight One
Stormbringer (Boss) LV39
Everwinter Shadewalker LV39
Incineration Shadewalker LV39
This is definitely the warm-up battle. Even though Stormbringer is technically a boss/elite unit, this fight shouldn’t be much more challenging than the tough mobs you’ve fought in Jarilo-VI. I recommend dealing with the Shadewalkers before turning your attention to the boss.
These enemies aren’t a huge threat but will slowly chip away at your defenses. If you’re relying on March’s Shields, this can be an issue, so prioritize the mobs and go all out.
Fight Two
Guardian Shadow (Boss) LV39
Imaginary Weaver LV39
Imaginary Weaver LV39
This is the main event! Make sure you use any Techniques you have available before you fight. Deal with the Imaginary Weavers first before focusing on the Guardian Shadow.
This boss is a pest because it can place ‘Bans’ on specific actions. These Bans don’t prevent you from using your abilities. Instead, you’ll take damage if you perform them, so you need to pay attention to the prompts. These are the three Bans you need to watch out for:
Disarm Ban
You’ll take damage if you perform a basic attack on the boss. Keep your Energy up in this fight to ensure you can use your Skills when the Disarm Ban goes live. Remember, you can’t skip your turn; if you have no Skill points, you’ll be forced to attack and eat the damage.
Silent Ban
This time around, you can’t use Skills. The wording is precise, and even using a support Skill, like Natasha’s healing, will trigger a punishment. Use your basic attacks here, and stockpile your Energy.
Tranquil Ban
This Ban triggers if you deal direct damage, but if Guardian Shadow gets hit as part of an AoE ability, it’s still okay. Tranquil Ban shouldn’t cause too much trouble, and you can use this time to cast shield or healing skills.
Patience is the key to victory in this Trial. It doesn’t matter how long the fights take as long as you survive, so keep your team topped up and prioritize defense over offense. The bosses can’t heal themselves, so you can slowly chip them away even if you’re getting unlucky with Bans against Guardian Shadow.
Once both bosses are defeated, you can level up your characters and Light Cones to 50. You’ll also unlock ‘Stagnant Shadows.’ These work similarly to Calyx’s and reward Ascension Materials, which you’ll need to strengthen your team.
Trials of the Equilibrium: Part Three
Location: Great Mine – Jarilo-VI
Trailblaze Level: 40
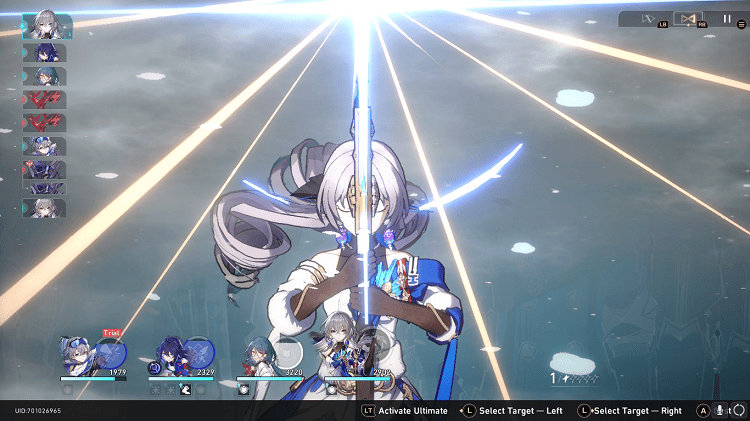
This time, you don’t have any annoying mechanics like Bans to bother you. You’ll likely cruise through the second encounter without any trouble. If you struggle anywhere, it will be against the Frigid Prowler.
Fight One
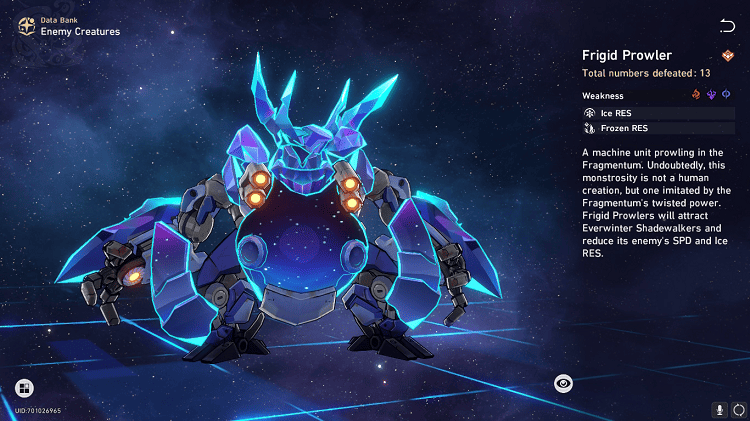
Frigid Prowler (Boss) LV50
Everwinter Shadewalker LV50
The big problem in this battle is the Frigid Prowler can call reinforcements whenever it likes. Everwinter Shadewalkers aren’t a massive threat, but there’s no summon limit. You could probably ignore them on their own, but there’s another mechanic you need to worry about.
The Frigid Prowler has an ability called ‘Devour Otherling’ that consumes the Shadewalkers for an attack boost. Because of this, it’s best to deal with reinforcements as they appear, even though the fight will take longer. If you’re confident you can burst the Prowler down, go for it! Just beware that you can’t heal between battles and must be in good shape for the next round.
Fight Two
Voidranger Trampler (Boss) LV50
Voidranger Weaver LV50
Voidranger Weaver LV50
I found this fight much easier than the first. The Voidranger Trampler has allies you should prioritize first, and they won’t come back once they are defeated. There’s not much to say about this fight other than to prioritize healing over dealing damage. I was lucky enough to have Seele for this battle, but even without her, Fire Trailblazer counters the Trampler nicely.
Once both sets of enemies are defeated, your party and Light Cone cap is raised to 60, and you can opt to fight tougher versions of bosses in the Echo of War for better rewards.
The Relic Synthesis system is also unlocked and allows you to select exactly what relics you want without rolling the dice in the Cavern of Corrosion. Just beware that Relic Synthesis is expensive, so don’t rule out Cavern farming as a free option.
Trials of the Equilibrium: Part Four
Location: Cloudford – The Xianzhou Loufu
Trailblaze Level: 50
By the time you reach this Trial, you’ll likely have powerful gear and a decent optimized team. Neither battle here is particularly tough, but the 2nd encounter can be problematic if you don’t manage the boss’s supporting units.
Fight One
Stormbringer (Boss) LV60
Windspawn LV60
Windspawn LV60
There’s not much to say about this fight. Focus on the Windspawn when they show up; otherwise, throw everything you can at the boss. Stormbringer is weak to Fire, so Fire Trailblazer is a strong choice in this battle.
Fight Two
Aurumaton Gatekeeper (Boss) LV60
Thunderspawn LV60
Thunderspawn LV60
Just like Stormbringer, Aurumaton Gatekeeper is a straightforward enemy, and as long as you destroy his Thunderspawn, you should be fine. The only issue is the boss’s ‘Sanction Rate’ mechanic, which allows the Gatekeeper to spawn Illumination Dragonfish as allies.
Sanction Rate is tied to how often you use Skills, so if you use Seele, who seems to have far more turns than everyone else, there will be a constant stream of support units.
Going into this fight, I didn’t understand this mechanic and could still burst down the boss while ignoring the Dragonfish. The safer approach is to prioritize the support units, but once the Gatekeeper is at half health, you should be able to defeat it quickly.
After the Trial, you’ll unlock Equilibrium Level 4, which increases your character and Light Cone cap to 70. The materials required to Ascend everything are costly and time-consuming to obtain. As tempting as it may be, don’t waste your Stellar Jades on Trailblaze Power. Some Ascension materials can be obtained from Calyx’s, but others require a bit of luck from world drops.
What happens after Equilibrium Level 4?
At the time of writing, Level 4 is the highest Equilibrium level players can reach without spending a lot of money. If you’re looking for things to do while you wait, focus on maxing out your character levels and Traces. Everything is incredibly expensive on the way to level 70, so this should keep you going until the next update.
Frequently Asked Questions
Question: Should I grind for Trailblazer rank?
Answer: I strongly recommend ranking up naturally in Honkai: Star Rail. As explained in the guide, there are many soft caps and time gates on your progression.
There are a few reasons for this, but it’s obvious you’re not meant to fly through all the content over a weekend. Grinding often yields diminishing returns. You’ll rank up at a decent pace as long as you complete every mission and spend your Trailblaze Power daily.
Question: What are ‘F2P’ characters?
Answer: ‘F2P is shorthand for ‘Free to play’ and describes any character that can be obtained without Warps. Even if you don’t spend a dime, any unit only available through Warping (Seele and Gepard, for example) is classed as a premium character.
Question: Are the ‘F2P’ characters really good enough for every Equilibrium Trial?
Answer: Yes, they are. In fact, HoYoverse is known for balancing its games around F2P characters. Powerful new 5 Star characters undoubtedly make some content more manageable, but you can still do great things with characters who join your team in the story.
For more interesting readings, please check out: